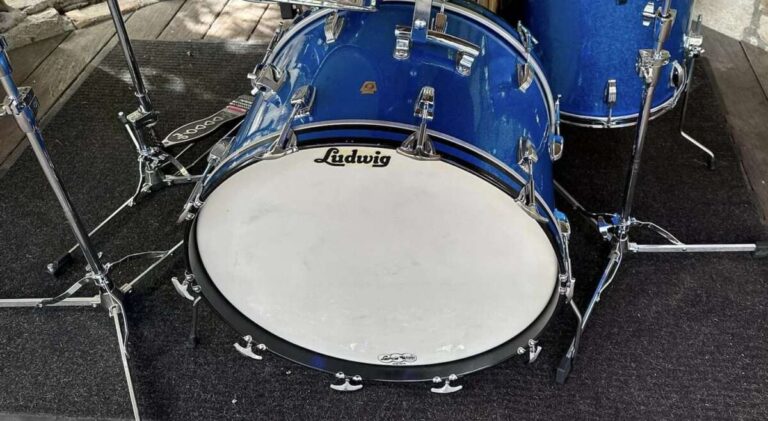
In the United States, the snare drum is a core part of drum sets, marching bands, orchestras, jazz groups, and concert bands. Its sharp, buzzing sound comes from a simple design: two drumheads stretch over a hollow shell, while metal snare wires press against the bottom head.
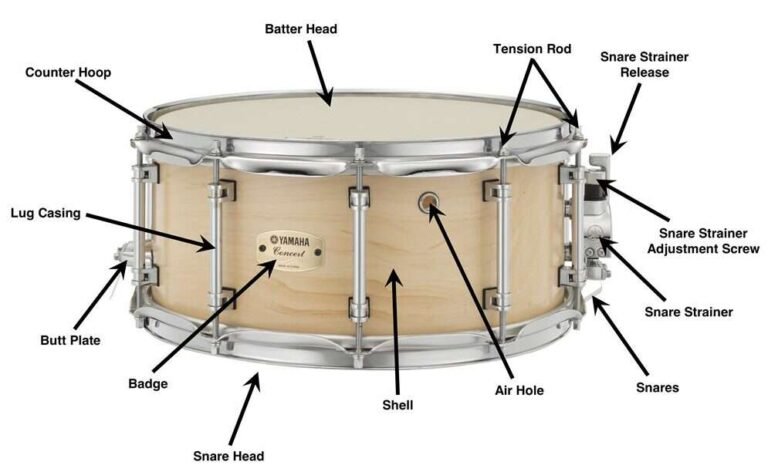
The main parts of a snare drum are the shell, batter head, snare-side head, hoops, tension rods, lugs, snare wires, strainer, butt plate, snare beds, bearing edges, and air vent. Each part affects the drum’s tone, response, volume, and feel.

The Main Parts of a Snare Drum
A snare drum has parts that hold the drum together, parts that create its sound, and parts that control the snares.


1. Drum shell
The shell is the hollow body of the snare drum. It supports the heads and hardware.
Common shell materials include:
- Maple
- Birch
- Oak
- Poplar
- Mahogany
- Steel
- Brass
- Aluminum
- Copper
- Acrylic
Wood shells often produce a warm and full sound. Metal shells can create more attack, brightness, and projection. The material matters, but shell depth, thickness, bearing edges, heads, and tuning also shape the final sound.
Common snare sizes in the United States include:
- 14 × 5 inches: A common all-purpose size
- 14 × 6.5 inches: Deeper sound with more body
- 14 × 8 inches: Large, deep tone and strong projection
- 13 × 3 to 4 inches: Piccolo-style snare with a high, sharp sound
- 12 × 5 inches: Small, quick, and focused sound
The first number is the diameter. The second number is the shell depth.
2. Batter head
The batter head is the top drumhead. It is the head the drummer strikes with the sticks.
The batter head controls much of the snare drum’s:
- Attack
- Rebound
- Brightness
- Sustain
- Rimshot sound
- Playing feel
Single-ply heads are usually open and sensitive. Two-ply heads often sound thicker and can resist dents better. Coated heads add a softer feel and are common in jazz, concert, and general drum-set playing.
Some batter heads include a control ring, dot, or built-in muffling. These features can reduce unwanted overtones and make the drum sound more focused.
3. Snare-side head
The snare-side head, also called the bottom head or resonant head, sits under the shell. It is thinner than most batter heads.
This head vibrates when the snare wires touch it. Its main jobs are to:


- Respond quickly to light playing
- Carry the vibration from the snare wires
- Help create the buzzing sound
- Add sensitivity and sustain
A snare-side head is delicate. Use the correct type and size for the drum. A regular batter head is usually too thick for this job and may reduce snare response.
4. Hoops or rims
The hoops hold the drumheads against the shell. They also provide the surface used for rimshots and cross-sticking.
The most common types are:
- Triple-flanged hoops: Light and flexible, with an open sound
- Die-cast hoops: Heavy and rigid, with strong tuning stability and a focused tone
- Wood hoops: Warm and broad sounding, often used for special snare designs
- Straight hoops: Found on some vintage or specialty drums
The hoop type affects more than appearance. A heavy hoop can increase focus and rimshot power. A lighter hoop may allow more ring and resonance.
5. Tension rods
Tension rods are threaded metal bolts that tighten the hoops. Each rod passes through a hoop and screws into a lug.
Turning the rods changes the tension of the drumhead. Small adjustments can affect:
- Pitch
- Response
- Tone
- Evenness
- Snare-wire contact
Tighten tension rods in a cross pattern. This helps spread pressure evenly across the head. Avoid forcing a rod that feels stuck, since damaged threads can make tuning difficult.
6. Lugs
Lugs are the small hardware pieces attached to the outside of the shell. They hold the tension rods in place.
Most snare drums use either:
- Tube lugs: Separate each tension rod and may allow the shell to vibrate freely
- Bridge lugs: Connect the upper and lower tension points with one longer piece
Lugs can include springs, inserts, or other parts that keep the tension rods secure. A loose lug may cause rattling, tuning problems, or uneven tension.
7. Snare wires
The snare wires are the thin metal strands stretched across the bottom head. They are the parts that give the snare drum its name and distinctive buzz.
A snare set may use:
- Metal wires
- Cable snares
- Spiral snares
- Synthetic or specialty snare materials
Common snare-wire counts include 16, 20, and 24 strands. More strands do not always mean a better sound. They can increase coverage and fullness, while fewer strands may create a drier or more open response.
The wires should sit in the center of the snare-side head. They should contact the head evenly without being so tight that the drum loses sensitivity.
8. Strainer or throw-off
The strainer, often called the throw-off, is the lever that turns the snares on and off.


When the lever is engaged, the mechanism pulls the snare wires against the bottom head. When it is released, the wires move away from the head.
A good strainer should:
- Engage smoothly
- Stay in position
- Release without sticking
- Allow small tension adjustments
- Keep the wires centered
Many strainers have a tension knob or adjustment screw. This lets the drummer change how firmly the wires touch the head.
9. Butt plate
The butt plate is the hardware on the side opposite the throw-off. It anchors the other end of the snare wires.
The butt plate may be fixed or adjustable. Adjustable butt plates make it easier to center the wires and set the correct tension.
The throw-off and butt plate work as a pair. If one side is misaligned, the wires may sit at an angle or contact the head unevenly.
10. Snare straps or cords
Snare straps or snare cords connect the snare wires to the throw-off and butt plate.
Common materials include:
- Nylon strap
- Polyester strap
- Cotton cord
- Synthetic cord
The strap or cord must fit through the snare-wire end plates. It should be secure but not so thick that it prevents the wires from sitting correctly.
11. Bearing edges
The bearing edges are the angled surfaces at the top and bottom of the shell. The drumheads rest on these edges.
Bearing edges help determine:
- How evenly the head vibrates
- How easily the drum tunes
- How much sustain it produces
- How sensitive it feels
A clean, even bearing edge is important. A damaged edge can create weak spots, air leaks, tuning problems, or uneven contact.
12. Snare beds
Snare beds are shallow cutouts in the bottom bearing edge. They give the snare wires room to sit against the bottom head.
Most snare drums have beds at both ends of the shell. The beds may be shallow or deep, narrow or wide.
A properly shaped snare bed helps the wires:


- Rest evenly on the head
- Respond to soft playing
- Stay in contact during rimshots
- Avoid excessive buzzing
A problem with the snare bed can be difficult to fix at home. Shell repair and edge work usually require a qualified drum technician.
13. Air vent
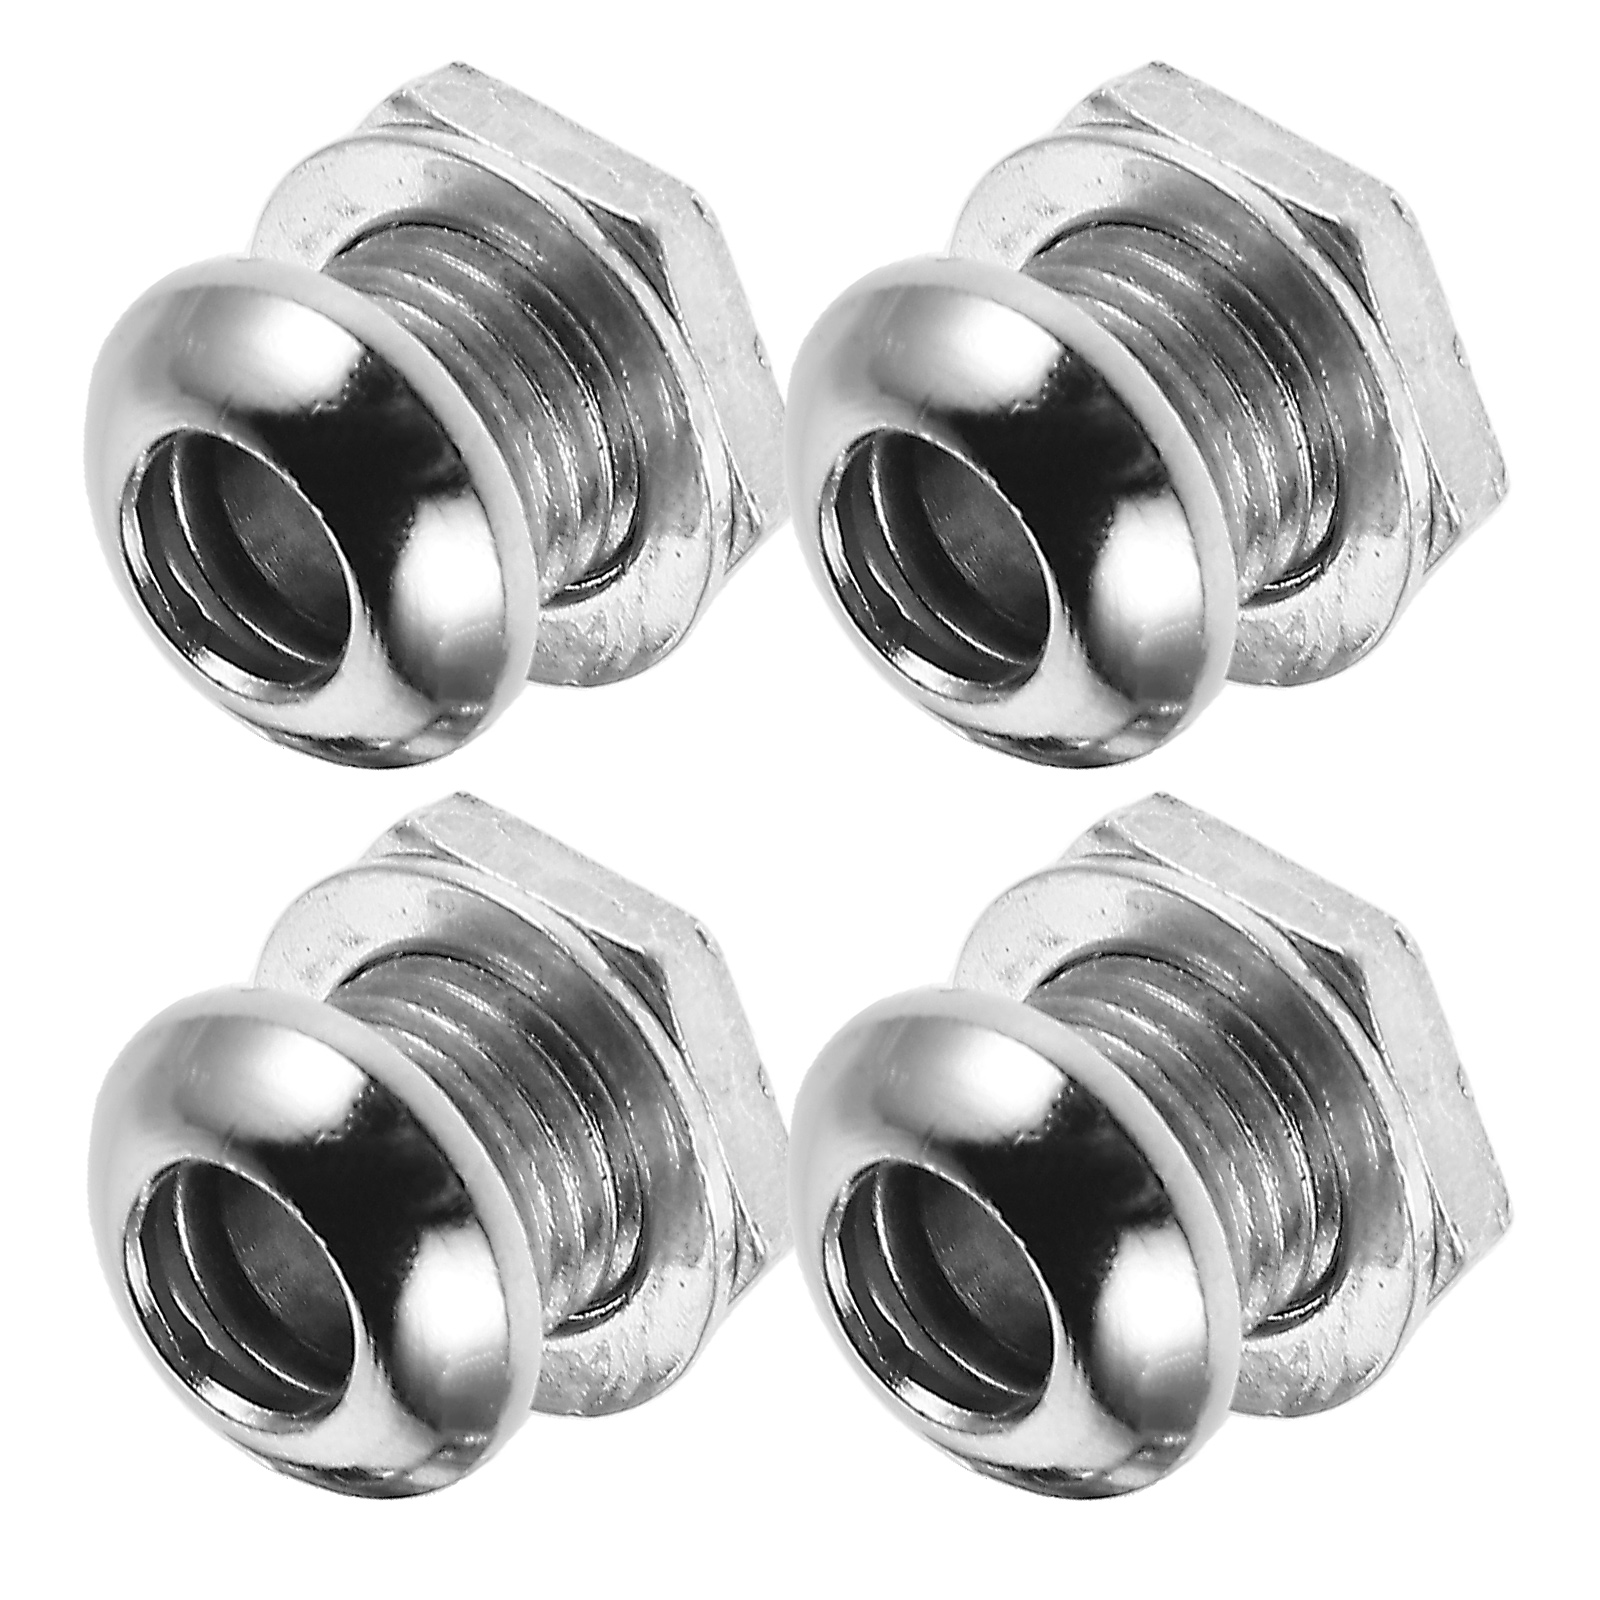
The air vent, also called a vent hole, is a small hole in the shell. It lets air move in and out as the heads vibrate.
Many vents include a metal grommet. Some drums have more than one vent, while others use a small number of carefully placed holes.
The vent is not a tuning control. Do not enlarge it or add holes without proper shell-repair knowledge.
14. Badge
The badge identifies the drum’s maker, series, or model. It may also include information about the shell or production period.
The badge does not normally affect the drum’s sound. It can, however, help with:
- Identifying a vintage drum
- Finding replacement parts
- Confirming the model
- Checking shell size
15. Muffler or tone-control system
Some snare drums include a muffler or internal tone-control system. This part presses lightly against the batter head to reduce ring.
A muffler can be useful when a drummer wants a short, controlled sound. Many modern drummers use external tools instead, such as:
- Gel dampers
- Tape
- Rings
- Cloth
- Small muffling pads
Muffling changes the sound, but it does not repair poor tuning or uneven head tension.

How the Parts Work Together
A snare drum produces its sound through the movement of the heads, shell, and snare wires.
When you strike the batter head, it moves air inside the shell. That air movement causes the snare-side head to vibrate. The snare wires then rattle against the bottom head and create the crisp buzz associated with a snare drum.
The basic sound path is:
- The stick hits the batter head.
- The batter head vibrates.
- Air moves inside the shell.
- The snare-side head vibrates.
- The snare wires react against the bottom head.
- The shell, hoops, and heads shape the final tone.
The throw-off controls whether the snare wires touch the bottom head. With the snares off, the drum sounds more like a small tom. With the snares on, it produces its familiar sharp response.
What happens when the snares are too tight?
Over-tight snare wires may produce a thin or choked sound. The drum can lose sensitivity, especially during quiet playing.


What happens when the snares are too loose?
Loose wires may buzz unevenly, rattle after each hit, or fail to respond clearly. They may also create unwanted sympathetic buzz from nearby drums.
What happens when the heads are tuned unevenly?
Uneven tension can cause:
- Strange overtones
- Weak response
- Poor rimshots
- Wrinkles near the hoop
- Inconsistent pitch
The main parts must work as a system. Changing one part often changes the way the other parts behave.

Which Snare Drum Parts Affect Sound the Most?
The heads, snare wires, shell, hoops, bearing edges, and tuning usually have the largest effect on sound.
| Part | Main effect |
|---|---|
| Batter head | Attack, rebound, feel, and overall tone |
| Snare-side head | Sensitivity and snare response |
| Snare wires | Buzz, crispness, and articulation |
| Shell | Body, color, projection, and resonance |
| Hoops | Focus, rimshots, sustain, and tuning feel |
| Bearing edges | Head contact and tuning stability |
| Snare beds | Even wire contact and sensitivity |
| Tuning | Pitch, openness, power, and control |
| Muffler | Ring and sustain |
There is no single “best” combination. A marching drummer may want strong projection and durable heads. A jazz drummer may prefer quick response and more open tone. A rock drummer may choose a loud, focused drum with a durable batter head.
Shell material versus shell size
Shell material changes the character of the sound, but shell size often changes the basic voice more clearly.
- A shallow shell usually responds quickly and sounds sharp.
- A deep shell often produces more body and lower tone.
- A small-diameter shell may sound higher and tighter.
- A larger-diameter shell may produce more depth and volume.
These are general tendencies, not fixed rules. Head choice and tuning can change the result.
Drumhead choice
A thin, single-ply batter head may suit soft playing and detailed ghost notes. A thicker or two-ply head may suit loud playing and frequent rimshots.
The bottom head usually needs to be thin enough to respond to the snares. Using a heavy head there can make the drum feel slow or dull.
Hoop choice
Die-cast hoops often give a focused sound and strong rimshots. Triple-flanged hoops may allow more resonance and a more open tone.
Neither type is automatically better. The right choice depends on the sound and playing style you need.

How to Replace Snare Wires
Replacing snare wires is a common repair. Before starting, confirm the correct length and width for the drum.
What you need
- Replacement snare wires
- Correct snare cord or strap
- Drum key
- Small screwdriver, if needed
- Clean work surface
Steps
- Turn the snares off. Release the throw-off before removing the old wires.
- Remove the old straps or cords. Keep the hardware if it is still in good condition.
- Center the new wires. Place them across the snare-side head.
- Attach one end. Secure the strap or cord to the butt plate.
- Attach the other end. Connect it to the throw-off.
- Engage the strainer. Move the throw-off to the on position.
- Adjust the tension. Turn the adjustment knob in small steps.
- Check alignment. The wires should run straight across the head.
- Test the drum. Play soft taps, normal strokes, and rimshots.
The wires should touch the head evenly. If one end lifts, the straps may be uneven, the wires may be off-center, or the snare beds may not match the wire set.


Do not solve every buzz problem by tightening the wires. First check alignment, head tension, wire condition, and nearby drums.

How to Tune a Snare Drum
Tuning is the safest first step when a snare drum sounds weak, harsh, or uneven.
1. Inspect the heads
Look for dents, tears, deep wrinkles, or loose areas. Replace a damaged head before trying to solve the sound with more tension.
2. Seat the bottom head
Place the snare-side head on the bearing edge. Install the hoop and tension rods. Tighten the rods by hand, then use a drum key in a cross pattern.
The bottom head should be even around the shell. It may need more tension than the batter head, but avoid extreme tension.
3. Tune the batter head
Use the same cross-pattern method. Tap near each tension rod and compare the pitch. Adjust until the tension sounds even.
4. Set the snares
Engage the throw-off. Increase tension slowly until the wires respond clearly. Stop if the sound becomes thin, choked, or less sensitive.
5. Test different strokes
Play:
- Soft taps
- Center hits
- Ghost notes
- Rimshots
- Cross-stick notes
A well-adjusted snare should respond across a useful range, not only in loud center hits.
Signs of a good setup
- The head has even tension.
- The wires sit straight.
- Soft notes produce a clear response.
- The drum does not rattle after every hit.
- Rimshots remain strong.
- The throw-off works smoothly.
- The drum can be played with the snares off.

Common Snare Drum Problems and Fixes
The drum buzzes too much
Possible causes include loose wires, uneven head tension, a damaged head, or sympathetic vibration from another drum.
Try these checks:
- Confirm that the snare wires are centered.
- Check the bottom head for dents or wrinkles.
- Adjust the snare tension slightly.
- Tune nearby toms or the bass drum.
- Check that no lug, tension rod, or strainer part is loose.
Some buzz is normal. A snare drum is designed to produce wire vibration.
The drum sounds choked
Possible causes include excessive snare tension, very high head tension, heavy muffling, or an overly thick bottom head.
Reduce snare tension in small steps. Remove unnecessary muffling and test the drum again.
The snare wires do not engage
Check whether the throw-off is moving fully. Then inspect the strap, cord, butt plate, and adjustment screw.
Do not force a stuck lever. A damaged strainer may need cleaning or replacement.
The wires sit unevenly
The wires may be off-center, the straps may be different lengths, or the snare bed may not suit the wire set.
Remove and reinstall the wires carefully. If the problem remains, a drum technician should inspect the shell and hardware.
A tension rod keeps loosening
Check the rod, lug insert, washer, and hoop. A missing washer or damaged lug insert can allow the rod to back out.
Thread-locking products should not be used casually. They can make future repairs harder and may damage some hardware.
The drum has a sharp metal rattle
Inspect the throw-off, butt plate, lugs, washers, and tension rods. Lightly touch one hardware part at a time while tapping the drum to help locate the rattle.
Replace worn washers or damaged hardware rather than tightening every part as much as possible.

How to Choose Replacement Snare Drum Parts
Choose parts by size, function, fit, and intended sound.
Replacement heads
Match the head to the drum diameter. A 14-inch snare needs a 14-inch head, but the shell depth does not determine head diameter.
Use a snare-side head on the bottom unless the manufacturer specifies another design.
Replacement snare wires
Check:
- Diameter
- Length
- Strand count
- End-plate design
- Strap or cord spacing
- Compatibility with the snare beds
A wire set that is too long may extend past the beds. A set that is too short may not attach correctly.
Replacement hoops
Confirm the diameter and the number of tension-rod openings. A hoop must fit the shell and work with the lug spacing.
Also check whether the drum uses triple-flanged, die-cast, wood, or another hoop design.
Replacement strainers
Measure the mounting-hole spacing before ordering. Two strainers can look similar but use different hole patterns.
Check:
- Mounting distance
- Throw-off direction
- Cable or strap attachment
- Adjustment range
- Clearance from the hoop and shell
Replacement tension rods
Tension rods must have the correct length and thread type. A rod that is too long may hit the shell or bottom out in the lug.
When uncertain, remove one existing rod and compare it with the replacement before installing a full set.

Care and Safety Tips
Snare drums are generally simple to maintain, but careless adjustments can damage threads, heads, or shell edges.
- Loosen tension rods gradually and in a cross pattern.
- Do not over-tighten the snare wires.
- Keep the drum dry and away from extreme heat.
- Store the drum in a padded case when transporting it.
- Inspect heads before important performances.
- Replace cracked straps and frayed cords.
- Keep loose hardware away from young children.
- Use care around sharp wire ends and broken head edges.
- Have a technician inspect damaged bearing edges or shell cracks.
Remove a broken head before playing hard. A damaged head can expose sharp edges and may place uneven stress on the shell.
If a vintage, thin-shell, or valuable snare needs drilling, edge repair, or major hardware changes, consult a qualified drum repair specialist.
Key Takeaways
- The shell is the main body of the snare drum.
- The batter head is the top head that you strike.
- The snare-side head is the thin bottom head.
- Snare wires create the drum’s buzzing response.
- The throw-off engages and releases the wires.
- The butt plate anchors the opposite end of the wires.
- Hoops, tension rods, and lugs hold and tune the heads.
- Bearing edges and snare beds help the heads and wires work evenly.
- Tuning, head choice, wire tension, and alignment often matter more than a single shell-material choice.
Frequently Asked Questions
What is the most important part of a snare drum?
There is no single most important part. The shell, heads, snare wires, strainer, and bearing edges must work together. For immediate sound changes, the batter head, snare-side head, tuning, and wire adjustment usually have the greatest effect.
What part makes a snare drum buzz?
The snare wires make the buzzing sound. They vibrate against the snare-side head when the batter head is struck.
What is the bottom of a snare drum called?
The bottom head is called the snare-side head or resonant head. The snare wires rest against it.
What does the snare throw-off do?
The throw-off, or strainer, moves the snare wires onto or away from the bottom head. It lets the drummer switch between snare sound and a more tom-like sound.
Can you play a snare drum without snare wires?
Yes. With the wires released, the drum can produce a short, open sound similar to a shallow tom. The wires can also be removed for repair or replacement.
How often should snare wires be replaced?
Replace them when they become bent, loose, rusty, uneven, or difficult to adjust. There is no fixed replacement schedule because playing time, storage, humidity, and wire quality all vary.
Why does my snare drum sound bad after changing the heads?
The new heads may need to settle and may not have even tension. Check the bearing edge, tune each tension point evenly, center the snare wires, and adjust the strainer in small steps.
Conclusion
A snare drum is made from a set of connected parts rather than one sound-producing piece. The shell provides the body, the heads create vibration, the hoops and lugs hold everything under tension, and the snare wires add the sharp buzz.
To understand or repair a snare drum, start with the parts that affect contact and tension: the heads, hoops, bearing edges, snare beds, wires, throw-off, and butt plate. Keep those parts aligned and evenly adjusted, and the drum will respond more clearly, tune more easily, and remain reliable for practice and performance.

Senior Music Reviewer
Alex Carter is a seasoned music reviewer with over a decade of experience in the world of sound and instruments. Passionate about helping musicians and enthusiasts make informed choices, he brings sharp insights and in-depth knowledge to every review. From classical instruments to modern gear, Alex combines technical expertise with a love for music to deliver content that resonates with readers.
As a Senior Music Reviewer and expert author on Tuneluma.com, Alex is dedicated to sharing honest evaluations, practical advice, and thoughtful commentary to guide readers in their musical journey.