How Do You Play C Chord On Guitar: Easy Guide
To play a C chord on guitar, fret A3, D2, and B1, then strum from the A string down.
Learning how do you play c chord on guitar is one of the first big steps for a new player. The open C major chord appears in folk, pop, rock, country, and worship songs, so mastering it gives you a useful chord right away. This guide explains the finger shape, string-by-string method, common mistakes, practice tips, and easier variations.
How Do You Play C Chord on Guitar?
The most common beginner shape is the open C major chord. It uses three fretted notes and two open strings.
Here is the chord shape:
C major: x 3 2 0 1 0
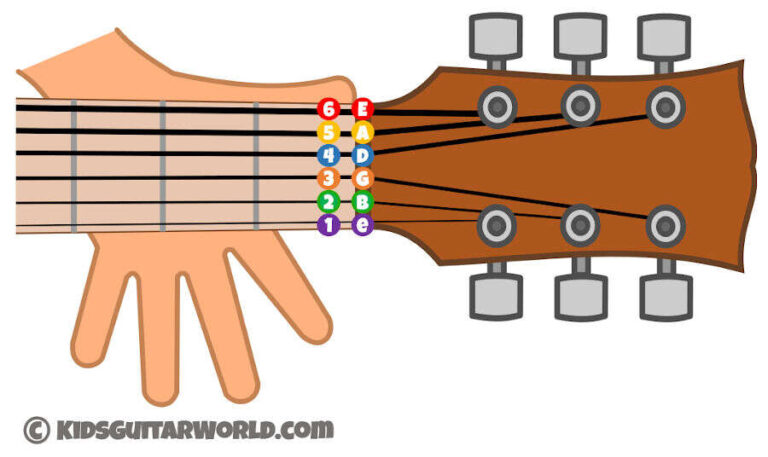
         E A D G B e
The letters show the six guitar strings from the thickest string to the thinnest string. The “x” means you should not play that string.
Use this fingering:
• Index finger: First fret on the B string
• Middle finger: Second fret on the D string
• Ring finger: Third fret on the A string
The G and high E strings remain open. When you strum, begin with the A string and move down through the high E string. Avoid the low E string because it can make the chord sound muddy.
If you are asking how do you play c chord on guitar in the simplest way, remember this pattern: ring finger on A3, middle finger on D2, index finger on B1, and open G and high E strings.

Step-by-Step Guide to the C Major Chord
Follow these steps slowly. Accuracy matters more than speed.
1. Place your ring finger
Put your ring finger on the third fret of the A string. The A string is the fifth string when you count from the thinnest string upward.
Keep your finger close to the fret wire. Do not place it directly on top of the metal fret. This position helps the note ring with less buzzing.
2. Add your middle finger
Place your middle finger on the second fret of the D string. Try to keep your finger upright so it does not touch the open G string.
A relaxed hand is important here. If your thumb squeezes too hard, your wrist may become tense.
3. Place your index finger
Put your index finger on the first fret of the B string. This is often the hardest part for beginners because the index finger must press firmly while staying clear of the open high E string.
Curve your finger slightly. Your fingertip should press near the fret, not in the middle of the space.
4. Check every note
Pick each string one at a time:
• Low E: Do not play it
• A string: Fretted third-fret note
• D string: Fretted second-fret note
• G string: Open note
• B string: Fretted first-fret note
• High E string: Open note
If one string buzzes, adjust one finger at a time. This method is much faster than changing the entire shape without knowing the problem.

How to Read a C Chord Diagram
A chord diagram is like a small map of your guitar neck. The vertical lines represent strings, and the horizontal lines represent frets.
Most diagrams place the thickest string on the left and the thinnest string on the right. Some charts show the guitar from the player’s view, so always check the labels before copying a shape.
For a standard C major diagram:
e|--0--  High E open
B|--1--  Index finger
G|--0--  Open
D|--2--  Middle finger
A|--3--  Ring finger
E|--x--  Do not play
The numbers tell you which fret to press. A “0” means play the string open. An “x” means mute or skip the string.
Understanding this diagram helps answer how do you play c chord on guitar without relying on a picture alone. Once you understand the symbols, you can learn thousands of other guitar chords.

How Should You Strum the C Chord?
Start with a slow downstroke. Use your thumb or a pick and brush across the A, D, G, B, and high E strings.
Do not worry about a full rhythm at first. Your first goal is to make each note sound clean.
Try this simple pattern:
Down, down, down, down
1     2     3     4
Next, try a common beginner pattern:
Down, down-up, up-down-up
1     2-and   3-and-4-and
Keep your strumming hand moving evenly, even when you do not hit the strings. Think of your hand like a steady windshield wiper. This keeps the rhythm smooth.
A common mistake is strumming all six strings. The low E note is not part of the basic open C major shape, so it can overpower the chord. You can lightly touch the low E string with the tip of your ring finger to mute it if your strumming hand often hits it.

Common Problems When Playing C Major
Many beginners understand how do you play c chord on guitar but still hear a weak or buzzy sound. The issue is usually hand position, not a lack of strength.
Buzzing notes
A buzzing note often means your finger is too far from the fret. Move it closer to the metal fret without placing it directly on top.
Also check whether another finger is touching the string. This is common with the index finger and the open high E string.
Muted open strings
The G and high E strings must ring openly. Lift your fingers slightly and check that they are not leaning into nearby strings.
Your fingers should form small arches. Avoid flattening them across the fretboard.
Pain or hand tension
New players often squeeze the neck too hard. Press only as much as needed to create a clear note.
Take short breaks. Mild fingertip tenderness is normal, but sharp pain in your wrist, thumb, or forearm is a reason to stop and rest.
The chord sounds dull
Check your pick angle and strumming motion. A heavy, stiff stroke can make the chord sound harsh. A relaxed stroke usually creates a clearer tone.
In my teaching experience, beginners often improve faster when they pick each string separately before strumming. It turns a vague problem into a clear one.

Practice Exercises for the C Chord
Good practice does not need to be long. Five focused minutes can help more than 30 minutes of rushed playing.
Exercise 1: Build the shape
Place all three fingers at once. Pick each string slowly.
Repeat this process five times. Each repetition should sound clean before you move on.
Exercise 2: Lift and replace
Make the C shape, lift your fingers slightly, and place them back down. Do not move your hand away from the guitar.
Try 10 slow repetitions. This builds muscle memory and improves finger control.
Exercise 3: Change between C and G
Play C for four beats, then change to G for four beats. Repeat without stopping.
At first, the change may feel slow. That is normal. Keep the beat steady and allow the chord change to take as long as needed.
Exercise 4: Change between C and Am
The C and A minor chords share useful finger movements. Practice four beats of C followed by four beats of Am.
This change is common in songs and helps your index and middle fingers become more accurate.