How To Build A Cajon Drum: Easy DIY Guide
Build a cajon drum with plywood, wood glue, screws, a snare, and careful tuning for rich bass and crisp slap tones.
Learning how to build a cajon drum is a rewarding woodworking and music project. A cajon looks simple, but small changes in wood thickness, box size, and snare tension can greatly change its sound. This guide explains the full process, from choosing materials to finishing and tuning your homemade percussion instrument.

What Is a Cajon Drum?
A cajon is a box-shaped percussion instrument. You sit on its top and strike the front panel, called the tapa, with your hands. The center produces a deep bass tone, while the upper corners create sharp slap sounds.
The modern cajon comes from Afro-Peruvian musical traditions. Today, players use it in flamenco, acoustic music, folk, pop, worship, and street performances. Its compact size makes it useful when a full drum kit is too large or too loud.
A basic cajon has five key parts:
• Front tapa: The thin playing surface that creates most of the sound.
• Side panels: The vertical boards that form the main shell.
• Top and bottom panels: These close the box and support its shape.
• Back panel: This contains the sound hole.
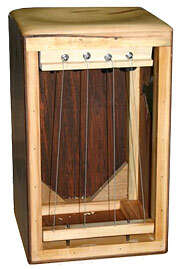
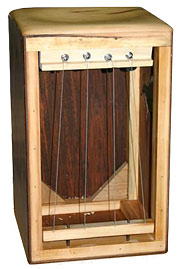
• Snare system: Thin wires or guitar strings that add a buzzing response.
The goal of how to build a cajon drum is to create a strong box with a flexible front panel. The box gives the bass tone structure, while the tapa vibrates like a small drumhead.

Cajon Drum Dimensions and Sound Design
A common cajon measures about 12 inches wide, 12 inches deep, and 18 inches tall. This size works well for most adult players. You can change the dimensions, but each change affects comfort, volume, and tone.
A taller box may provide more bass but can feel awkward for shorter players. A wider box can sound fuller, but it may be harder to hold between your knees. A smaller cajon is easier to carry but often has less low-end power.
Use these dimensions as a reliable starting point:
• Height: 18 inches
• Width: 12 inches
• Depth: 12 inches
• Tapa thickness: ⅛ inch to ¼ inch
• Side, top, and bottom thickness: ½ inch to ¾ inch
• Back panel thickness: ¼ inch to ½ inch
• Sound hole diameter: 4 inches to 5 inches
For a balanced sound, keep the internal cavity clear. Braces, glue, or loose wires should not block the air path. The sound hole lets air move in and out of the box, much like the opening of an acoustic guitar.
The tapa is the most sensitive part of the design. Thin plywood responds quickly and gives bright slaps. Thicker plywood feels stronger and can produce a darker tone, but it may require more hand force.

Materials and Tools You Need
Good materials make how to build a cajon drum easier and more predictable. You do not need expensive hardwood for your first build. Quality birch plywood is often a smart choice because it is stable, strong, and easy to find.
Recommended materials
• One sheet of ⅛-inch to ¼-inch plywood for the tapa
• Plywood or solid wood for the top, bottom, sides, and back
• Four narrow internal support strips
• Wood glue
• Small wood screws
• Two adjustable snare wires or a short guitar string
• Sandpaper in 80, 120, and 220 grits
• Wood filler
• Clear finish, paint, or furniture oil
• Four rubber feet
Birch plywood gives a clear, focused sound. Poplar plywood is lighter and easy to work with. Pine can work for the shell, but soft wood may dent and can produce a less controlled tone.
Useful tools
• Measuring tape or ruler
• Pencil and square
• Circular saw, table saw, or handsaw
• Drill and drill bits
• Screwdriver or driver bit
• Clamps
• Router or round file for the sound hole
• Sanding block or random orbital sander
• Safety glasses and hearing protection
Measure twice before every cut. A small error in one panel can create gaps, weak joints, or a box that is not square.
How to Build a Cajon Drum Step by Step
The following process explains how to build a cajon drum with a simple internal snare system. Work slowly, especially when cutting the thin tapa. It is easier to remove more wood later than to repair a panel that was cut too small.
1. Plan and mark the panels
Mark each panel before cutting. Label the inside and outside faces so you do not lose track of their positions.
For a 12-inch by 12-inch by 18-inch cajon, prepare:
• Two side panels measuring 18 inches by 12 inches
• One top panel measuring 12 inches by 12 inches
• One bottom panel measuring 12 inches by 12 inches
• One back panel measuring about 17 inches by 12 inches
• One tapa measuring 18 inches by 12 inches
The back panel may be slightly smaller if you plan to mount it inside the shell. The exact size depends on your joinery method.
2. Cut the panels
Cut each panel with a straight blade and a firm guide. Support the plywood during the cut to prevent splintering.
Mark the front, back, top, and bottom edges. If the grain or face pattern matters to you, choose the best-looking side for the outside. Keep the tapa grain running vertically or horizontally based on the look and flexibility you want.
Check each cut with a square. A panel that is only slightly crooked can twist the entire cajon.
3. Cut the sound hole
Mark the sound hole in the center of the back panel. A hole between 4 and 5 inches across is a practical starting point.
Drill a small pilot hole first. Then use a hole saw, jigsaw, router, or round file to make the opening. Sand the edge until it feels smooth.
A larger sound hole usually increases projection and can make the bass feel more open. A smaller hole may create a tighter, softer sound. Avoid placing the hole too close to an edge because that weakens the back panel.
4. Prepare the internal supports
Cut four support strips to fit inside the corners. These strips give the screws more wood to grip and help keep the box square.
You can also add narrow cleats behind the tapa. Keep them small and smooth. Large cleats can press against the tapa and create unwanted dead spots.
Before applying glue, dry-fit the panels. Place everything together without glue and check that the corners meet cleanly.
5. Assemble the shell
Apply a thin, even layer of wood glue to the joining edges. Do not spread a thick bead that can squeeze into the cavity.
Join the side panels to the top and bottom panels. Use clamps to hold the box while you check the corners with a square. Add screws through the panels and into the internal support strips.
Wipe away excess glue with a damp cloth. Dried glue is harder to remove and can prevent stain or finish from soaking evenly.
Allow the shell to dry according to the glue maker’s instructions. Most wood glue needs several hours for handling strength and about 24 hours for a full cure.
6. Attach the back panel
Place the back panel on the shell and check the sound hole position. Apply glue to the edges, clamp the panel, and secure it with small screws.
Keep the screw heads below the surface. Do not use screws so long that they can reach through the shell or into the future tapa.
Seal any small gaps with wood filler after the glue dries. A tight shell helps the air move through the sound hole instead of escaping through open joints.
7. Install the snare system
A snare is optional. A snareless cajon has a cleaner, more wooden sound. A snare cajon gives a familiar buzz when you strike near the top corners.
You can use:
• Two short snare wires mounted across the inside front
• A length of guitar string
• A small replacement cajon snare assembly
Mount the snare close to the upper inside edge. It should lightly touch the back of the tapa, not press hard against it.
Use a simple wooden wedge or small adjustable block to control tension. Too much tension makes the sound harsh and rattly. Too little tension produces a weak buzz.
8. Attach the tapa
The tapa must be secure but still able to vibrate. Apply glue around its edges and position it carefully on the front of the shell.
Use small screws around the perimeter. Space them about 2 to 3 inches apart. Keep them away from the edge to prevent splitting.
Some builders use only screws, while others use glue and screws together. Glue creates a firm seal, while screws make future replacement easier. If you expect heavy use, use both methods.
Do not add a center brace behind the tapa. The center needs room to move and create the low bass note.
9. Add rubber feet
Attach four rubber feet to the bottom corners. Feet protect the wood and stop the cajon from sliding across a hard floor.
They also create a small gap under the box. This can slightly reduce vibration transfer into the floor and make the instrument feel more controlled.
10. Sand the cajon
Start with 80-grit sandpaper to remove rough edges. Move to 120 grit, then finish with 220 grit for a smooth surface.
Round the front edges lightly. Sharp corners can hurt your legs during long playing sessions. Be especially careful around the tapa, where aggressive sanding can reduce its strength.
Run your hand over every edge. If you feel a rough spot, sand it before applying the finish.

How to Tune a Cajon Drum
A homemade cajon does not have notes that you tune like a guitar. Instead, you adjust its response, buzz, and balance.
Start by sitting on the cajon and playing three areas:
• Center: This should produce a low, full bass tone.
• Upper corners: These should create a bright slap.
• Area near the snare: This should produce a controlled buzz.
If the bass sounds weak, check for air leaks. Inspect the joints, back panel, and tapa edges. You can also try a slightly larger sound hole, but make this change carefully.
If the slap sounds dull, the tapa may be too thick, too tight, or damped by excess glue. Check that the snare is not pressing too hard against the panel.
If the snare buzz is too loud, reduce its tension or move it slightly away from the tapa. If the buzz is too soft, increase the tension in small steps.
One practical lesson in how to build a cajon drum is that tiny changes matter. A quarter turn on a tension screw can change the response more than expected. Make one adjustment at a time and test the instrument after each change.

Finishing Your Homemade Cajon
The finish protects the wood from sweat, dust, and small impacts. It also gives the cajon a personal style.
Good finish options include:
• Water-based polyurethane: Low odor and quick drying
• Oil finish: Brings out the grain and feels natural
• Wipe-on varnish: Easy for beginners
• Acrylic paint: Good for bold designs
• Clear lacquer: Smooth and durable, but best used with strong ventilation
Do not apply thick finish to the tapa. Heavy coatings can reduce its vibration and make the sound less lively. Two thin coats are safer than one heavy coat.
Sand lightly between coats. Let the finish cure fully before playing. Fresh finish can remain soft or release fumes for some time.
You can decorate the front with a simple geometric pattern, a family design, or a painted logo. Keep paint and stickers away from the main vibrating area if you want maximum acoustic response.

Common Mistakes to Avoid
Many problems in how to build a cajon drum come from rushing the basic steps. A clean, square box usually sounds better than a complicated box made without careful measurement.
Avoid these mistakes:
• Using very thick wood for the tapa: This can make the instrument quiet and stiff.
• Leaving glue inside the cavity: Hardened glue can create unwanted rattles.
• Making the sound hole too large: This may reduce bass depth and weaken the back.
• Tightening the snare too much: Excess tension creates a sharp, unpleasant buzz.
• Skipping the dry fit: You may discover gaps only after applying glue.
• Using long screws: They can damage the tapa or reach into the playing area.
• Forgetting edge comfort: Sharp corners can make long practice sessions painful.
• Adding too many braces: Extra wood can block vibration and reduce volume.
• Finishing the tapa too heavily: Thick finish can deaden the slap tone.
A useful test is to tap each panel before assembly. Listen for cracks, loose layers, or a dull thud. Plywood should feel firm and should not flex in random places.

Safety Tips for Building a Cajon
Woodworking is simple when you respect the tools. Wear eye protection whenever you cut, drill, or sand. Use a dust mask when sanding plywood, paint, or finish.
Secure the wood before cutting. Never hold a small panel close to a moving blade. Keep power cords away from the cutting path and unplug tools before changing blades or bits.
Work in a space with good airflow. Many finishes release fumes that can irritate your eyes and lungs. Follow the product label and keep finishes away from flames.
If you are building with a child, let them help with measuring, sanding, and design. An adult should handle power tools, sharp blades, and chemical finishes.

How Much Does It Cost to Build a Cajon?
The cost depends on the wood, tools, and finish you already have. A basic cajon can cost less than a store-bought model, especially if you own common woodworking tools.
A simple budget may include:
• Plywood: $20 to $45
• Glue and screws: $8 to $15
• Snare wires: $10 to $25
• Sandpaper: $5 to $10
• Finish: $10 to $25
• Rubber feet: $4 to $8
The total may range from about $40 to $120. Tool costs can raise the price if you need to buy a saw, drill, clamps, or router.
Building your own cajon also gives you control over its size and tone. However, a factory-made instrument may offer more consistent construction and finish. Decide whether your main goal is saving money, learning woodworking, or creating a custom sound.
How to Improve the Sound of a Cajon
Once you understand how to build a cajon drum, you can experiment with its voice. Change only one feature at a time so you know what caused the result.
Try these adjustments:
• Use a thinner tapa for more slap and sensitivity.
• Use a slightly thicker tapa for a darker, stronger tone.
• Move the snare closer to the top for more buzz.
• Move the snare lower for a softer response.
• Add a thin internal damping strip if the box rings too long.
• Seal air leaks around the back and shell joints.
• Test the cajon on carpet, wood, and concrete floors.
The playing surface also changes the sound. A soft hand strike gives a warm tone. A firm fingertip strike creates a sharper attack. Palm position, finger angle, and playing force matter as much as the wood.
Record short tests with your phone. Your ears can adjust to a sound quickly, but recordings reveal uneven bass, excessive buzz, or weak corners.
Caring for a Cajon Drum
Keep the cajon indoors and away from extreme heat or moisture. Wood expands and contracts as humidity changes. Sudden changes can cause cracks, loose joints, or a warped tapa.
Wipe the instrument with a dry or slightly damp cloth. Do not soak the wood. Check the screws and feet every few months, especially if you carry the cajon to performances.
Store it upright or on a flat surface. Do not place heavy objects on the tapa. If the snare begins to rattle, inspect the wire, screws, and internal supports before changing the tension.
A small crack does not always mean the cajon is ruined. Clean the area, apply suitable wood glue, clamp it gently, and let it dry. Larger structural damage may need a repair shop or an experienced woodworker.
Frequently Asked Questions About How to Build a Cajon Drum
What wood is best for building a cajon drum?
Birch plywood is a strong and dependable choice for both beginners and experienced builders. Use thinner plywood for the tapa and thicker material for the shell so the front can vibrate while the box stays rigid.
How thick should the cajon tapa be?
A tapa between ⅛ inch and ¼ inch works well for many homemade cajons. Thinner wood responds easily, while thicker wood can handle harder playing and produce a darker tone.
Does a cajon need a snare?
No, a cajon can work without a snare. A snare adds buzz and makes the instrument sound more like a compact drum kit, while a snareless design gives a cleaner wooden tone.
Why does my homemade cajon sound weak?
A weak sound may come from air leaks, a thick tapa, an oversized sound hole, or loose joints. Check the shell first, then test the tapa and snare with small adjustments.
Can I build a cajon without power tools?
Yes, but the work will take longer. A handsaw, hand drill, files, clamps, and sanding blocks are enough if you measure carefully and accept slower cuts.
How long does it take to build a cajon drum?
A first project may take one or two days of active work, plus drying and curing time. Rushing glue, paint, or finish can reduce the strength and sound quality of the finished instrument.
Conclusion
Learning how to build a cajon drum combines simple woodworking with basic acoustic design. Choose stable wood, keep the shell square, use a thin and secure tapa, install the snare with care, and test the sound before making major changes.
Your first cajon may not sound perfect, and that is part of the process. Each build teaches you more about vibration, air movement, wood, and touch. Start with the dimensions in this guide, make careful cuts, and shape the tone through patient testing.
Build your cajon, play it often, and share your results or questions in the comments.

Senior Music Reviewer
Alex Carter is a seasoned music reviewer with over a decade of experience in the world of sound and instruments. Passionate about helping musicians and enthusiasts make informed choices, he brings sharp insights and in-depth knowledge to every review. From classical instruments to modern gear, Alex combines technical expertise with a love for music to deliver content that resonates with readers.
As a Senior Music Reviewer and expert author on Tuneluma.com, Alex is dedicated to sharing honest evaluations, practical advice, and thoughtful commentary to guide readers in their musical journey.