How Do You Restring An Electric Guitar: Easy Guide
To restring an electric guitar, remove the old strings, clean the guitar, install each new string through the correct bridge path, wind it neatly onto the tuning post, then tune and stretch the strings until they hold pitch. Most electric guitars take 10–20 minutes once you know the bridge style.
This guide applies to electric guitars commonly sold and used in the United States, including Fender-style, Gibson-style, hardtail, wraparound, Tune-o-matic, and locking tremolo guitars. The exact steps can vary, so check the owner’s manual if your bridge has locking screws or a floating tremolo.

What You Need Before You Start
Gather the new strings, a string winder, wire cutters, a tuner, and a clean cloth. A guitar pick or ruler can also help lift strings from tight bridge parts.
Basic restringing tools
- A new set of electric guitar strings
- A digital tuner or tuning app
- String cutters
- String winder
- Soft, dry cloth
- Small screwdriver or hex key, if your bridge requires one
- Manufacturer’s manual for guitars with a locking tremolo
Choose the same string gauge if you want the guitar to feel and respond much as it did before. String gauge means the thickness of each string. A common electric guitar set is .010–.046, often called a “10–46” set.
Changing gauge can alter:
- String tension
- Neck relief
- Action, or string height
- Intonation
- Tremolo balance
- Tuning stability
A small gauge change may need only minor setup work. A larger change, such as moving from .009–.042 to .012–.052, may require a truss rod, bridge, or nut adjustment. If you are not familiar with guitar setup, have a qualified guitar technician check the instrument.
Wipe the guitar with a dry or slightly damp cloth. Do not spray cleaner into the pickups, switches, bridge, or tuning machines. Use products made for the guitar’s finish, especially on older instruments or guitars with an unfinished fretboard.

Identify Your Electric Guitar’s Bridge
The bridge determines where each string starts and how you remove and install it. Look at the guitar before cutting anything.
Hardtail bridge
A hardtail bridge does not move when you use the tremolo arm because it has no tremolo system. The strings may load:
- Through the back of the guitar
- Through holes in the bridge
- Through a combination of both
Hardtail guitars are usually the simplest to restring. Follow the path of the old string and copy it with the new one.
Fender-style tremolo bridge
A Fender-style tremolo, often called a synchronized tremolo, usually has six bridge saddles and string holes in the back of the guitar. Each string passes through the guitar body and comes up through the bridge.
Keep the tremolo bridge supported while all strings are off. On a floating setup, removing every string at once can change the spring balance and pull the bridge out of position.
Tune-o-matic and stopbar bridge
Many Gibson-style guitars use a Tune-o-matic bridge with a separate stopbar tailpiece. The string goes through the stopbar, passes over the bridge, and continues toward the neck.


Some guitars use a wraparound bridge instead. On that design, the string passes around or through the bridge itself. Take a quick photo before removing the old strings if the path is unclear.
Locking tremolo
A Floyd Rose-style or other locking tremolo uses locking nuts and locking saddles. The string ends are often cut off before the strings are clamped into the bridge.
Do not treat a locking tremolo like a standard bridge. Removing every string without supporting the bridge can make the setup difficult to restore. If you are new to this system, change one string at a time or follow the exact manual for your model.

How to Restring an Electric Guitar Step by Step
The safest general method is to change one string at a time. This keeps the neck and bridge close to their normal tension and helps you avoid mixing up the string order.
1. Check the current setup
Tune the guitar before you begin, if possible. Look at the bridge, string path, and tuning post.
Take a photo of:
- The bridge path
- The direction of each string
- The number of wraps around the tuning post
- The angle of the strings behind the nut
This photo gives you a useful reference if you forget how a part fits.
2. Loosen and remove the old string
Turn the tuning key until the string has no tension. Pull the string from the tuning post.
Next, remove it from the bridge. On a standard bridge, the string may pull out from the back of the body or from the tailpiece. On a locking tremolo, loosen the saddle clamp with the correct hex key before removing the string.
Be careful with the sharp cut ends. Place old strings in a container or fold them before throwing them away.
3. Clean the exposed areas
With the string removed, wipe the fretboard, bridge, and area under the string. This is the easiest time to remove dust and skin oil.
Do not use household oil, water, or abrasive products. Rosewood, ebony, maple, and finished maple fretboards may need different care.
4. Feed the new string through the bridge
Start with the low E string or replace the strings in the same order as you removed them.
Feed the ball end through the correct hole. Pull the string until the ball stops against the bridge or tailpiece.


Check the path from the bridge to the nut. The string should sit in its correct slot and should not cross another string.
5. Pull the string to the tuning post
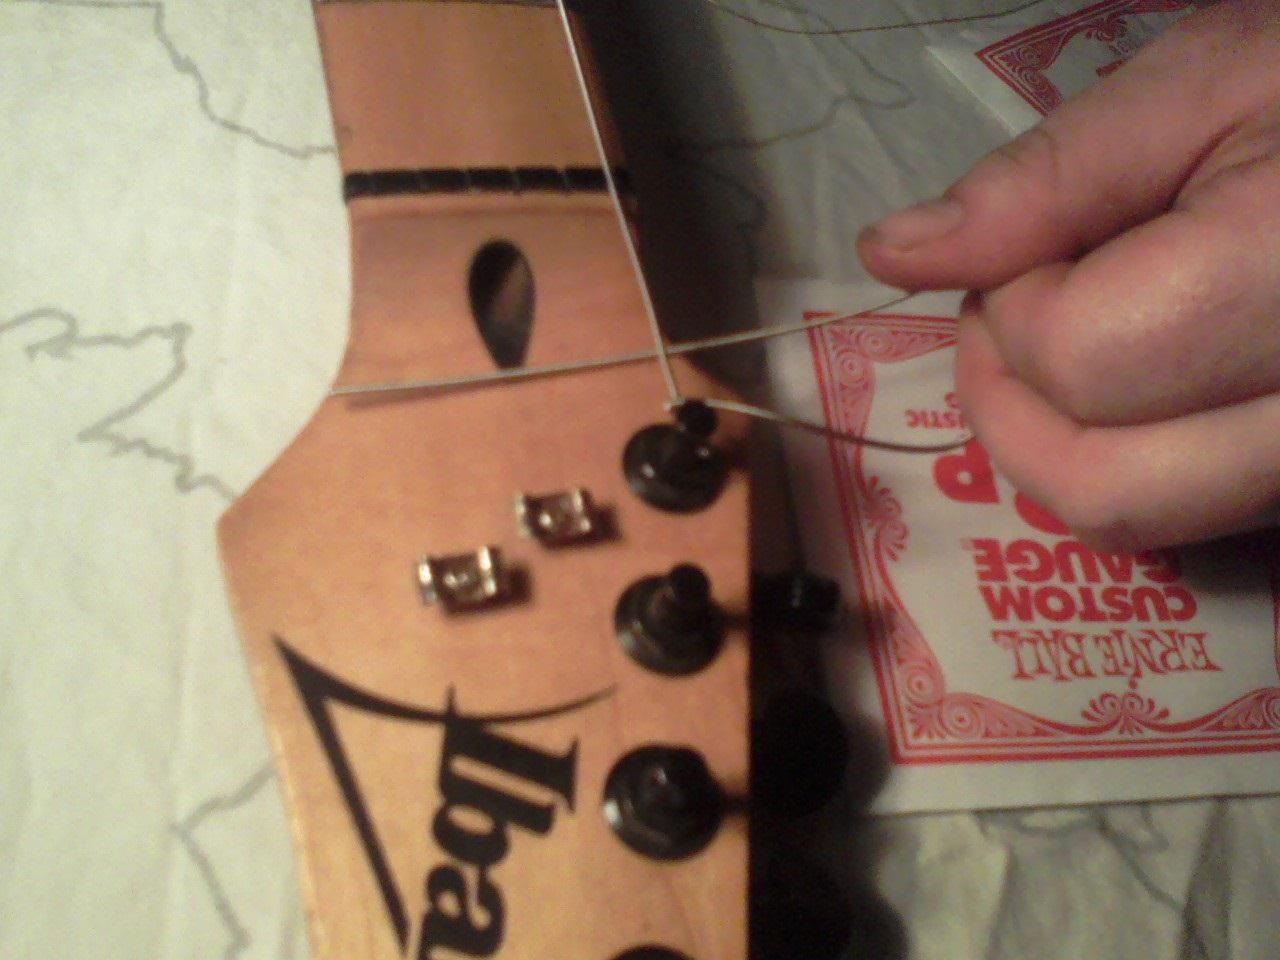
Guide the string along the neck and through the correct tuning post. Keep the string straight, but do not pull it tight yet.
On most guitars, the string passes through the post from the side facing the headstock’s outer edge. Some tuning machines use a different path, so copy the original setup if it worked well.
6. Leave enough slack
Pull the string past the tuning post and leave slack for the wraps. A useful starting point is:
- About 2 inches of slack for the plain G, B, and high E strings
- About 2–3 inches for the wound D, A, and low E strings
The exact amount depends on the headstock and tuning post. Too little slack can leave only one wrap. Too much slack creates a tall stack of loose wire.
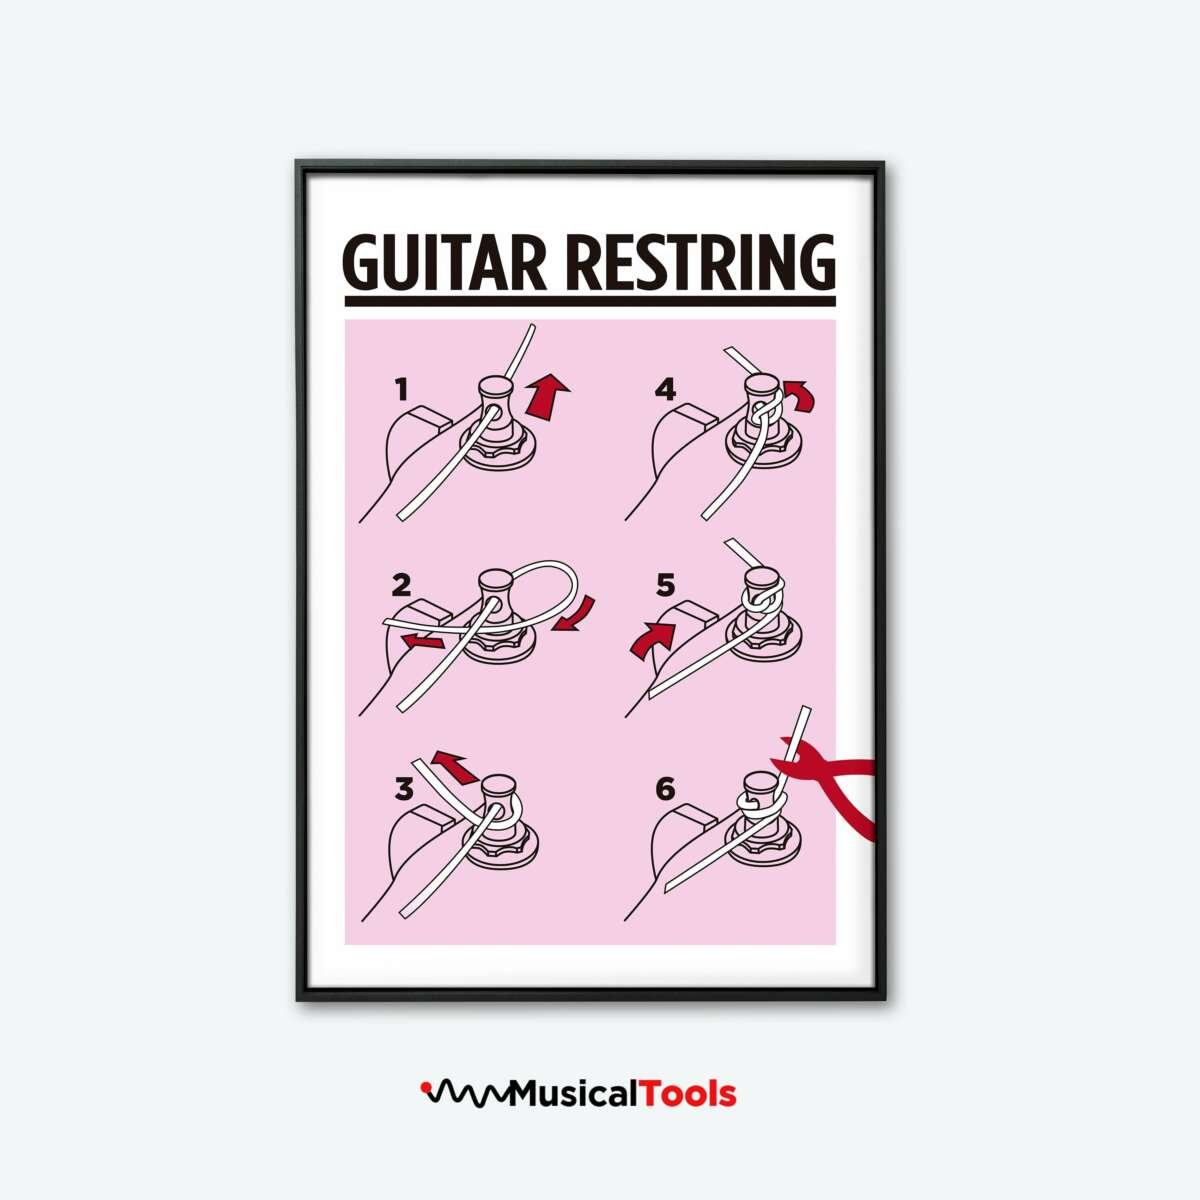
7. Make the first bend
Bend the string at a right angle just after it passes through the tuning post. This bend helps the string stay in place while you wind it.
For many standard tuning machines, keep the free end pointing upward for the first wrap. Then guide the remaining wraps downward toward the headstock.
The goal is a neat coil that moves down the post. The wraps should not overlap or climb over one another.
8. Wind the string
Use a string winder or turn the tuning key by hand. Keep light tension on the string with your other hand.
Wind the string in the direction that lowers the pitch when you turn the tuner. Most guitars use roughly two to three clean wraps on plain strings and two to four on wound strings, but the tuning post design matters more than a fixed number.
Leave enough room for the string to break cleanly over the nut. On a six-in-line headstock, the posts farther from the nut often need slightly more slack because the string travels farther.
9. Tune the string gradually
Bring the new string near its target note. Do not immediately force it far above the correct pitch.
Use standard tuning if that is your normal setup:
- Low E
- A
- D
- G
- B
- High E
A chromatic tuner will show whether the note is sharp or flat. Tune upward to the note when practical. If you pass the note, tune below it and approach the pitch again.
10. Repeat for the other strings
Replace the remaining strings one at a time. Check each string at the bridge, nut, and tuning post before applying full tension.


Keep the string order correct. From thickest to thinnest, the usual order is low E, A, D, G, B, and high E.
11. Stretch and retune the strings
New strings need to settle. Tune the guitar, then gently stretch each string by lifting it a small amount above the fretboard around the middle of its length.
Use light, controlled pressure. Do not pull hard enough to damage the string, bridge, finish, or neck. Retune after each stretch and repeat until the pitch changes only slightly.
New strings may go flat several times during the first tuning session. That does not always mean the tuners are faulty.

How to Restring Different Bridge Types
The tuning-post steps are similar on most electric guitars, but the bridge end changes.
Fender-style tremolo
Feed the string through the hole in the bridge or through the back of the guitar body. Make sure the ball end seats fully before bringing the string toward the neck.
If the bridge floats above the body, changing all six strings can disturb the balance between string tension and tremolo springs. A one-at-a-time change is easier for most players.
If you want to remove all strings for cleaning, place a soft block under the rear of the bridge to keep it near its normal position. Use care, because the correct block height depends on the guitar’s setup.
Tune-o-matic and stopbar
Feed the string through the stopbar from the front or back, depending on the design. Run it over the correct bridge saddle and toward the nut.
Watch the string angle at the bridge. A sharp or poorly aligned angle can cause kinks. Make sure the string sits in the saddle groove instead of resting against the edge of the saddle.
Wraparound bridge
A wraparound bridge may require the string to enter from the rear, pass over the bridge, and continue toward the neck. Follow the original route.
Some wraparound bridges have separate holes for the strings. Others require the string to wrap around the bridge bar. Do not force the ball end into a hole that is not designed for it.
Locking tremolo
For a Floyd Rose-style bridge, remove the old string, cut off the ball end if required, and clamp the string into the saddle. Use the correct Allen or hex key and tighten the clamp firmly, but do not strip the screw.
Many locking tremolo guitars also have a locking nut. Leave the nut unlocked while you tune. Lock it only after the guitar is close to pitch and the strings have settled.


If the bridge tilts sharply forward or backward, stop and correct the spring and string balance. Do not keep tightening strings on a bridge that is moving far from its normal position.

How Many String Wraps Should You Use?
Use enough wraps to hold the string securely without creating a thick, tangled coil. Two to four clean wraps is a practical range for many electric guitars.
The plain strings usually need fewer wraps because they are thinner and easier to bend around the post. The wound strings may need slightly more slack and more contact around the post.
Avoid these problems:
- Wraps crossing over one another
- A string winding above the top of the post
- A loose first wrap
- Too little string around the post
- A long, sharp string end pointing toward your hand
Neat wraps help the string settle. They do not, by themselves, guarantee tuning stability. Friction at the nut, poor bridge alignment, loose hardware, and an unstable tremolo can also cause tuning problems.

Check Tuning Stability, Action, and Intonation
A successful restring ends with more than a tuned open chord. Check whether the guitar still plays correctly.
Tuning stability
Play a few chords, bend each string, and retune. The guitar should settle after several stretch-and-tune cycles.
If one string repeatedly goes flat, inspect:
- The tuning-post wrap
- The string’s seating at the bridge
- The nut slot
- Any locking hardware
- Loose tuner screws or bushings
Do not file the nut yourself unless you understand the correct slot width, depth, and angle. A poorly cut nut can create buzzing, binding, and tuning problems.
Action and neck feel
Action is the distance between the strings and frets. A different string gauge can change that distance slightly.
Check for:
- New fret buzz
- Strings that feel unusually tight
- A bridge that has moved
- A neck that looks noticeably more bowed or more straight
A small change can be normal. A large change may need a professional setup.
Intonation
Intonation determines whether the guitar plays in tune higher up the neck. After restringing, compare the fretted 12th-fret note with the 12th-fret harmonic.
If the fretted note is sharp, the saddle usually needs to move away from the neck. If it is flat, the saddle usually needs to move toward the neck. Make small adjustments and retune before checking again.
Do not adjust intonation until the strings are fully stretched and the guitar is tuned to the pitch you normally use.

Common Restringing Problems and Fixes
The string keeps slipping at the tuning post
The string may have too little slack, too few wraps, or a loose first wrap. Remove tension, unwind the string, and install it again with a firm bend and neat wraps.
On a locking tuner, make sure the string is properly clamped. Do not add excessive wraps to a post designed to lock the string.
The string will not stay in tune
New strings need time to settle, but repeated slipping may point to friction or a poor installation.
Check the bridge, nut, and tuning post in that order. Make sure the string is not caught on a sharp saddle edge and that the wraps are tight.
The tremolo bridge rises or sinks
This usually means the spring tension and string tension are no longer balanced. Confirm that every string has the correct gauge and is tuned to the intended pitch.
On a floating tremolo, adjust spring tension only if you understand the setup. Otherwise, a guitar technician can restore the bridge angle and intonation.
The string breaks during installation
Stop and find the cause. A string can break because of excessive tension, a sharp saddle, a damaged nut slot, a kink, or an incorrectly routed bridge path.
If the replacement string breaks at the same location, the guitar may have a burr or sharp edge that needs repair.
The guitar now buzzes
A new string set can reveal or create a setup issue. Check that the string sits correctly in the nut and bridge. Confirm that the string gauge matches the previous set.
If buzzing affects many frets or appeared after a major gauge change, the neck or bridge may need adjustment.
The guitar sounds out of tune up the neck
Check tuning and string stretching first. Then inspect intonation at the 12th fret.
If only one string has a large intonation problem, its saddle position or string seating may be the cause. If every string is affected, the guitar may need a full setup.

Mistakes to Avoid When Changing Electric Guitar Strings
Avoid cutting all the strings at once unless the guitar and bridge are designed for that method or you know how to support the setup.
Other common mistakes include:
- Installing strings in the wrong order
- Forgetting to pass a string through the bridge
- Using the wrong string gauge for a floating tremolo
- Leaving too little slack at the tuning post
- Allowing wraps to overlap
- Tuning a locked nut before releasing the lock
- Tightening a locking screw with excessive force
- Cutting the string end before it is secure
- Adjusting the truss rod because of a minor tuning change
- Using household cleaners on the finish or fretboard
When in doubt, pause and compare the new string with the old one before removing another string. A photo can prevent a surprising amount of confusion.
How Often Should You Restring an Electric Guitar?
Replace electric guitar strings when they sound dull, feel rough, show rust, lose tuning stability, or no longer intonate well. The right interval depends on how often you play, how much your hands sweat, the climate, and the string type.
A player who performs often may replace strings every few weeks. A casual player may go much longer. There is no single schedule that fits every guitarist.
Wipe the strings after playing with a clean, dry cloth. Store the guitar in a stable indoor environment, away from extreme heat and rapid humidity changes. These steps will not make strings last forever, but they can slow dirt and corrosion.

Frequently Asked Questions
Should I change all six electric guitar strings at once?
You can, but changing one string at a time is easier for beginners and safer for many floating tremolo systems. Removing all strings at once also makes it easier to lose the bridge’s normal position.
Can I restring an electric guitar without a string winder?
Yes. A string winder saves time, but you can turn each tuning key by hand. Keep tension on the string and guide the wraps carefully.
Which end of the guitar string goes into the tuning post?
The end with the ball usually goes into the bridge. The plain or cut end goes through the tuning post. Locking tremolo systems may require the ball end to be cut off first.
Why do new guitar strings keep going flat?
New strings stretch, and loose wraps can settle around the tuning post. Stretch the strings gently, retune, and check that each wrap is tight and correctly aligned.
Do I need a setup after restringing?
You may not need one when you replace strings with the same gauge and tuning. A setup is more likely to help after a major gauge change, a tuning change, or a problem with action, fret buzz, intonation, or tremolo balance.
When should I ask a guitar technician for help?
Ask for help if the bridge will not return to position, a string repeatedly breaks at the same spot, the truss rod needs adjustment, the nut is damaged, or a locking tremolo will not balance. These repairs can affect playability and may require special tools.
Final Checklist
Before you play, confirm that:
- Every string follows the correct bridge path
- Each string sits in its nut slot
- The wraps are neat and tight
- No sharp string ends can catch your hand
- The guitar is tuned to the correct pitch
- The strings have been gently stretched
- The tremolo, if present, sits at its normal angle
- The guitar does not have new buzzing or severe intonation problems
Once the strings hold pitch and the guitar feels normal, the restring is complete. If the guitar behaves differently after a large gauge change, stop making random adjustments and arrange a proper setup.

Senior Music Reviewer
Alex Carter is a seasoned music reviewer with over a decade of experience in the world of sound and instruments. Passionate about helping musicians and enthusiasts make informed choices, he brings sharp insights and in-depth knowledge to every review. From classical instruments to modern gear, Alex combines technical expertise with a love for music to deliver content that resonates with readers.
As a Senior Music Reviewer and expert author on Tuneluma.com, Alex is dedicated to sharing honest evaluations, practical advice, and thoughtful commentary to guide readers in their musical journey.