How To Adjust Violin Strings: Easy Tuning Guide
To adjust violin strings, turn the pegs or fine tuners slowly while checking pitch, bridge position, and string tension.
Learning how to adjust violin strings is a basic skill that helps every player tune faster, protect the instrument, and improve sound. The process looks simple, but small mistakes can loosen a bridge, break a string, or damage a peg. This guide explains the safe method used by students, teachers, and violin technicians, with clear steps for tuning, replacing, and balancing your strings.
What It Means to Adjust Violin Strings
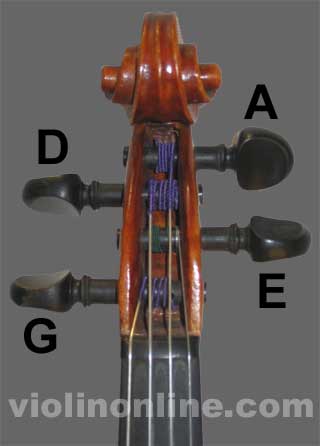
To adjust violin strings means changing their tension until each string reaches the correct musical pitch. You do this with the tuning pegs near the scroll or the fine tuners near the tailpiece.
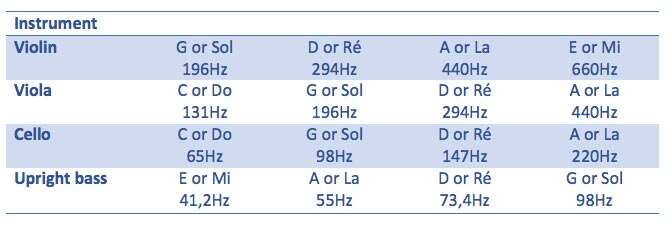
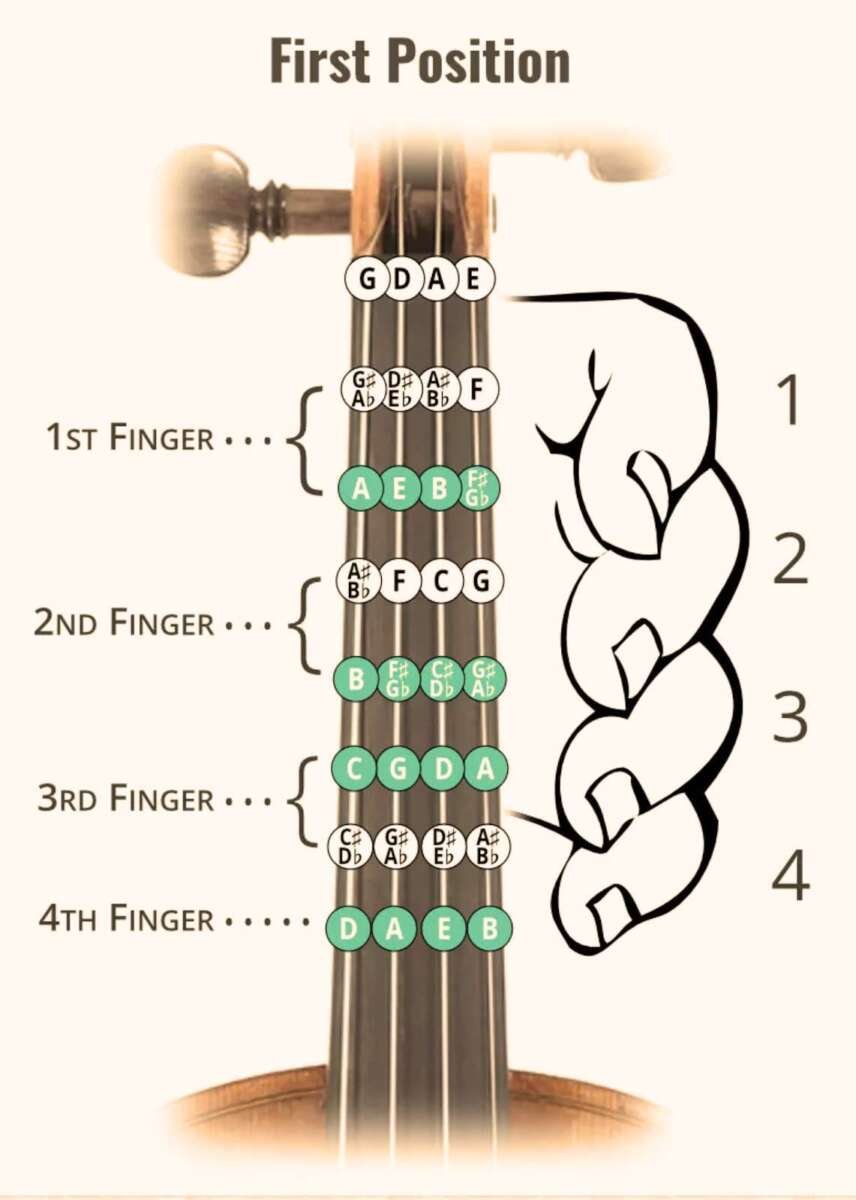
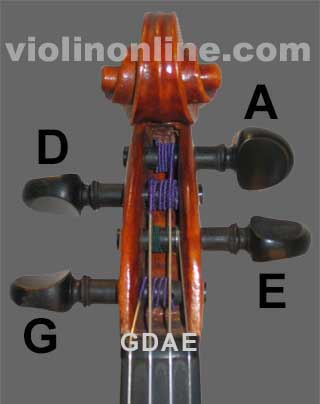
A standard violin is tuned in perfect fifths:
• G3: lowest and thickest string
• D4: second string
• A4: third string
• E5: highest and thinnest string
Most players tune to A4 at 440 Hz. Your teacher, orchestra, or ensemble may use a slightly different pitch, so follow their direction when needed.
When learning how to adjust violin strings, remember that pitch changes quickly. A small turn can move the note by several cents, especially on the E string. Think of the string like a rubber band: more tension raises the pitch, while less tension lowers it.
What You Need Before You Start
You do not need many tools to adjust violin strings. However, the right setup makes the job safer and easier.
Gather these items:
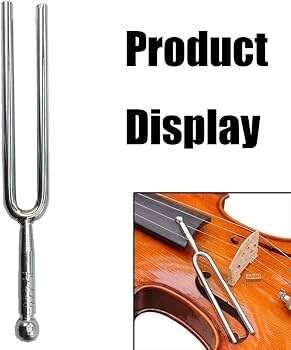
• A reliable chromatic tuner or tuning app
• A properly fitted shoulder rest, if you use one
• A soft cloth
• A pencil with graphite for the bridge grooves
• Replacement strings that match your violin’s size and setup
• A string winder for faster replacement, if desired
Place the violin on a stable surface or hold it securely in playing position. Keep the instrument away from the edge of a table. A violin can slide quickly when string tension changes.
Before you turn anything, inspect the bridge. It should stand upright, with its feet flat on the violin’s top. The bridge often leans toward the fingerboard after repeated tuning, so checking it first is an important part of how to adjust violin strings safely.
Never use oil, water, or household lubricant on the pegs. If a peg slips or feels stuck, a luthier should inspect it. Peg compound may help in some cases, but incorrect use can make the problem worse.

How to Adjust Violin Strings With Fine Tuners
Fine tuners are small screws attached to the tailpiece. They are best for small pitch changes. Many beginner violins have four fine tuners, while more advanced instruments often use only one on the E string.
Follow these steps:
- Turn on your tuner and place it where you can see it clearly.
- Pluck the string gently or use a soft bow stroke.
- Check whether the note is sharp or flat.
- Turn the fine tuner slowly.
- Pluck the string again after each small turn.
- Stop when the pitch is centered on the target note.
If the note is sharp, loosen the string by turning the fine tuner to reduce tension. If the note is flat, tighten it by increasing tension. The exact direction can feel confusing because tuner designs vary, so watch the pitch rather than relying only on memory.
Leave some adjustment space in the fine tuner. If the screw is fully tightened or fully loosened, it cannot make further corrections. Reset the tuner near the middle of its range, then use the peg for larger changes.
When learning how to adjust violin strings, avoid turning the fine tuner too far. A fully tightened tuner may press against the tailpiece and create noise or damage the finish.

How to Adjust Violin Strings With the Tuning Pegs
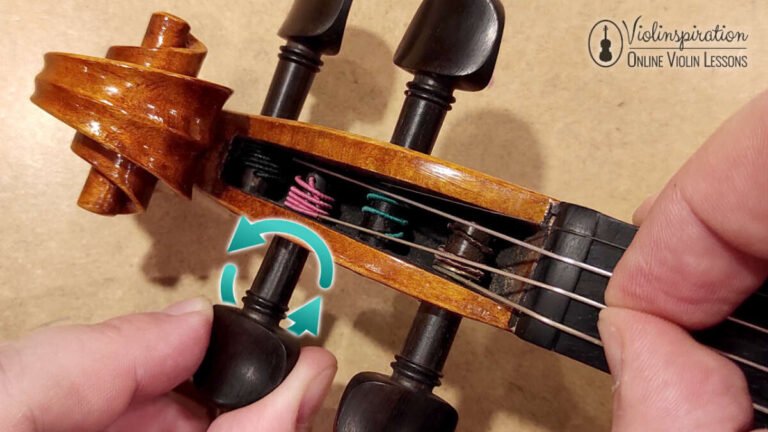
Tuning pegs make larger pitch changes than fine tuners. They also require more control because the string can rise or fall in pitch very fast.
Use this method:
- Identify the string you want to tune.
- Turn the peg only a few millimeters at a time.
- Pluck the string after each small movement.
- Keep the string close to the correct note.
- Use the fine tuner for the final adjustment.
- Recheck all four strings when finished.
To raise the pitch, increase string tension. To lower the pitch, reduce tension. Turn the peg slowly and keep gentle inward pressure on it. This helps the tapered peg stay seated in the pegbox.
Do not force a peg that will not turn. A stuck peg may have a poor fit, dry wood, or excess pressure from the string. Forcing it can crack the pegbox or snap the string.
A useful technique is to tune slightly below the target note, then raise the pitch gradually. This helps the peg hold its position. If you tune above the note, lower it below the target and raise it again rather than simply loosening a tiny amount.
This is one of the most important lessons in how to adjust violin strings: slow movements are safer and more accurate than large turns.
How to Tune the Strings in the Right Order
You can tune the strings in any order, but many players begin with A. This gives the ear a clear reference and matches the A used by orchestras and tuning devices.
A practical order is:
- Tune A.
- Tune D.
- Tune G.
- Tune E.
- Check all four strings again.
Changing one string affects the violin’s overall tension. When you raise the pitch of one string, the bridge and top may respond slightly. This can make another string move a little out of tune.
After the first pass, check the strings again. Experienced players often tune in pairs of fifths, such as G and D or D and A. The interval should sound smooth, without a strong wavering beat.
Electronic tuners are useful, but your ear still matters. A tuner can show pitch, while your ear can detect tone, resonance, and the quality of the fifth. Using both gives the best result.

How to Adjust Violin Strings After Replacing One
A new string stretches during its first hours or days. It may go flat several times, especially during the first few minutes. This is normal and does not always mean the string is defective.
To replace one string safely:
- Loosen the old string slowly.
- Remove it from the peg and tailpiece.
- Check that the bridge stays upright.
- Place the new string in the correct peg hole.
- Seat the ball or loop in the tailpiece.
- Wind the string neatly around the peg.
- Bring it gradually up to pitch.
- Tune the other strings again.
Keep the windings neat and close to the peg wall, but do not let them pile over one another. The string should leave the peg in a clean line toward the pegbox opening.
Do not remove all four strings at once unless a trained repairer is handling the instrument. The soundpost may fall when string pressure disappears. Replacing one string at a time keeps the setup stable.
When practicing how to adjust violin strings, replace strings in a quiet space with good light. Rushing is the main cause of crossed windings, misplaced string ends, and leaning bridges.

How to Keep the Bridge Safe
The bridge transfers string vibration to the violin’s body. It is not glued in place. String tension holds it there, which is why bridge care is central to how to adjust violin strings.
Check the bridge from the side. The side facing the tailpiece should usually be close to vertical. The side facing the fingerboard often has a slight shape or lean, depending on the bridge design.
If the top of the bridge leans toward the fingerboard, correct it carefully:
• Loosen the strings slightly, but do not remove them.
• Hold the bridge with both hands.
• Move the top edge back into position with gentle pressure.
• Confirm that both feet remain flat on the violin.
• Retune slowly and check the bridge again.
A beginner should ask a teacher or luthier to demonstrate this first. A bridge can crack if it is moved roughly or while the strings are too tight.
A small amount of graphite in each bridge groove can reduce friction. Use a sharpened pencil and apply only a little. Do not widen the groove or file the bridge yourself.

Common Problems When Adjusting Violin Strings
Even careful players meet a few common problems. Most have simple causes, but some need professional help.
The peg keeps slipping
The peg may not fit the pegbox well, or the string may be wound in a way that pulls it outward. Push the peg inward gently while tuning. If it still slips, have a luthier check the peg fit.
The peg is hard to turn
A dry or poorly fitted peg may bind. Do not force it or use household products. A violin shop can apply the correct peg compound or repair the fit.
The string makes a buzzing sound
Buzzing may come from a loose fine tuner, a poorly seated string, a worn bridge groove, or another setup issue. Check the tuner and tailpiece first, then seek professional help if the sound remains.
The string breaks near the bridge
The bridge groove may be too narrow or sharp. A sharp edge can cut into the string. Stop tuning and ask a luthier to inspect the bridge.
The bridge moves during tuning
This often happens when the string slides through the bridge groove. Tune in smaller steps and watch the bridge after each string. Keep the feet flat and the bridge centered between the f-holes.
These problems show why how to adjust violin strings is not only about reaching the right notes. It is also about watching the instrument as you tune.

How Often Should You Adjust Violin Strings?
You should check violin tuning every time you play. Temperature, humidity, travel, and playing time can all change string tension.
New strings need more frequent adjustment because they stretch. After installation, tune them gently several times. Avoid pulling hard on a new string, since sudden force can break it or damage the bridge.
Replace strings based on tone and playing habits rather than a fixed rule. Many active players change them every few months, while casual players may use them longer. Replace them sooner if they sound dull, feel rough, show visible wear, or stop staying in tune.
Wipe rosin dust from the strings and violin top with a clean, dry cloth after playing. Do not use alcohol or household cleaner on the instrument. Solvents can harm varnish and finishes.
A stable environment also helps. Keep the violin away from heaters, air conditioners, direct sunlight, and very dry rooms. Extreme humidity changes can affect wood, glue, bridges, and pegs.
Mistakes to Avoid
The safest way to learn how to adjust violin strings is to build careful habits from the start.
Avoid these mistakes:
• Turning a peg in large, fast movements
• Tuning without checking the bridge
• Tightening a string far above its correct note
• Removing all four strings at the same time
• Forcing a stuck or slipping peg
• Using oil or water on the pegbox
• Letting string windings overlap heavily
• Ignoring a sharp bridge groove
• Trusting a tuner without listening to the instrument
• Leaving fine tuners at the extreme end of their range
One practical lesson applies to almost every violin setup: stop when something feels wrong. Strange resistance, cracking sounds, sudden bridge movement, or repeated string breaks are signs to get help.
A teacher can show the correct peg direction in a few minutes. A qualified luthier can handle bridge fitting, peg work, soundpost problems, and nut or tailpiece repairs.
A Simple Daily Tuning Routine
A short routine can make how to adjust violin strings feel natural instead of stressful.
Before playing:
- Look at the bridge and confirm that it is upright.
- Check the A string with a tuner.
- Tune the other strings using the pegs or fine tuners.
- Listen to the fifths between neighboring strings.
- Play a few notes and check the tuning again.
- Wipe away rosin dust when finished.
Tune gently after taking the violin from its case. A cold instrument may change pitch as it warms in the room. Give it a minute if the tuning seems unstable.
If you play with others, tune to the group’s A. In an orchestra, the oboe often provides the reference pitch. In private practice, a reliable tuner is enough.
Frequently Asked Questions About How to Adjust Violin Strings
Which violin string should I tune first?
Most players tune the A string first because it provides a common reference pitch. Then tune D, G, and E before checking all four strings again.
Should I use the pegs or fine tuners?
Use the pegs for large pitch changes and the fine tuners for small corrections. Many players use the fine tuner mainly for the E string because it is thin and sensitive.
How do I know if a violin string is too tight?
A string is too tight if its pitch is above the target note, feels unusually stiff, or produces a harsh sound. Stop turning the peg and compare the note with a reliable tuner.
Why does my violin go out of tune after I adjust the strings?
New strings stretch, and all strings affect the instrument’s overall tension. Temperature, humidity, and peg slipping can also cause tuning changes.
Can I adjust violin strings without a tuner?
You can tune by ear if you have a trusted reference pitch and strong interval skills. Beginners should use a chromatic tuner while also learning to hear the perfect fifths between strings.
What should I do if a violin string breaks?
Move your face and hands away from the string, then loosen and remove the broken piece carefully. Replace it with the correct string and tune slowly, or ask a teacher or luthier for help.
Conclusion
Learning how to adjust violin strings helps you protect your instrument, tune with confidence, and get a clearer tone. Use the pegs for large changes, fine tuners for small ones, and always watch the bridge as tension changes.
Tune in small steps, replace strings one at a time, and never force a stuck peg. With a reliable tuner and steady practice, this task soon becomes as routine as tightening your bow. Try the process during your next practice session, and ask a teacher or luthier to check your technique if you are unsure.

Senior Music Reviewer
Alex Carter is a seasoned music reviewer with over a decade of experience in the world of sound and instruments. Passionate about helping musicians and enthusiasts make informed choices, he brings sharp insights and in-depth knowledge to every review. From classical instruments to modern gear, Alex combines technical expertise with a love for music to deliver content that resonates with readers.
As a Senior Music Reviewer and expert author on Tuneluma.com, Alex is dedicated to sharing honest evaluations, practical advice, and thoughtful commentary to guide readers in their musical journey.