How To Install Violin Strings: Easy Step-By-Step Guide
Install violin strings one at a time, secure each winding, set the bridge upright, and tune slowly.
Learning how to install violin strings is easier when you understand the purpose of each part: the peg, bridge, tailpiece, fine tuner, and string winding. A careful setup protects the instrument, keeps the bridge stable, and helps new strings settle with a clear tone. This guide explains the full process in simple steps, including common mistakes, tuning tips, and signs that you should ask a luthier for help.
What You Need Before You Install Violin Strings
Before you learn how to install violin strings, gather the right tools and create a safe work area. A table with a soft towel or clean cloth can protect the violin from scratches. Keep the instrument away from the edge of the table, pets, and anything that could knock it to the floor.
You will need:
• A complete set of violin strings in the correct size and scale length
• An electronic tuner or a reliable tuning app
• A pencil with soft graphite
• A clean, dry cloth
• Peg compound, only if a peg slips or turns poorly
• A string winder, if you want faster and smoother peg turns
• A small bridge straightening tool or a clean fingertip
Check the string package before opening it. Standard violin strings are tuned from thickest to thinnest as G, D, A, and E. Some sets use a loop end, while others use a ball end. Your tailpiece must match the string end.
A full-size violin usually takes full-size strings, but fractional violins need shorter strings. Using the wrong length can make tuning unstable and may place excess stress on the instrument. If you are unsure, check the violin’s size or ask a violin shop.

Understand the Violin String Parts
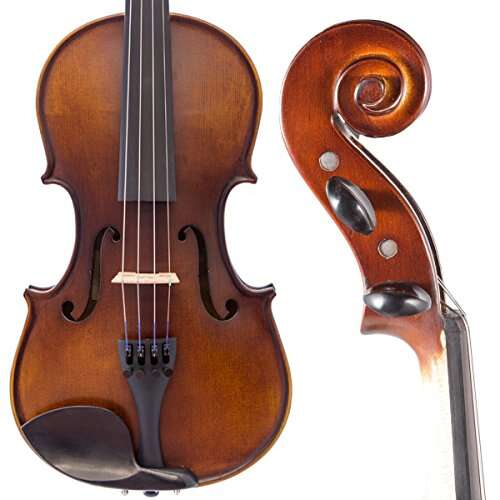
Each violin string has a core, winding, peg end, and tailpiece end. The peg end is usually plain or lightly colored. The tailpiece end has either a small metal ball or a loop. Knowing these parts makes how to install violin strings much less confusing.
The string passes through several parts:
• The tailpiece holds the ball or loop end.
• The bridge supports the string above the violin top.
• The fingerboard provides the playing surface.
• The nut guides the strings before they reach the pegbox.
• The peg controls the main pitch.
• The fine tuner makes small pitch changes, if fitted.
The four strings also have different thicknesses. The G string is the thickest, and the E string is the thinnest. Many string sets use colored thread or winding to help you identify each string, but the color code differs by brand. Always check the package instructions.
The bridge is not glued to the violin. String pressure holds it in place. This design lets a luthier adjust the bridge, but it also means the bridge can lean or fall during a string change.

Should You Replace One String or All Four?
For most players, replacing one string at a time is the safest way to install violin strings. The remaining strings keep tension on the bridge and help it stay in position. This method also lets you compare the new string with the old setup.
Replace all four strings at once when:
• The strings are old, rusty, frayed, or badly worn
• You are changing to a new string set
• The violin has been neglected for a long time
• A teacher or luthier recommends a full replacement
If you remove all four strings, the bridge may fall, and the soundpost may shift. The soundpost is the small wooden post inside the violin that supports the top and helps shape the tone. It should not be moved unless a trained luthier adjusts it.
I often recommend changing one string first for a beginner. It gives you a visual guide for the correct winding and bridge position. Once you feel confident, you can replace the full set, but keep the violin supported and watch the bridge closely.
How to Install Violin Strings Step by Step
The following process explains how to install violin strings safely and correctly. Work slowly. A few extra minutes can prevent a broken string, a slipping bridge, or a damaged peg.
1. Place the violin securely
Set the violin on a clean, soft surface with the strings facing up. You can rest the neck in your hand, but do not press hard on the body. Keep the scroll supported if you are working near the pegbox.
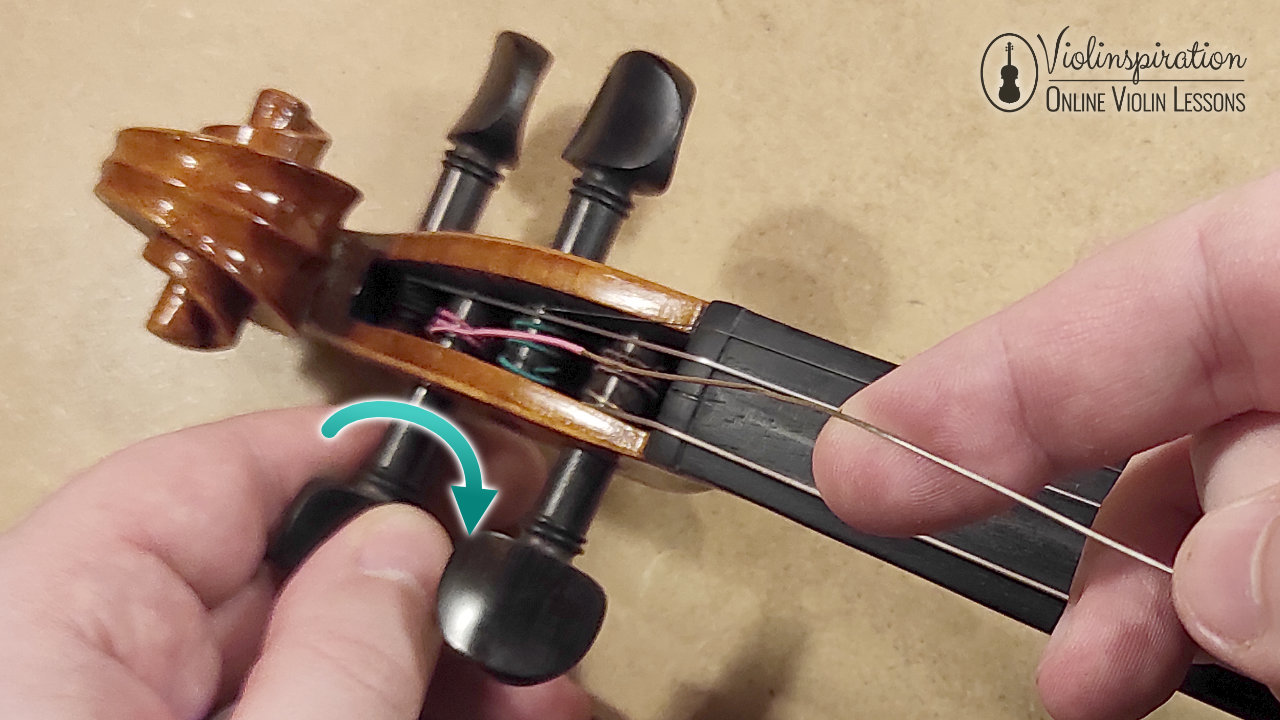
Loosen only the string you plan to replace. Turn its peg toward you in small movements until the string has no tension. Do not pull a tight string from the peg, because it may snap or scratch the varnish.
2. Remove the old string
Unwind the string from the peg and pull the end out of the peg hole. Then lift the ball or loop from the tailpiece. If the string catches, release it gently rather than forcing it.
Use this moment to inspect the bridge. Look for a bridge that leans toward the fingerboard, deep grooves, cracks, or sharp edges. A bridge that is cracked or badly worn needs professional attention.
3. Check the new string
Identify the correct string by its label, thickness, or color. Make sure the tailpiece end matches your violin. A ball-end string needs a ball-end slot, while a loop-end E string usually fits over a fine tuner hook.
Some violins have fine tuners built into the tailpiece. Others use only a fine tuner for the E string. If the tailpiece has a fine tuner, confirm that the string ball or loop sits correctly in its hook or slot.
4. Attach the string to the tailpiece
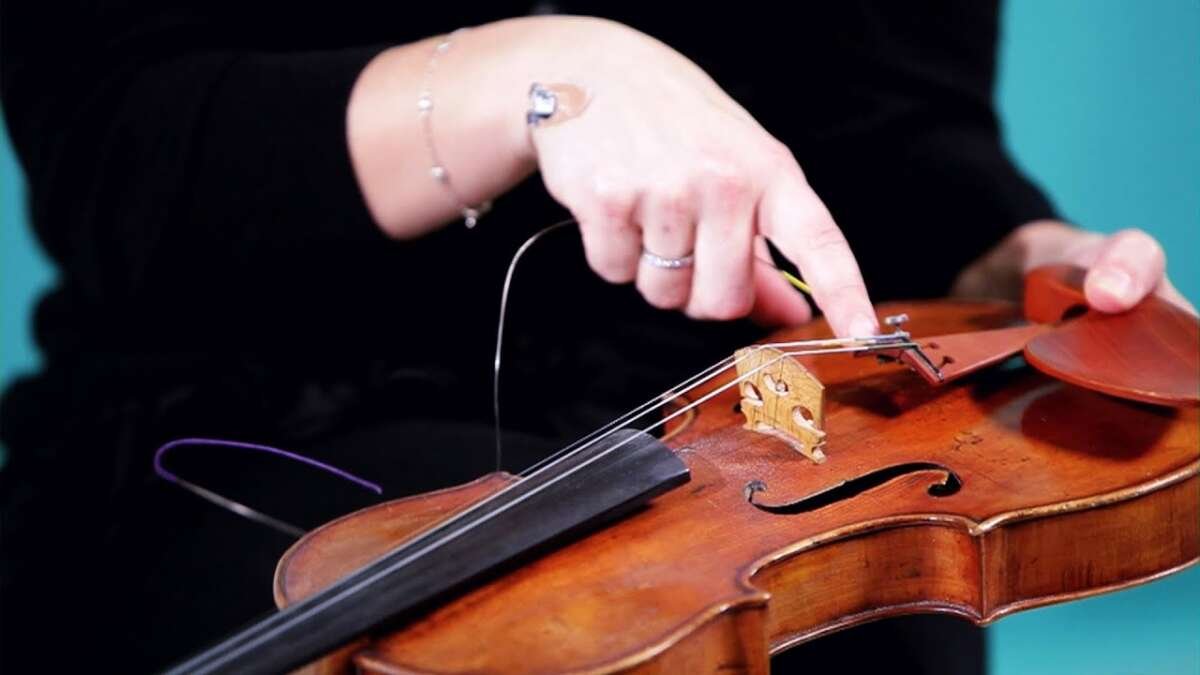
Insert the ball into the tailpiece slot or place the loop over the fine tuner hook. The string should sit neatly in the center of the tailpiece opening. Do not let the metal ball rest against a sharp edge.
For a loop-end string, check that the loop is fully seated. If the loop slips off while tuning, stop and attach it again. A loose loop can damage the tailpiece or cause the string to jump free.
5. Thread the string through the peg
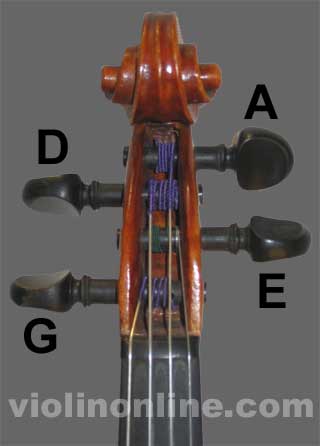
Guide the free end over the bridge and toward the pegbox. Insert the end through the correct peg hole, leaving about 1 to 2 inches of string beyond the hole. This amount gives you enough material for a secure winding without creating a large coil.
The string should enter the peg hole from the correct direction. As you turn the peg, the string should wind toward the pegbox wall, not toward the neighboring peg. Proper direction helps the string pull the peg inward and stay tight.
6. Wind the string neatly
Turn the peg slowly while keeping light tension on the string with your other hand. Make each coil sit beside the last one. Do not cross the coils or pile them over one another.
Leave the first coil close to the inside wall of the pegbox, then wind outward in a neat row. The final coils should sit near the outside edge without touching the pegbox. Neat winding helps the peg hold and reduces tuning problems.
7. Guide the string through the bridge
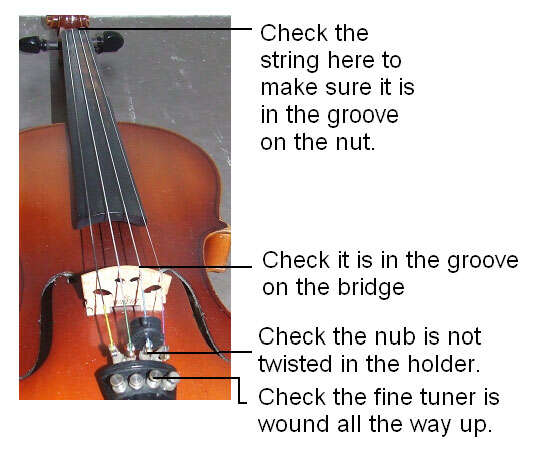
The bridge has four slots, one for each string. Place the string in the correct slot, centered between the fingerboard and tailpiece. The string should not sit too deeply in the groove.
Some players apply a tiny amount of soft graphite to the bridge and nut grooves. This can reduce friction during tuning. Use only a small amount; do not fill the groove with pencil material or use oil.
8. Bring the string to light tension
Turn the peg until the string is just firm. Do not tune directly to the final pitch yet. Check the tailpiece, bridge, peg winding, and string groove before adding more tension.
The bridge should remain upright. Its feet should sit flat on the violin top, and its top edge should lean slightly toward the tailpiece in a normal setup. If the bridge begins to lean toward the fingerboard, stop and correct it gently.
9. Tune gradually
Use a tuner and raise the pitch in small steps. Standard violin tuning is:
• G3, the lowest string
• D4
• A4, commonly 440 Hz
• E5, the highest string
New strings stretch as they settle. Tune close to the target, wait a moment, and tune again. Avoid making large, fast turns with the peg. A sudden increase in tension can break a string or pull the bridge out of position.
10. Check the violin again
After installing one string, inspect the bridge from the side. It should remain straight, with both feet flat on the top. Check that the string is centered in its bridge and nut grooves.
Repeat the process for the other strings if needed. When all strings are installed, tune the violin several times over the next day or two. New strings often require regular tuning before they become stable.