How To Tune A Brand New Violin: Easy Beginner Guide
Tune a brand new violin slowly with a chromatic tuner, careful peg turns, and frequent checks for string stretch.
Learning how to tune a brand new violin takes more care than tuning an older instrument. New strings stretch, pegs may slip, and the bridge may not yet be set safely. This guide explains how to tune a brand new violin step by step, while helping you avoid the common mistakes that can damage the instrument or break a string.
What to Know Before Tuning a Brand New Violin
A violin has four strings. From lowest to highest, they are:
• G3, the thickest string
• D4
• A4
• E5, the thinnest string
Most violins use standard tuning at A4 = 440 Hz. This means the A string should vibrate at 440 cycles per second when it is in tune.
When learning how to tune a brand new violin, remember that the instrument may not be ready to tune straight from the box. Some new violins arrive with the bridge separate. Others have loose strings, stiff pegs, or strings that need several days to settle.
Check these parts first:
• The bridge should stand between the two f-holes.
• The bridge should face the correct direction, with the lower side under the G string.
• The bridge feet should sit flat on the violin top.
• The strings should rest in the bridge grooves and the nut grooves.
• The tailpiece should sit straight and centered.
• The fine tuners should not touch the violin top.
If the bridge is missing, badly tilted, or not fitted to the violin, ask a violin teacher or luthier for help. A poorly fitted bridge can fall, warp, or damage the top of the instrument.

Tools You Need to Tune a New Violin
The right tools make how to tune a brand new violin much easier. You do not need a large kit, but each tool serves a useful purpose.
• Chromatic tuner: A clip-on tuner or phone tuner can detect the pitch of each string.
• Fine tuners: These allow small pitch changes, especially helpful for beginners.
• Peg compound: This may help pegs turn smoothly and hold their position. Use it only when needed.
• Soft cloth: Use it to wipe rosin dust from the strings and violin.
• Spare strings: New strings can break, especially during the first setup.
• Music stand or stable surface: This keeps your hands free and reduces accidents.
A chromatic tuner is better than a basic guitar tuner because it recognizes every note. Set the tuner to chromatic mode when possible.
Electronic tuners are helpful, but they are not perfect. Room noise, phone microphones, and vibration from nearby instruments can affect the reading. Always listen to the tone as well as watching the tuner.

How to Tune a Brand New Violin Safely
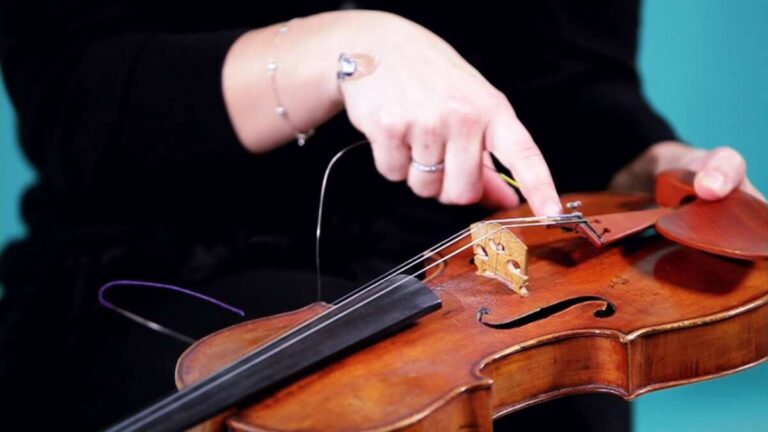
Before turning any peg, hold the violin in a stable position. You can place it on your lap with the scroll pointing left or right, or hold it under your chin without squeezing the neck.
Follow these steps:
- Check the bridge and strings before making any pitch changes.
- Turn on the chromatic tuner and set it where you can see it.
- Start with the A string.
- Pluck the string gently or use a slow bow stroke.
- Compare the pitch with A4 on the tuner.
- Turn the peg in very small movements.
- Stop often and check the tuner again.
- Tune the other strings one at a time.
- Recheck all four strings after a few minutes.
Turn the peg slowly. A small movement can create a large pitch change. If the note is too low, raise the pitch by tightening the string. If the note is too high, loosen the string slightly.
Do not make large peg turns while the string is under strong tension. If the string suddenly breaks, it can snap near your face or hand. Small adjustments are safer and give you better control.
When learning how to tune a brand new violin, tune in this order:
• A first
• D second
• G third
• E last
You may also tune from the A outward. Professional players often use the A string as the main reference because orchestras commonly tune to A4.

How to Use the Tuning Pegs
The large wooden pegs control the main pitch of each string. They give you fast, wide adjustments, but they require a gentle touch.
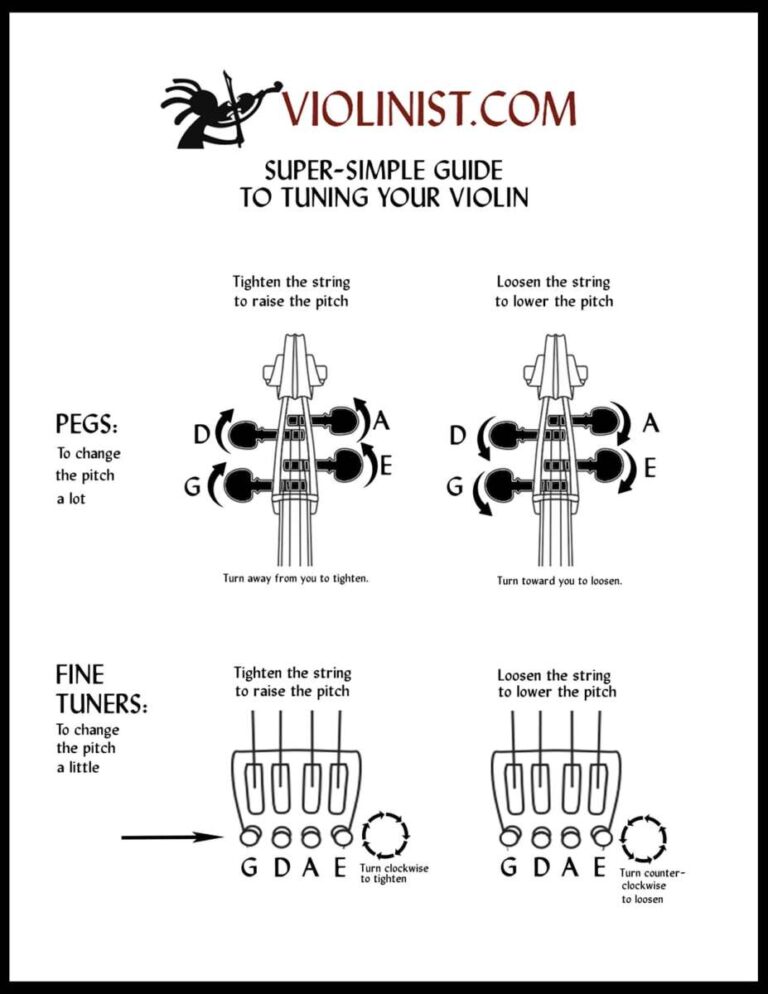
To raise the pitch, turn the peg so the string winds tighter around it. To lower the pitch, turn the peg so the string becomes less tight. The exact turning direction depends on which side of the pegbox the peg sits on, so watch the pitch rather than relying only on a fixed direction.
Use this method:
• Turn the peg only a few millimeters.
• Pluck the string after each small turn.
• Keep light inward pressure on the peg.
• Make sure the string winds neatly toward the pegbox wall.
• Keep the coils beside each other instead of crossing them.
Pegs can slip if you turn them without pushing them gently inward. They can also become stuck if you force them too hard. If a peg will not turn or will not hold, stop and consult a violin technician.
A common beginner mistake is to spin the peg quickly while looking only at the tuner. I have seen this send a string far above its target pitch in seconds. Slow movements protect both the string and the violin.

How to Use Fine Tuners
Fine tuners make small pitch adjustments. Many beginner violins have four fine tuners, while some violins use only one fine tuner on the E string.
Turn a fine tuner clockwise to tighten it and usually raise the pitch. Turn it counterclockwise to loosen it and usually lower the pitch. Check the tuner after each small turn.
Fine tuners work best when they have room to move. If one is already screwed almost all the way in or out, use the peg to bring the string closer to the correct note first.
Use the fine tuner when:
• The string is close to the target note.
• You need a small correction.
• You are still learning to control the pegs.
• The string keeps drifting by a small amount.
Do not force a fine tuner. If the screw reaches its limit, reset it and use the peg. A fine tuner that touches the violin top can scratch the finish or create unwanted noise.
For many beginners, the best method for how to tune a brand new violin is to use the peg for large changes and the fine tuner for the final adjustment.

How to Tune a Brand New Violin With New Strings
New strings stretch more than seasoned strings. This is normal. A violin may go out of tune several times during the first day or week.
Tune each string to its correct note, then wait a minute and check again. Play a few gentle notes between checks. The string may settle as it adjusts to the peg, bridge, nut, and tailpiece.
Use this simple routine:
- Tune the A string to A4.
- Tune the D, G, and E strings.
- Check the A string again.
- Correct every string that has moved.
- Repeat the process two or three times.
Do not try to force a new violin to stay perfectly in tune after one adjustment. The strings need time to settle. Frequent, gentle tuning is safer than one aggressive adjustment.
During the first few days, keep the violin away from extreme heat, direct sunlight, and very dry air. Sudden climate changes can affect wood, glue, pegs, and string tension. Normal indoor humidity is usually safer than a very dry or damp room.

Checking the Bridge While Tuning
String tension pulls the bridge toward the fingerboard. Over time, the bridge can lean forward. A leaning bridge is one of the most important problems to watch for when learning how to tune a brand new violin.
Look at the bridge from the side. The side facing the tailpiece should usually be close to a right angle with the violin top. The side facing the fingerboard often has a slight curve.
Before moving the bridge, loosen the strings a little. Never force a bridge while the strings are fully tight. A new bridge may be difficult to adjust and can crack if handled roughly.
Stop and seek professional help if:
• The bridge is strongly leaning.
• One bridge foot does not touch the violin top.
• The bridge is too thick or too high.
• The strings sit outside the bridge grooves.
• The soundpost has fallen.
• The tailpiece is not centered.
A violin bridge is not a simple flat stand. It is fitted to the instrument’s arch and helps transfer string vibration. A trained luthier can shape and position it correctly.

Common Problems When Tuning a Brand New Violin
New players often face the same tuning problems. Most have simple causes, but some need professional attention.
The peg keeps slipping
The peg may not have enough inward pressure, or it may not fit the pegbox correctly. Push it in gently while turning. If it still slips, a luthier may need to apply peg compound or refit the peg.
The string will not reach the right note
Check that the string is sitting correctly in the nut, bridge, and fine tuner. A string can also be wound poorly around the peg, which prevents stable tuning.
The pitch rises too fast
The peg is moving too much. Use tiny turns and check the note after each movement. This is especially important with the thin E string.
The string sounds dull
A dull sound may come from old or poor-quality strings, too much rosin, incorrect bow contact, or a setup issue. Tuning alone may not solve the problem.
The string breaks
A string can break from age, sharp edges, excessive tension, or incorrect winding. Keep your face away from the string path and replace the string carefully.
The violin goes out of tune quickly
This is common with brand new strings. It may also result from temperature changes, slipping pegs, a moving bridge, or strings that were not stretched and wound properly.

How to Tune a Brand New Violin by Ear
A tuner is the safest starting point, but ear training is also valuable. Once two strings are close, you can compare them using perfect fifths.