
Mic a kick drum by placing a suitable microphone inside or near the resonant head, then adjust position for punch and depth.
Learning how to mic a kick drum is one of the fastest ways to improve a drum recording. The right microphone, position, angle, and room setup can turn a dull thump into a clear, powerful foundation. This guide explains the process step by step, with practical methods that work in home studios, rehearsal rooms, and professional sessions.

What You Need to Know Before Miking a Kick Drum
A kick drum produces two main sounds. The beater creates the sharp attack, while the drum shell and resonant head create the low-end body. Good kick drum miking captures both without making the track muddy.


Before you place a microphone, listen to the drum on its own. Then listen with the bass guitar, snare, and full band. A kick that sounds huge in isolation may overwhelm the mix. A less impressive solo sound may fit the full song perfectly.
The best approach to how to mic a kick drum is to treat placement as part of the tone. Do not rely on EQ to fix a poor microphone position. Moving the microphone a few inches can change the sound more than several EQ adjustments.
Consider these factors first:
• Drum size: Larger drums often produce deeper lows, while smaller drums may offer more attack.
• Drumhead type: Coated heads tend to sound softer and warmer. Clear heads often provide more attack.
• Muffling: Pillows, blankets, rings, and internal dampers affect sustain and resonance.
• Beater type: Felt beaters sound rounder. Plastic and wood beaters create more click.
• Room sound: A small room can add boxiness, while a larger room may add useful depth.
A useful habit is to ask the drummer to play the exact pattern used in the song. A drum can sound different during soft verses and loud choruses. Check both before you commit to a position.
Choose the Right Kick Drum Microphone
The most common kick drum microphones are dynamic microphones built to handle high sound pressure levels. They usually have a strong low-frequency response and a controlled upper-midrange boost for attack.


A large-diaphragm condenser microphone can capture more detail and sub-bass. However, it may pick up more room sound and can overload if placed too close to the drum. Use it with care and check the microphone’s maximum sound pressure rating.
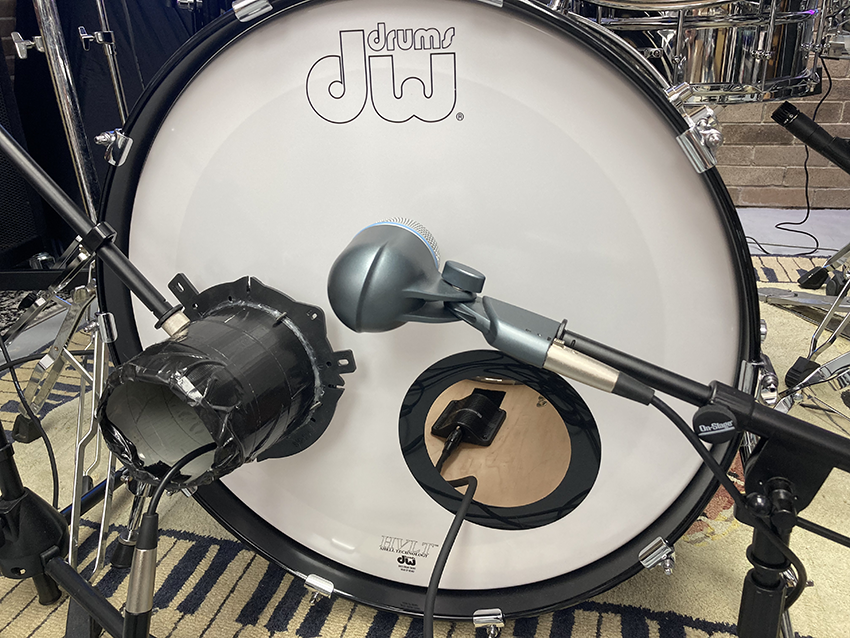
A boundary microphone placed inside or just outside the drum can produce a clean, focused sound. Some engineers also use a subkick or speaker-based microphone to capture very low frequencies. These options can sound impressive, but they work best when blended with a standard kick microphone.
Common microphone choices include:
• Dynamic kick microphones: Best for loud sources, strong attack, and reliable studio or live use.
• Large-diaphragm condensers: Useful for detailed low end and a more open sound.
• Boundary microphones: Helpful when you want a compact setup with a focused response.
• Subkick microphones: Designed to capture deep bass rather than beater attack.
• Ribbon microphones: Can sound warm and smooth, but they need careful handling and enough distance from strong air movement.
There is no single best kick drum microphone. The right choice depends on the drum, drummer, music style, room, and desired mix. Manufacturer frequency charts can help, but your ears should make the final decision.

How to Mic a Kick Drum from the Inside
Miking from inside the kick drum is one of the most common techniques. It gives you a direct sound with strong attack and less room ambience.
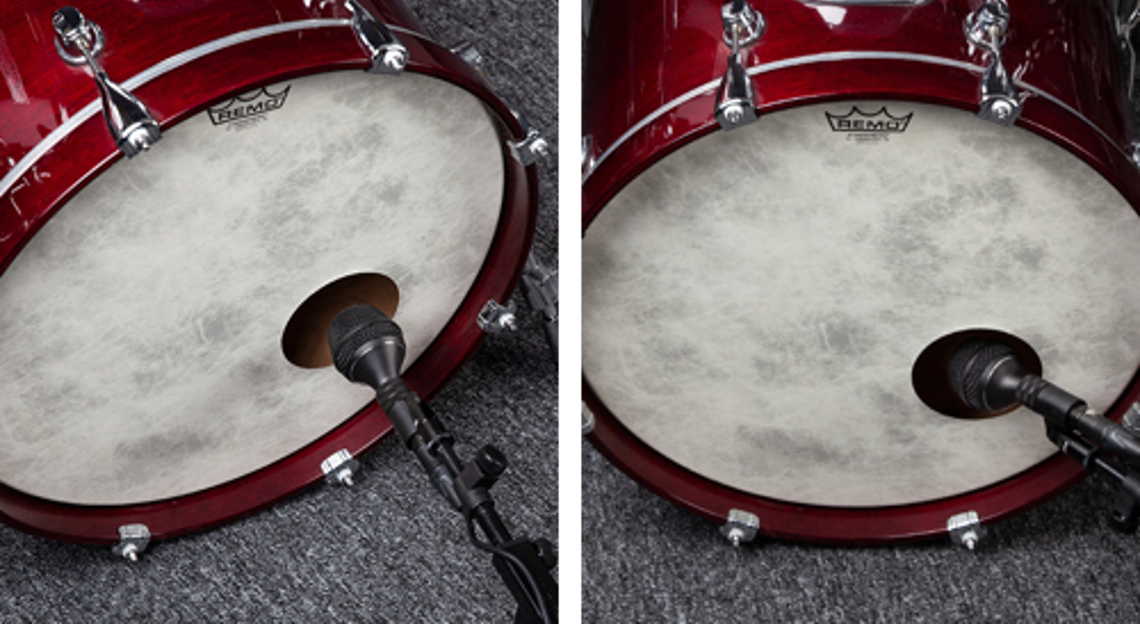
If the front head has a port, place the microphone through the opening. Start with the capsule about 3 to 6 inches from the beater head. Point it toward the area where the beater strikes.
This position usually gives you:
• More beater attack
• A tight low end


• Less room sound
• Better isolation from other drums
If the sound is too clicky, move the microphone away from the beater impact point. You can also angle it slightly toward the shell or outer edge of the head. If the sound lacks attack, move it closer to the beater strike zone.
Avoid pushing the microphone so far into the drum that it touches the head or muffling material. Strong air movement can create unwanted pops. A short stand, boom arm, or internal mount can help keep the microphone stable.
When learning how to mic a kick drum inside the shell, make small changes. Move the microphone one inch at a time, record a short passage, and compare each take. Small movements often reveal major tonal differences.

How to Mic a Kick Drum from the Outside
An outside microphone captures more of the kick drum’s body and resonance. This sound is often rounder, deeper, and less focused than an inside microphone.
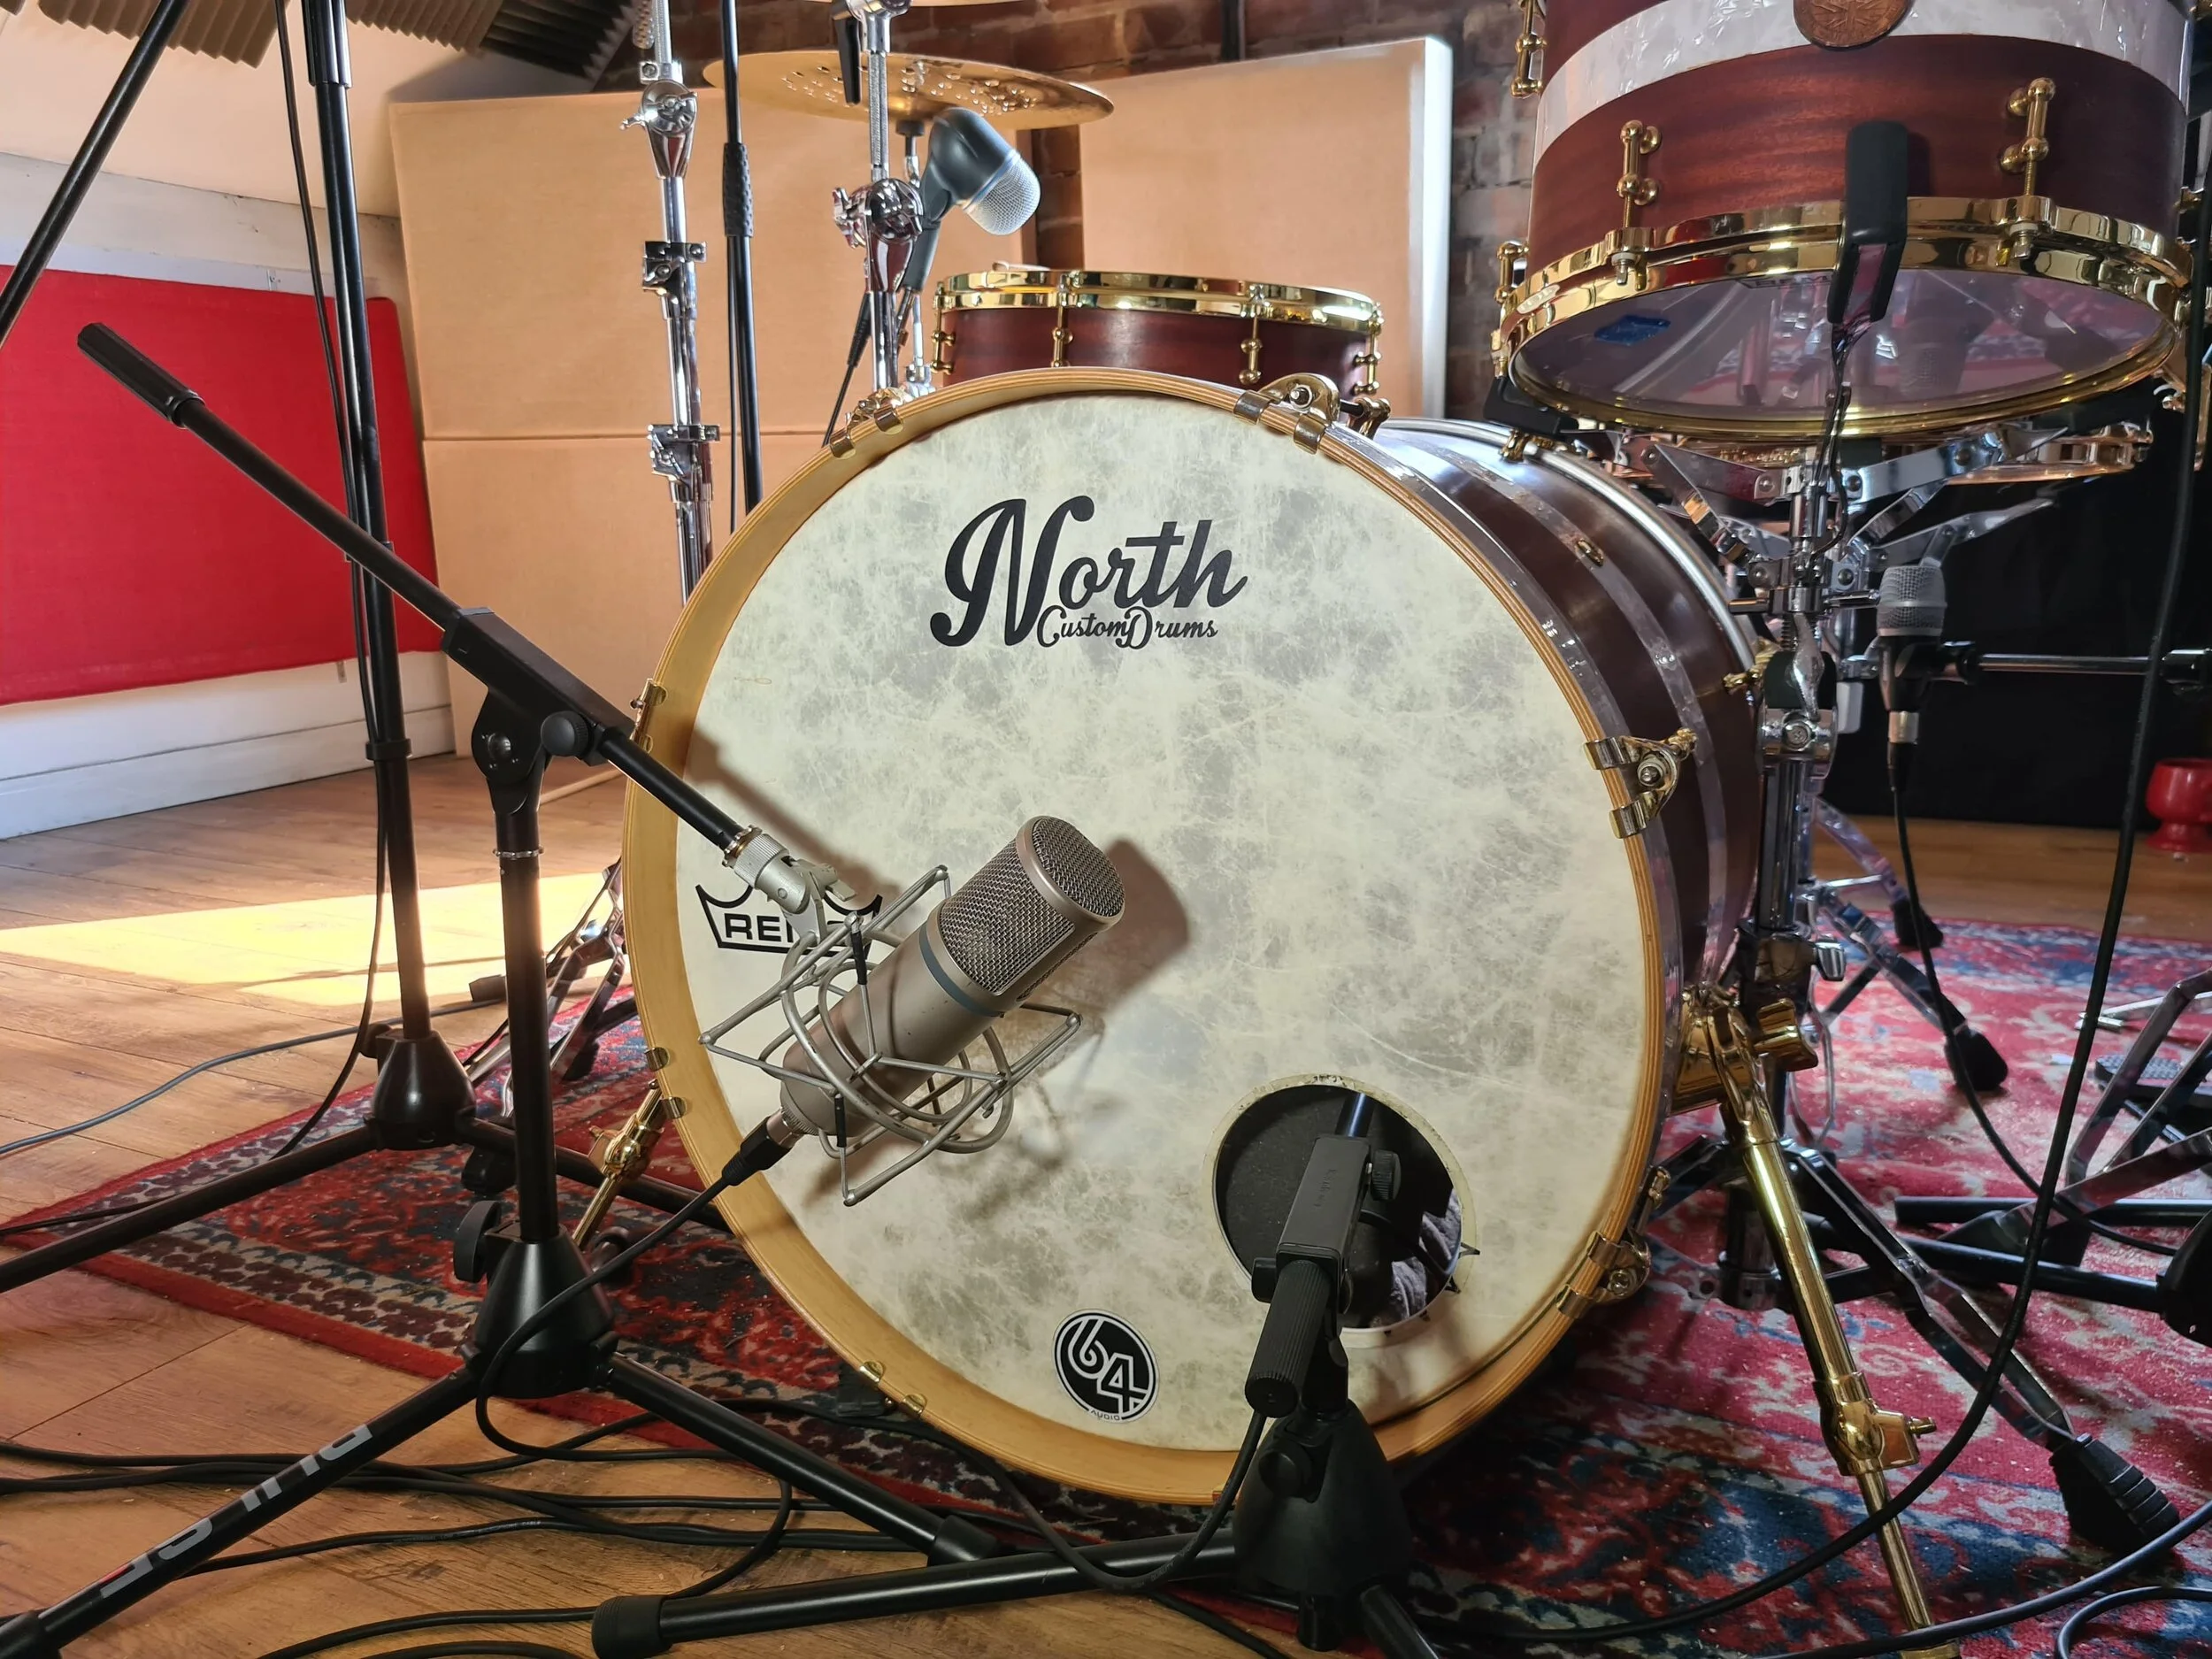
Place the microphone 3 to 12 inches in front of the resonant head. Start near the center, then move toward the edge if the sound is too boomy. A microphone near the center often gives more low-end weight, while a position near the edge can add tone and definition.
Outside placement works well when:
• The drum sounds thin from inside.
• You want a natural, roomy kick sound.
• The front head has no port.
• You are recording jazz, blues, folk, or acoustic music.
• You plan to blend the kick with a close inside microphone.
The room matters much more with outside miking. Listen for reflections from walls, floors, and nearby furniture. If the sound is boxy, move the microphone away from a wall or place a thick absorber behind it.


You can also place the microphone slightly off-center. This reduces direct air pressure and may create a smoother low end. Always use a shock mount or stable stand when possible.

How to Use Two Microphones on a Kick Drum
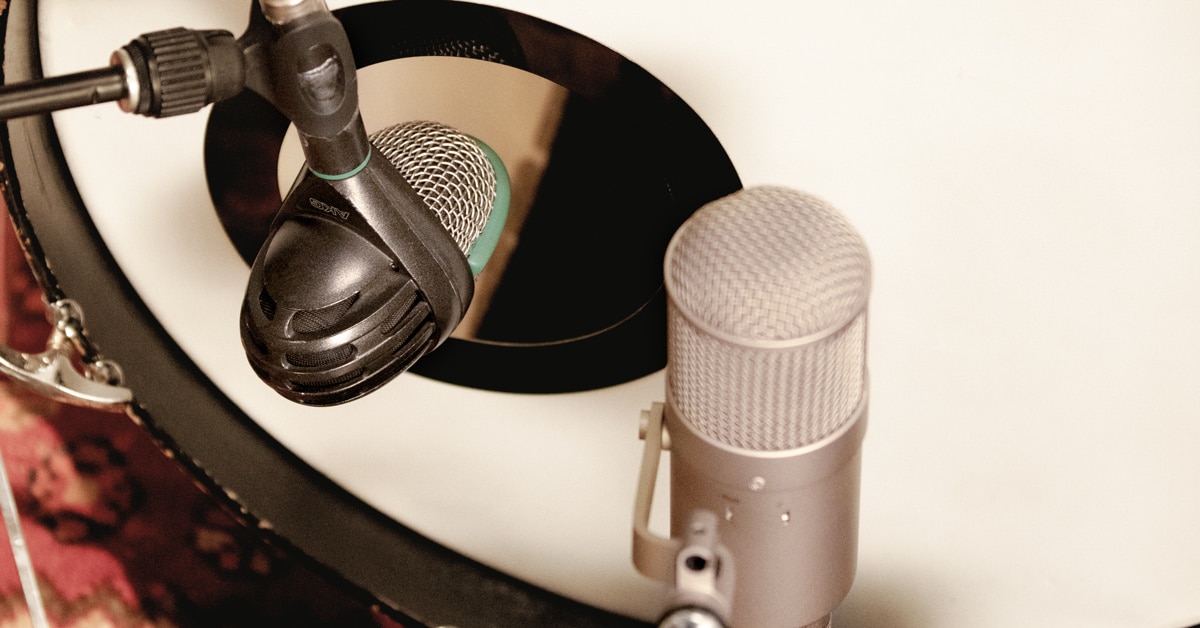
Two microphones can give you more control. A common setup uses one microphone inside the drum for attack and one outside for body.
Start by setting the inside microphone first. Get a clear beater sound with enough low end. Then add the outside microphone and raise its level until the kick gains weight without becoming cloudy.
Phase alignment is critical. The two microphones hear the kick at different times because they sit at different distances from the beater. This difference can cause low frequencies to cancel when the tracks are combined.
Check the relationship by:
-
Recording both microphones at the same time.
-
Listening to them together in mono.
-
Reversing the polarity of one microphone.
-
Choosing the setting that gives the strongest, fullest low end.
-
Nudging one track slightly in your recording software if needed.
Polarity reversal does not fix every timing problem. It only changes the direction of the waveform. If the microphones remain out of time, use careful track alignment or move one microphone during recording.
Do not assume the loudest setting is the best setting. Choose the sound that fits the bass guitar and the full drum kit. A powerful solo kick can still cause problems in the mix.
How to Place the Microphone for Different Kick Sounds
Microphone position changes the balance between attack, body, and resonance. Think of the capsule as a flashlight. Where it points determines which part of the drum receives the most attention.


Use these starting points:
• Near the beater impact area: More attack and click.
• Near the center of the drum: More low-end weight and direct sound.
• Near the edge of the beater head: Less click and more shell tone.
• Close to the resonant head: More body and sustain.
• Farther from the drum: More room sound and a softer transient.
For rock and metal, start inside the port and aim toward the beater strike area. For pop, aim slightly away from the strike point to reduce excessive click. For jazz, try an outside position or a greater distance from the front head.
For hip-hop and electronic-influenced productions, you may want a strong sub-frequency foundation. Use an outside microphone or subkick, but check the result with the bass line. Very low kick frequencies can compete with bass and reduce clarity.
One practical lesson from many tracking sessions is that the drummer’s beater choice often matters more than a costly microphone. Before changing microphones, test a different beater, adjust the head tension, or reduce excessive muffling.
How to Mic a Kick Drum in a Small Room
Small rooms can make kick drums sound thick, hollow, or boomy. Low frequencies build up near walls and corners, so room position matters.
Keep the drum away from corners when possible. Place thick absorption at nearby reflection points, especially on the wall behind the microphone. Blankets can help with high and mid frequencies, but bass traps work better for deep low-end problems.
Do not place the kick drum directly in the center of a square room. That position can excite strong room modes. Try several locations and record short tests before setting up the full session.
A few simple steps can improve a home recording:
• Close doors and windows to reduce outside noise.


• Keep the microphone stand away from rattling objects.
• Secure loose drum hardware and cymbal stands.
• Check for floor vibrations.
• Use headphones to listen for mechanical noise.
• Record the kick with the full band playing, not only in solo.
If the room remains difficult, use a closer microphone position and reduce the amount of outside microphone signal. You can add a controlled room sample or reverb later.
Kick Drum EQ and Compression After Recording
Good placement should come first. EQ and compression should refine the recording, not rescue it.
Common kick drum EQ areas include:
• Sub-bass below 40 Hz: Remove unnecessary rumble if it does not support the song.
• Low body around 50 to me? 80 Hz: Add weight carefully when the drum sounds thin.
• Mud around 200 to 400 Hz: Cut gently if the kick sounds cloudy or boxy.
• Attack around 2 to 5 kHz: Boost carefully for beater definition.
• Click around 5 to 8 kHz: Adjust if the beater needs more or less presence.
These ranges are starting points, not fixed rules. The exact frequency depends on the drum, microphone, tuning, and arrangement.
Compression can make the kick more consistent. Try a moderate ratio, such as 3:1 or 4:1, with an attack that lets some beater sound pass through. A medium release can help the compressor recover before the next kick.
Fast attack settings may remove the initial punch. Very slow release settings can cause pumping. Use the gain reduction meter as a guide, but trust the groove and the full mix.
A high-pass filter may seem strange on a kick drum, but removing inaudible rumble can create more headroom. Make the decision while listening to the bass, snare, and full arrangement.

Common Kick Drum Miking Mistakes
Many poor kick recordings come from simple setup errors. Fixing these problems usually takes less time than trying to repair the track with plugins.
Avoid these mistakes:
• Placing the microphone too close to the beater: This can create harsh click and excessive air noise.
• Ignoring phase: Multiple microphones may cancel the low end.
• Using too much muffling: A dead drum may lack body and sustain.
• Boosting sub-bass too early: This can create mud and reduce headroom.
• Soloing for too long: A kick should serve the song, not only sound impressive alone.
• Pointing every microphone at the center: Different angles can provide a more balanced tone.
• Forgetting the drummer’s playing position: The beater may strike a different area than expected.
• Moving the drum after tuning: Room changes can alter the recorded sound.
One of the most useful habits in how to mic a kick drum is to record a short test before the full session. Play a verse and chorus, listen in context, and make one change at a time. This process prevents guesswork.
A Simple Step-by-Step Kick Drum Miking Method
Use this method when you need a reliable starting point.
-
Tune the kick drum before placing the microphone.
-
Remove unwanted rattles from pedals, stands, heads, and nearby equipment.
-
Decide whether you want attack, body, room sound, or a blend.
-
Place a dynamic microphone inside the port, about 3 to 6 inches from the beater head.
-
Aim toward the beater strike zone for attack.
-
Move the microphone toward the edge for a softer, rounder tone.
-
Record a short passage with the bass and drums.
-
Check the sound in mono and through small speakers.
-
Add an outside microphone if the kick needs more depth.
-
Check polarity and timing before mixing.
-
Apply light EQ and compression only after the placement works.
-
Save notes about the microphone distance and angle.
This method works because it starts with the source. A well-tuned drum, a suitable beater, and careful placement create a stronger foundation than processing alone.
How to Match the Kick Drum to the Bass
The kick and bass guitar often share the same low-frequency space. If both instruments occupy the same range, the mix may sound weak even when each track sounds large alone.
First, decide which instrument owns the deepest low end. In some productions, the kick provides the sub-bass while the bass carries more midrange. In others, the bass owns the low end and the kick uses more attack.
You can create separation by:
• Choosing a kick microphone position with less sub-bass.
• Asking the bass player to change notes or tone.
• Cutting a narrow frequency from one instrument.
• Using sidechain compression with restraint.
• Adding attack to the kick instead of boosting more low end.
Do not automatically cut the bass every time the kick plays. Sidechain compression can help, but too much pumping can make the groove feel unnatural. Small changes often create enough space.
Frequently Asked Questions About How to Mic a Kick Drum
Where should I place a microphone on a kick drum?
Start 3 to 6 inches inside the port, aimed toward the beater strike area. Move it toward the edge for less click and more shell tone, or move it outside the resonant head for a rounder sound.
Do I need a special microphone for a kick drum?
A dedicated dynamic kick microphone is helpful, but it is not required. Any microphone that handles high sound pressure and captures the desired low and midrange detail can work.
Should the kick drum microphone point at the beater?
Pointing toward the beater gives more attack and definition. If the sound becomes too sharp, angle the microphone away from the impact point or move it closer to the edge of the head.
Is it better to mic the kick drum inside or outside?
An inside microphone usually gives more attack and isolation. An outside microphone often provides more body and natural resonance, so many engineers blend both when the arrangement needs extra depth.
How do I stop a kick drum microphone from sounding muddy?
Try moving the microphone away from the center, reducing room reflections, and controlling excess muffling. During mixing, a gentle cut around the low-mid range can reduce muddiness, but placement should be corrected first.
Why does my kick lose bass when I use two microphones?
The microphones may be out of phase or out of time. Listen in mono, reverse the polarity of one track, and adjust the microphone distance or track timing until the low end becomes full again.
Should I use EQ while recording a kick drum?
It is usually safer to record a clean signal and apply EQ later. You can monitor with temporary EQ, but avoid permanent changes until you hear the kick with the complete arrangement.
Conclusion
Learning how to mic a kick drum comes down to careful listening, controlled placement, and a well-prepared drum. Start with a suitable microphone, test inside and outside positions, and move the capsule in small steps. Always check the kick with the bass and full band, not only in solo.
A strong recording does not require the most expensive microphone. It requires a tuned drum, a clear goal, and the patience to compare positions. Try the step-by-step method in your next session, keep notes about what works, and explore more recording techniques to build a tighter, more powerful mix.

Senior Music Reviewer
Alex Carter is a seasoned music reviewer with over a decade of experience in the world of sound and instruments. Passionate about helping musicians and enthusiasts make informed choices, he brings sharp insights and in-depth knowledge to every review. From classical instruments to modern gear, Alex combines technical expertise with a love for music to deliver content that resonates with readers.
As a Senior Music Reviewer and expert author on Tuneluma.com, Alex is dedicated to sharing honest evaluations, practical advice, and thoughtful commentary to guide readers in their musical journey.
One Comment