How To Record A Drum Kit: Studio Recording Guide
Recording a drum kit starts with a good room, tuned drums, careful mic placement, and clean gain levels.
Knowing how to record a drum kit is less about owning dozens of microphones and more about making smart choices before you press Record. A well-tuned kit, a balanced room, and a clear setup plan can produce punchy, natural drums in a home studio or a professional room. This guide explains the full process, from preparation and microphone placement to tracking, editing, and mixing.
Prepare the Room and Drum Kit
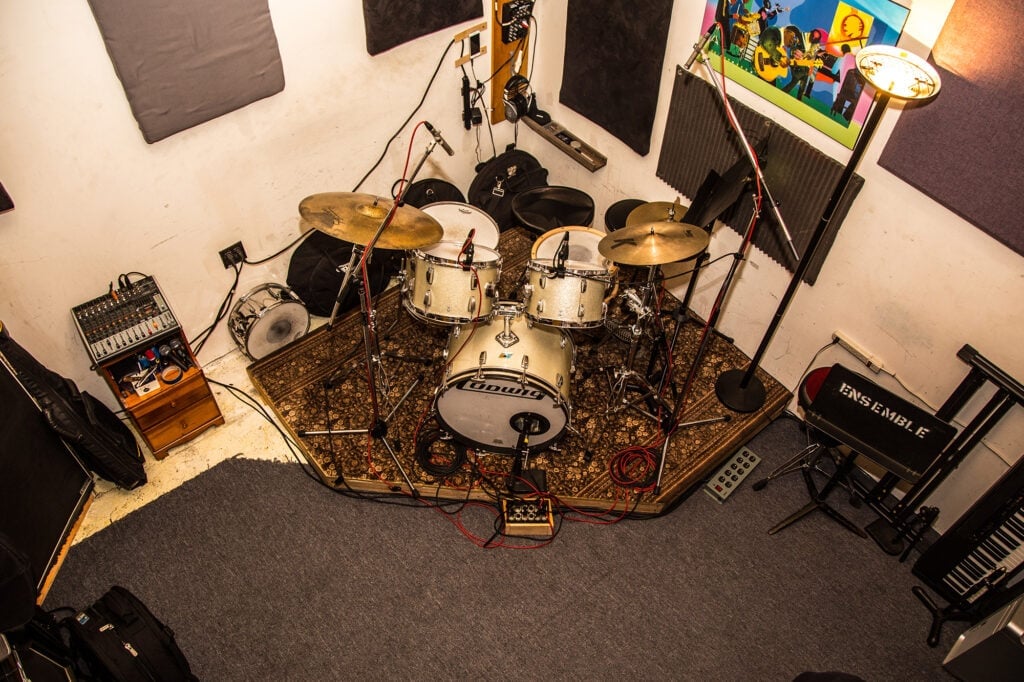
The room is the first part of your drum sound. Microphones capture the kit, but they also capture the walls, ceiling, floor, and reflections around it. A great kit in a poor room can sound boxy, harsh, or distant.
Start by choosing the best room available. A medium or large room often gives drums more depth, but size alone does not guarantee a good sound. Clap your hands in different spots and listen for ringing, flutter echoes, or a long, uneven decay.
Use rugs, curtains, bookshelves, and acoustic panels to control reflections. Do not cover every hard surface. Drums need some natural energy, or they may sound dull and lifeless.
Tune the drums before recording
Drum tuning has a greater effect on the final recording than many beginners expect. Spend time tuning the kit before moving microphones. Check the following:
• Replace damaged or worn heads.
• Seat each head evenly around the drum.
• Remove unwanted wrinkles near the tension rods.
• Tune the toms so each one has a clear, distinct note.
• Tune the snare for the right balance of crack, body, and wire sound.
• Adjust the kick drum for low-end weight and controlled attack.
A drum key and a little patience can save hours of mixing. If the snare sounds harsh in the room, moving the microphone will not fully solve the problem.
Control unwanted noise
Turn off fans, air conditioners, computer speakers, and noisy lights when possible. Check for rattles on stands, loose cymbal felts, squeaky pedals, and buzzing hardware.
I have found that small mechanical noises often become obvious after compression. It is much easier to fix a loose stand before the session than to repair it later with editing software.

Choose the Right Microphones and Audio Interface
You can record a drum kit with one microphone, two microphones, or a large multi-microphone setup. Each approach has strengths and limits.
A single microphone can sound open and natural. It also forces you to balance the kit through playing, tuning, and placement. A two-microphone setup can add control while keeping the sound simple.
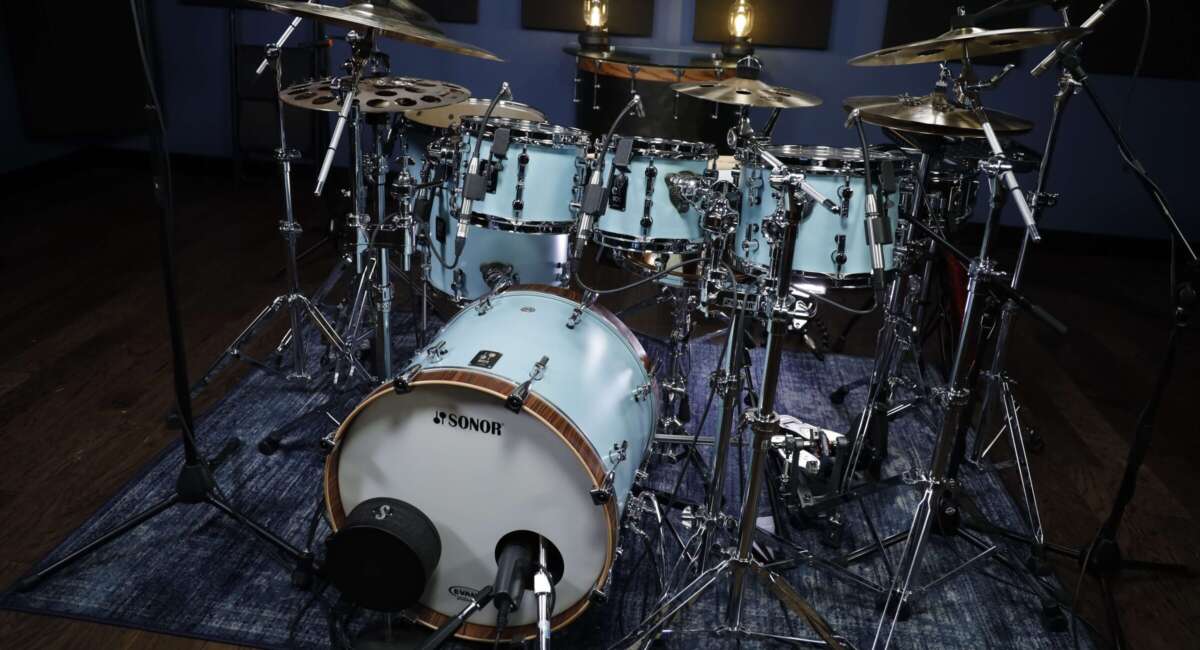
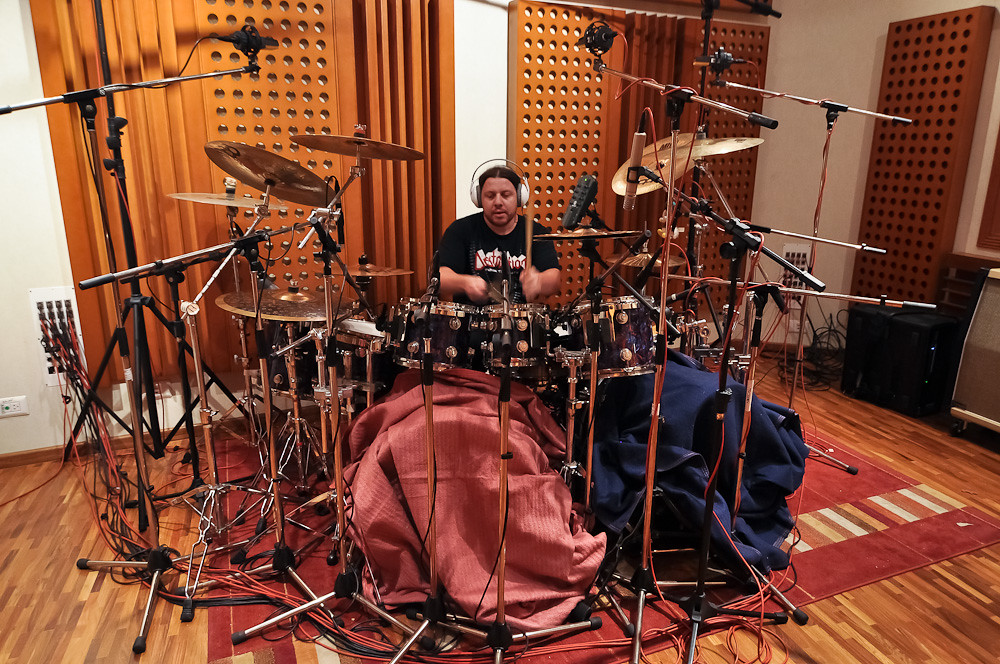
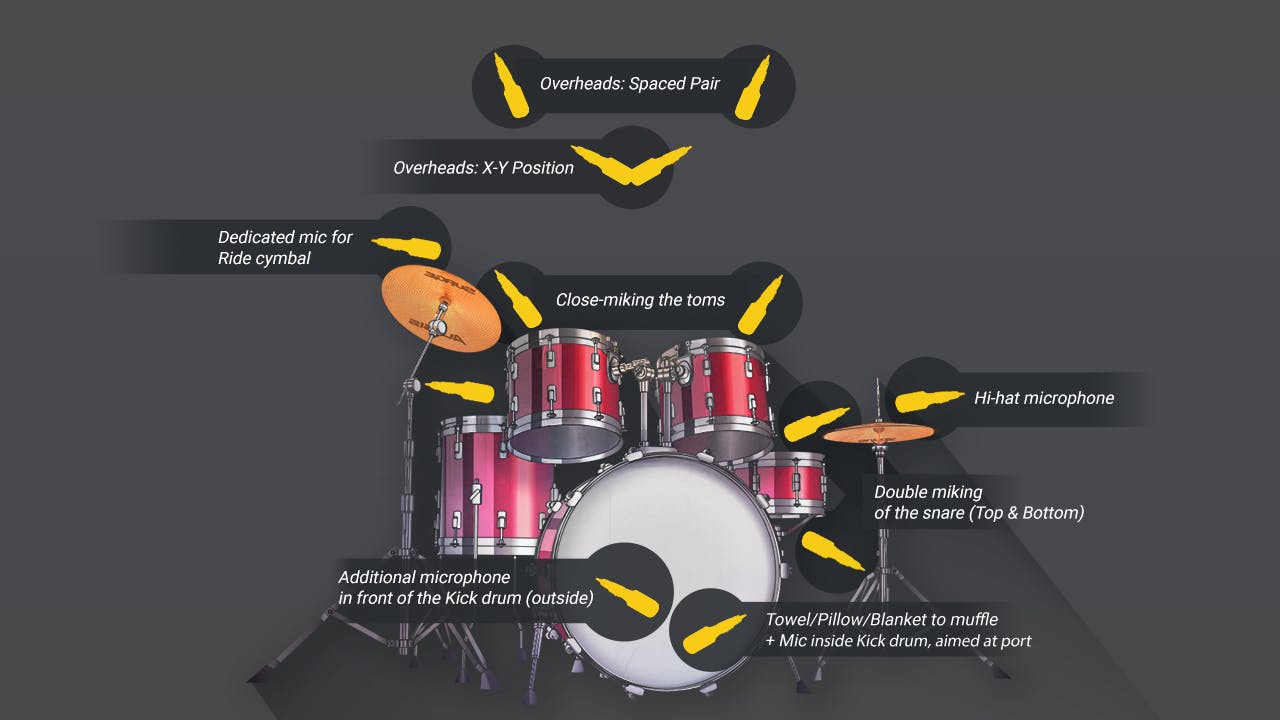
A typical multi-mic setup may include:
• One dynamic microphone for the kick drum.
• One dynamic or condenser microphone for the snare.
• Two microphones for the overheads.
• One microphone for each tom.
• One or two room microphones.
You do not need a matched set of expensive microphones. Common dynamic microphones can handle loud drums well. Condenser microphones often provide more detail for overheads and room tracks, but they may capture more harshness and unwanted reflections.
Match the microphone to the drum
The microphone should support the part of the drum sound you want to hear.
• Kick microphones often emphasize low-end weight and beater attack.
• Snare microphones should capture both the sharp hit and the lower body.
• Tom microphones need enough low-mid detail without excessive bleed.
• Overhead microphones capture cymbals, stereo width, and much of the kit’s overall image.
• Room microphones capture depth, size, and natural ambience.
Ribbon microphones can provide smooth room or overhead sounds, but some models are sensitive to high sound pressure. Always check the microphone’s specifications before placing it close to a loud source.
Set the recording level
Digital recording does not need to peak close to 0 dBFS. Leave healthy headroom. A practical starting point is to aim for drum peaks around −18 to −10 dBFS, depending on the interface and performance.
Avoid clipping the preamp or converter. A clipped kick or snare cannot be repaired perfectly later. Ask the drummer to play the loudest part of the song during the soundcheck, then set the gain from that performance.
Set Up the Kick Drum Microphone
The kick drum gives the recording its foundation. It must work with the bass guitar, not fight it.
Start by placing the microphone just inside the front port of the resonant head. Aim it toward the beater impact point for more attack. Aim it slightly away from the beater for a rounder and deeper sound.
You can also place the microphone outside the front head. This gives a softer, fuller sound with more room influence. A microphone inside the drum usually provides more definition and isolation.
Listen for three main qualities:
• Sub-bass, which creates depth.
• Low-mid body, which gives the kick its round sound.
• Beater attack, which helps it cut through guitars.
Do not assume that more low end is always better. Too much sub-bass can make the mix slow and unclear. The best kick sound is the one that fits the bass, tempo, and style of the song.
A common mistake is placing the microphone too close to the beater without checking the full mix. The soloed kick may sound exciting, but it can become thin or clicky beside the bass guitar.

Place the Snare Drum Microphone
The snare usually needs both attack and body. A dynamic microphone placed above the top head is a reliable starting point.
Aim the microphone toward the center of the head for more attack. Aim it toward the rim for a darker tone with less stick impact. Keep the microphone several inches above the head, and angle it away from the hi-hat to reduce bleed.
The distance and angle matter as much as the microphone model. Small changes can alter the sound quickly. Move the microphone a few inches, record a short test, and compare the result in the full kit.
You may add a second microphone beneath the snare to capture the wires. Remember that the bottom microphone often needs polarity reversal because the two microphones may move in opposite directions. Check the combined sound in mono and listen for a loss of low end or a hollow tone.
Do not chase isolation at the expense of tone. Some hi-hat bleed is normal. If the hi-hat is too loud, first ask the drummer to adjust the playing angle or cymbal balance. The best microphone position cannot fully correct an unbalanced performance.

Record Overhead Microphones Correctly
Overhead microphones are not only cymbal microphones. In many recordings, they provide the main picture of the drum kit. They capture the relationship between the snare, kick, toms, cymbals, and room.
Popular overhead techniques include:
Spaced pair
Place one microphone over the left side and one over the right side of the kit. This method can create a wide stereo image, but it requires careful distance measurement.
Measure from each microphone to the center of the snare. Keep the distances as equal as possible. This helps the snare remain centered and reduces phase problems.
X/Y pair
Place two directional microphones with their capsules close together and angled apart. X/Y creates a stable stereo image and usually has good mono compatibility.
It may sound narrower than a spaced pair, but it is often a safe option in a small room.
Recorderman setup
Place one microphone above the snare and another near the drummer’s shoulder or floor tom side. Measure both microphones so they are the same distance from the snare and kick.
This setup can give a focused kit image with strong center balance. It also requires careful adjustment to suit the drummer and kit.
Glyn Johns style setup
This approach uses an overhead above the kit and another microphone to the side, often near the floor tom. The distances from both microphones to the snare should match.
The method can sound large and powerful, but the room and microphone positions have a major effect. It works best when you have enough space to let the kit breathe.
Before recording, listen to the overheads in mono. If the snare becomes thin or the cymbals change dramatically, adjust the microphone spacing or polarity. Phase alignment is not only a technical issue. It changes the physical shape of the drum sound.

Add Tom and Room Microphones
Tom microphones give you control over fills and low-end movement. Place each microphone a few inches above the head and angle it toward the center or slightly away from it.
Keep the microphone out of the drummer’s stick path. A damaged microphone can end a session quickly. Use secure stands, clips, and cables that do not interfere with the player.
Toms often produce strong bleed from cymbals. You can reduce this by:
• Using tight polar patterns.
• Choosing sensible microphone angles.
• Adjusting the tom heads and cymbal heights.
• Muting unused tom tracks during parts without fills.
Room microphones add size and emotion. Place them at ear height, behind the kit, in front of the kit, or several feet away. Walk around the room while the drummer plays. The best spot may sound surprising.
In a lively room, room microphones can make drums feel explosive. In a small untreated room, they may add harsh reflections and noise. Room microphones are optional, not mandatory.
A useful recording trick is to capture several room positions during soundcheck. Label each test clearly. This gives you choices later without changing the drummer’s performance.
Check Phase and Stereo Balance
Phase problems are one of the most common reasons a drum recording sounds weak. Multiple microphones hear the same drum at slightly different times. When those signals combine, some frequencies can reinforce while others cancel.
Listen to the kick and snare with the overheads. Flip the polarity on close microphones when needed, then choose the setting that produces the strongest and most natural sound. Polarity reversal is not a complete solution for every timing problem, but it is a useful first check.
Use these tests:
• Listen to the full kit in mono.
• Compare overheads with and without close microphones.
• Check the kick in the center of the stereo field.
• Listen for a hollow snare or disappearing low end.
• Measure overhead distances from the snare when using spaced microphones.
You can also use sample delay or time alignment in a digital audio workstation. However, alignment is not always better. Moving a close microphone forward may improve punch but reduce the natural feel of the kit.
Trust your ears in the context of the song. A technically perfect measurement can still sound less musical.

Record a Drum Kit Step by Step
Once the room, drums, microphones, and interface are ready, use a repeatable workflow. A calm setup helps the drummer focus.
-
Set up the kit in the best-sounding part of the room.
-
Tune the kick, snare, and toms.
-
Place the overhead microphones first.
-
Add the kick and snare microphones.
-
Add tom and room microphones only if they improve the sound.
-
Connect microphones and label every input.
-
Set preamp gain while the drummer plays the loudest section.
-
Check for clipping, hum, rattles, and headphone bleed.
-
Listen to the kit in mono and stereo.
-
Record a short test take.
-
Make small microphone changes before using equalization.
-
Record the final performance with a count-in and enough space before the song begins.
The drummer’s headphone mix also matters. Give the player enough kick, snare, and vocal to stay confident. Too much click can cause a stiff performance, while too little cue information can lead to timing problems.
Record several complete takes when possible. A full performance often has better feel than a heavily assembled track. If you need to edit, capture clean replacement sections and keep crossfades short but smooth.
Edit and Mix the Drum Tracks
Start your drum mix with the overheads. They show you the natural balance of the kit. Bring in the kick and snare until the groove feels solid, then add toms and room microphones as needed.
Use equalization with a clear purpose:
• Cut muddy low mids if the kit sounds cloudy.
• Add kick attack only when it needs more definition.
• Reduce harsh cymbal frequencies instead of boosting every drum.
• Remove unnecessary rumble from microphones that do not need deep bass.
Compression can add energy and control. Moderate settings often work well at first. Fast attack can reduce the initial hit, while slower attack can preserve punch. Release time should follow the song’s tempo and groove.
Gate toms carefully. A gate that closes too fast can remove the natural ring of the drum. Many mixers prefer clip gain or automation because it gives more control over bleed without making the toms sound artificial.
Parallel compression can create excitement. Send the drums to a separate bus, compress that bus heavily, and blend it beneath the clean tracks. This can make a small kit sound larger while preserving the original transients.
Use saturation or distortion sparingly. A little harmonic color can help drums feel denser, but too much processing makes cymbals brittle and tiring.

Common Mistakes to Avoid
Learning how to record a drum kit involves learning what not to do. Many problems begin before the first take.
Using too many microphones
More microphones create more phase interactions, more bleed, and more decisions. Start with the smallest setup that gives you the sound you need.
Ignoring the room
Close microphones cannot remove the character of the room completely. Treat the space first, then place microphones.
Recording before tuning
A bad drum sound printed to every track is difficult to repair. Tuning takes time, but it is one of the most valuable parts of the session.
Setting levels too hot
Digital clipping damages the recording at the source. Leave headroom and check the loudest performance.
Soloing too much
A microphone that sounds perfect alone may sound wrong in the mix. Make decisions while the full band plays.
Overcompressing during tracking
Unless you understand the hardware and the signal path, record cleanly and process later. You can always add compression, but you cannot remove severe compression from a printed track.
Forgetting the drummer
The player is part of the sound. Give clear feedback, comfortable headphones, and enough breaks. A relaxed drummer usually delivers a better take than one who feels rushed.
How to Record a Drum Kit in a Home Studio
Home recording has limits, but it can still produce excellent results. The main challenge is often the room, not the equipment.
If you have a limited microphone collection, try a simple setup:
• One microphone in front of the kit.
• One microphone above the snare and kick line.
• Two overhead microphones with matched distances.
• Kick, snare, and overhead microphones if you have four inputs.
A four-microphone setup can be very effective. Put most of your effort into tuning, overhead balance, and room control.
Use blankets, thick curtains, and movable acoustic panels to reduce harsh reflections. Avoid placing the kit directly against a wall or in a corner unless you specifically want a strong, uneven room sound.
Record at the highest practical quality your system supports. A sample rate of 44.1 or 48 kHz is suitable for most music projects. Higher sample rates may increase storage and processing demands without solving poor placement or bad acoustics.
The limitation of a home studio is not always a weakness. Fewer microphones can encourage better playing and stronger arrangement choices. Sometimes a focused recording sounds more professional than a crowded one.
Frequently Asked Questions About How to Record a Drum Kit
How many microphones do you need to record a drum kit?
You can record a drum kit with one microphone, but four to eight microphones offer more control. The best number depends on your room, interface inputs, music style, and experience.
What is the best microphone for recording drums?
There is no single best microphone for every drum. Dynamic microphones are common for kick, snare, and toms, while condenser microphones often work well for overheads and room sounds.
Should overhead microphones point at the cymbals or the snare?
Overheads should capture the whole kit, not only the cymbals. Aim and balance them so the snare, kick, toms, and cymbals create a natural stereo picture.
How do you prevent phase problems when recording drums?
Keep overhead microphones the same distance from the snare when using a spaced setup. Check the kit in mono, compare polarity settings, and listen for hollow tones or disappearing low end.
What level should drums peak at when recording?
Leave enough headroom for the loudest hits. Peaks around −18 to −10 dBFS are a useful starting range, but the key rule is to avoid clipping.
Should you record drums with compression?
You can record with gentle compression if you understand the equipment and want a specific sound. For most home sessions, recording cleanly and adding compression during mixing gives you more control.
How do you make recorded drums sound bigger?
Use a strong overhead balance, suitable room microphones, careful phase checks, and controlled compression. A confident performance and well-tuned drums usually create more size than extreme processing.
Conclusion
Learning how to record a drum kit starts with the basics: prepare the room, tune the drums, place microphones with purpose, set safe recording levels, and check phase before tracking. You do not need a huge microphone locker to capture a powerful performance.
Begin with a simple setup and make one change at a time. Record short tests, listen in the full mix, and trust the sound rather than the equipment list. Try these steps on your next session, then explore more recording techniques and share what worked for you.

Senior Music Reviewer
Alex Carter is a seasoned music reviewer with over a decade of experience in the world of sound and instruments. Passionate about helping musicians and enthusiasts make informed choices, he brings sharp insights and in-depth knowledge to every review. From classical instruments to modern gear, Alex combines technical expertise with a love for music to deliver content that resonates with readers.
As a Senior Music Reviewer and expert author on Tuneluma.com, Alex is dedicated to sharing honest evaluations, practical advice, and thoughtful commentary to guide readers in their musical journey.