How To Remove Drums From A Song: Easy AI Guide
You can remove drums from a song with AI stem separation, phase cancellation, or careful editing in a digital audio workstation.
Learning how to remove drums from a song is useful for karaoke, remixing, music practice, sampling, and live performance. The best method depends on what you have: a full stereo mix, separate stems, or the original project file. In this guide, you’ll learn which method works best, how to use popular tools, why drum removal can sound imperfect, and how to get a cleaner result with simple steps.
What Does Removing Drums From a Song Mean?
Removing drums means reducing or separating drum sounds from a music track while keeping vocals, bass, guitars, keys, and other parts as intact as possible. It sounds simple, but a finished song is usually one combined audio file. The drums and other instruments share the same time, space, and frequencies.
Think of a stereo song as a smoothie. Once every ingredient is blended, you cannot remove only the strawberries with perfect accuracy. Audio software can still estimate and separate parts, but some traces of the drums may remain.
There are three main situations:
• You have the original multitrack session. This is the easiest case because you can mute or delete the drum tracks.
• You have a stereo instrumental or full mix. You need stem separation, phase cancellation, or frequency editing.
• You want to reduce drums rather than remove them fully. EQ, compression, and automation may be enough.
The phrase “remove drums” can also mean different things. You may want a silent drum stem, a quieter beat, or a version with only vocals and instruments. Define the goal before choosing a tool.

The Best Ways to Remove Drums From a Song
The most effective approach depends on the source file and the sound you need. Here are the main options, ranked from most reliable to least reliable.
1. Mute the drum tracks in the original project
If you have a session from a DAW such as Ableton Live, Logic Pro, Pro Tools, FL Studio, or Studio One, open the project and find the drum tracks. Mute the kick, snare, hi-hat, cymbal, percussion, and drum bus channels.
This method usually gives the cleanest result because the drums exist on their own tracks. You can also keep some percussion if the song needs movement.
Export the result as a WAV file for the best quality. Use MP3 only when you need a small file for sharing or quick listening.
2. Use AI stem separation
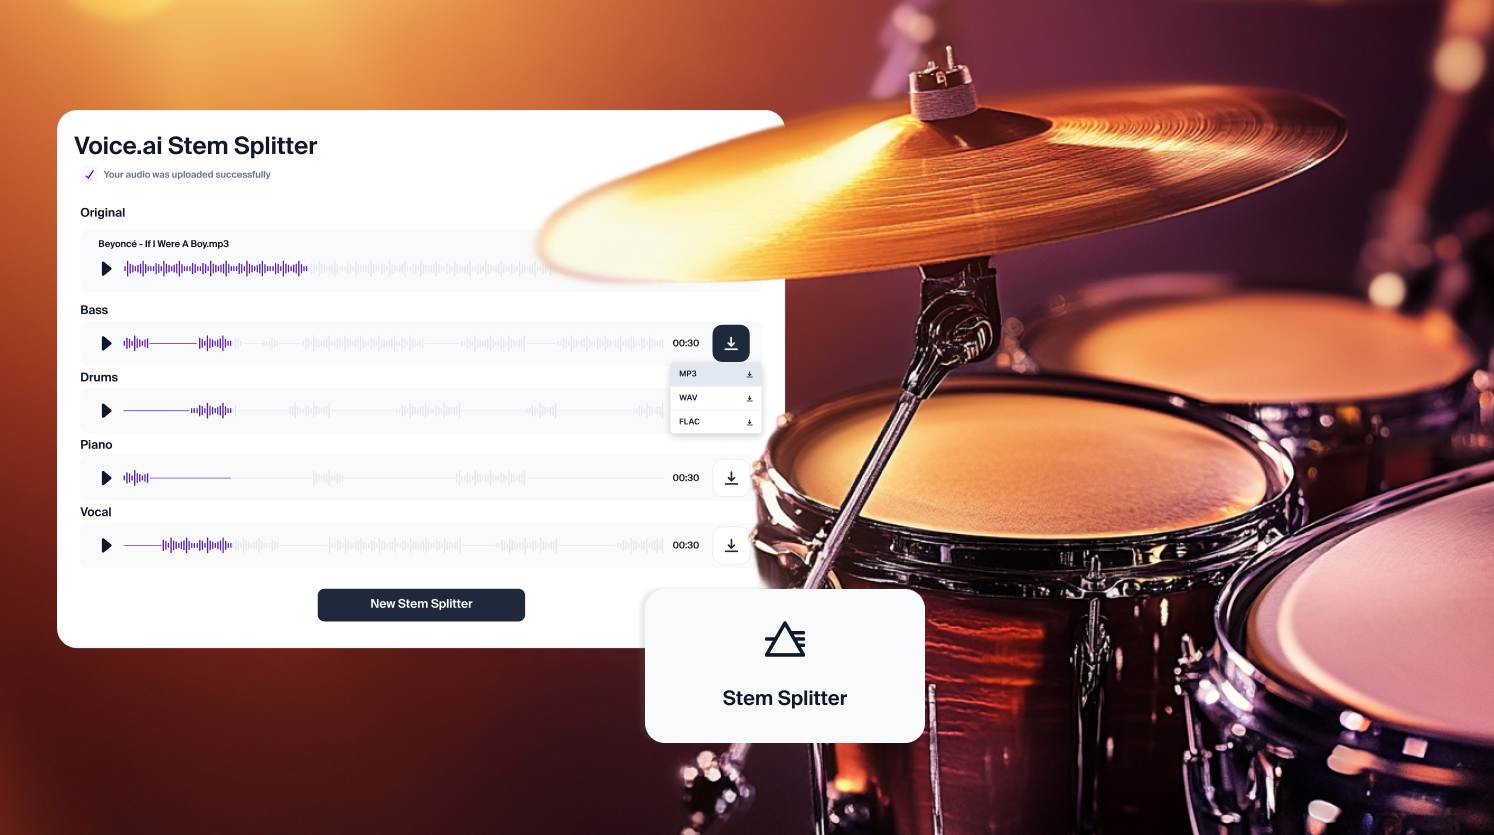
AI stem separation is now the most practical answer for most people asking how to remove drums from a song. These tools analyze the mix and create separate parts, often called stems:
• Vocals
• Drums
• Bass
• Other instruments
Common tools include Moises, LALAL.AI, RipX, Ultimate Vocal Remover, Demucs, and several modern DAWs with built-in stem features.
After processing the song, mute the drum stem and export the remaining stems. This method works well for practice tracks and remixes, though it may leave faint drum sounds or create small artifacts.
3. Use phase cancellation
Phase cancellation can remove drums when you have two closely related versions of a song. For example, you may have a full mix and an instrumental version made from the same master.
Place both files in a DAW. Align them exactly, reverse the phase of one file, and adjust the volume. Shared sounds may cancel each other out. This method is powerful, but it is very sensitive to timing, compression, mastering changes, and file quality.
Phase cancellation does not usually remove drums from one ordinary MP3 by itself. It needs a second, matching audio source.
4. Reduce drums with EQ and dynamic tools
If full removal sounds unnatural, reduce the strongest drum frequencies instead. A kick often has energy around 40 to 120 Hz. A snare may contain strong energy around 150 to 250 Hz and 2 to 6 kHz. Cymbals often reach from 5 kHz upward.
Use a narrow EQ cut only when you know the drum sound is isolated in that range. Other instruments may share these frequencies, so aggressive cuts can make the whole song sound thin or dull.
How to Remove Drums From a Song With AI
AI stem separation is the easiest starting point for beginners. The process is similar across most online tools and desktop programs.
Step 1: Choose a high quality audio file
Use a WAV or FLAC file when possible. A 320 kbps MP3 can work, but compressed files already contain less detail. AI software may exaggerate that loss and create watery or metallic sounds.
Avoid files recorded from speakers or downloaded from social media. Background noise, room echo, and low bit rates make separation harder.
Step 2: Upload or import the song
Open your chosen stem separation tool and import the track. Select a mode that creates at least four stems if the option is available. A four stem model usually gives you vocals, drums, bass, and other instruments.
Some tools offer a two stem mode, such as vocals and instrumental. That mode will not help much if you need to remove only drums.
Step 3: Process the audio
Start the separation process. It may take a few seconds online or several minutes on a local computer. More advanced models often take longer but can produce better results.
Do not judge the result from a phone speaker. Use headphones or studio monitors. Small drum artifacts are easier to hear when you listen closely.
Step 4: Mute the drum stem
Load the separated stems into your DAW or use the tool’s built-in mixer. Turn the drum stem down fully. Then listen for:
• Kick drum thumps
• Snare crack or ghost notes
• Hi-hat noise
• Cymbal tails
• Reverb caused by the drum kit
If the result sounds too empty, blend a very small amount of the drum stem back in. A reduction of 10 to 20 decibels can sound more natural than total silence.
Step 5: Clean the remaining audio
Use fades at the start and end of the track. Remove clicks with short crossfades. If small drum fragments remain, use a spectral editor or automate the volume at problem points.
Export a WAV master first. Then create an MP3 copy if needed.

How to Remove Drums From a Song in Audacity
Audacity is free and useful for basic audio editing. It can reduce some drum sounds, but it is not always the best choice for separating a full mix into clean stems.
Here is a practical workflow:
-
Open Audacity and import the song.
-
Duplicate the track so you can compare the edited version with the original.
-
Use the Spectrogram view to inspect drum hits and cymbals.
-
Apply EQ cuts to the most obvious drum ranges.
-
Use the envelope tool to lower drum hits by hand.
-
Add short fades around edits to avoid clicks.
-
Export the finished file as WAV or MP3.
Audacity works best when the drums are already quiet or have a clear frequency range. It cannot magically identify every kick, snare, and cymbal in a dense master.
For better separation, process the song first with an AI stem tool. Then use Audacity to trim, fade, and repair the extracted stems.

How to Remove Drums From a Song in FL Studio, Ableton, or Logic Pro
A DAW gives you more control than a simple online editor. You can combine AI separation with EQ, automation, compression, and noise reduction.
In FL Studio
Import the separated stems into the Playlist. Place vocals, bass, and instruments on separate mixer channels. Leave the drum stem muted, then adjust the remaining tracks with volume and EQ.
Use Edison or Newtone only for detailed repairs. These tools can help, but they will not replace a good stem separation model.
In Ableton Live
Drag the separated files into separate audio tracks. Use Clip Gain or track automation to lower any remaining drum hits. Ableton’s EQ Eight can reduce harsh snare or cymbal remnants.
Warping can change timing if used carelessly. Turn it off unless the file needs tempo correction.
In Logic Pro
Import the stems into the Tracks area. Use Channel EQ to manage unwanted low thumps and high cymbal traces. Logic’s Flex Time should remain off unless the track has timing problems.
A useful habit is to group the non-drum stems and compare them with the original. If the new mix loses too much energy, add gentle compression rather than boosting every track.
How to Remove Drums From a Song With Phase Cancellation
Phase cancellation is a technical method, but the basic idea is easy. When two matching waves are played together with one polarity reversed, shared information can become quieter or disappear.
Use this method only when the files are closely matched.
-
Import both versions into your DAW.
-
Place them on separate tracks.
-
Align the waveforms at the sample level.
-
Reverse the polarity of one track.
-
Adjust the volume until common parts reduce.
-
Listen for leftover vocals, bass, or instruments.
This method can fail if one file has a different master, tempo, length, sample rate, or compression level. Even a small timing error can prevent cancellation.
It is also possible to remove the wrong material. If the instrumental version contains the drums and the full mix contains everything, cancellation may remove the instrumental parts instead of the drums. Always check which elements are shared.

Why Drum Removal Is Not Always Perfect
Understanding the limits will help you set realistic expectations. A mixed song does not contain clean labels for each sound. The snare may overlap with a vocal, guitar, or room reverb.
Common problems include:
• Vocal echoes that remain after the drum stem is muted
• Low bass notes lost with the kick drum
• Guitars that sound watery after separation
• Cymbal noise spread across the whole mix
• Reverb tails that still contain drum energy
• Small gaps or musical artifacts between notes
AI models learn patterns from large collections of music. They make educated guesses, not perfect copies of the original recording. Results vary by genre, arrangement, mastering style, and recording quality.
Dense rock and metal mixes can be difficult because guitars, cymbals, and vocals occupy similar high frequency areas. Electronic music may also be challenging when the kick and bass are tightly layered.

Tips for Cleaner Drum Removal
A few small choices can make a large difference.
Start with the best source
Use the original WAV or FLAC file. A clean source gives the separation algorithm more detail to work with.
Try more than one model
Different tools produce different results. One may preserve vocals better, while another may handle kick drums more cleanly. Compare the results instead of assuming the first export is best.
Use gentle processing
Heavy EQ cuts often damage the whole mix. Start with small changes, then increase them only when necessary.
Check the chorus and bridge
The loudest section is often the hardest to process. A result that sounds clean in the verse may reveal artifacts during the chorus.
Keep the original file
Always save an untouched copy. Good editing means you can return to the source when a later change causes trouble.
Work at a sensible volume
Very loud monitoring can hide problems at first and make your ears tired. Listen at a moderate level, then check briefly at a lower volume.
In my editing tests, the most common mistake is trying to force complete silence from the drum stem. A small amount of natural room sound often sounds better than harsh cuts. The ear accepts a quiet drum trace more easily than a damaged vocal or guitar.
How to Remove Drums From a Song for Karaoke or Practice
Many musicians want a drumless track so they can play drums along with a recording. In this case, total removal is not always the best goal.
You may want to keep a faint beat as a timing guide. If you remove every kick and snare, it can become harder to follow the song’s structure.
For practice, try this approach:
• Separate the drums with an AI tool.
• Lower the drum stem by 12 to 20 decibels.
• Keep a small amount of kick if the tempo is hard to follow.
• Add a click track in your DAW if needed.
• Mark the intro, verse, chorus, bridge, and ending.
• Export a version for practice and another version for performance.
For karaoke, vocals are often the main concern. If you need both vocals and drums removed, separate the song into stems first. Then mute or lower each unwanted stem separately.
How to Remove Drums From a Song on a Phone
Several mobile apps can separate vocals, drums, bass, and instruments. The process usually follows the same pattern:
-
Install a trusted stem separation app.
-
Import a local audio file.
-
Choose four stem separation if available.
-
Wait for processing to finish.
-
Mute the drum stem.
-
Preview the result with headphones.
-
Export the file to your device.
Phone apps are convenient, but they may limit file length, export quality, or the number of free projects. Some also upload your audio to a remote server. Review the app’s privacy terms before uploading unreleased music.
For private demos, a mobile app may be enough. For a commercial remix, use a high quality source and inspect the final file on a computer.
Legal and Copyright Considerations
Removing drums for personal practice is different from distributing a modified song. Copyright usually covers the original sound recording and the underlying musical composition.
Before uploading or selling a drumless version, check whether you have permission from the copyright owner. This matters for public releases, monetized videos, remix packs, and commercial performances.
You should also check the terms of any online stem separation service. Some platforms may store uploads or apply limits to commercial use. Keep project files, licenses, and permission records when working with music for clients.
This guide explains audio editing. It does not provide legal advice. If a release involves money or a formal license, consult a qualified music attorney or licensing professional.
Common Mistakes to Avoid
Removing drums can go wrong in predictable ways. Avoid these errors:
• Using a low quality recording as the source
• Expecting EQ alone to remove a complete drum kit
• Processing an MP3 repeatedly and adding more compression
• Forgetting to align files before phase cancellation
• Cutting all low frequencies and damaging the bass
• Exporting without checking the start and end points
• Ignoring drum reverb and cymbal tails
• Making the track too quiet after muting the drum stem
• Judging the result only through laptop speakers
A useful habit is to compare the edited track with the original at the same loudness. A louder track can seem better even when it has more distortion. Loudness matching makes the comparison fair.
Frequently Asked Questions About How to Remove Drums From a Song
Can I remove drums from any song?
You can usually reduce drums from any song, but perfect removal is not guaranteed. Results depend on the source quality, music style, drum arrangement, and separation tool.
What is the best tool for removing drums from a song?
AI stem separation is usually the best choice for a finished stereo mix. A DAW with separate drum tracks is better when the original project is available.
Can Audacity remove drums from a song?
Audacity can reduce drum frequencies with EQ and manual editing, but it may not separate a complete drum kit cleanly. For better results, create stems with a dedicated AI tool before editing in Audacity.
How do I remove drums from a song without removing the bass?
Use a stem separation tool and mute only the drum stem. If you use EQ, avoid cutting the entire low end because bass instruments and kick drums often share the same frequency range.
Can I remove drums from a song on my phone?
Yes, many mobile apps can separate a song into vocal, drum, bass, and instrument stems. Use headphones to check the result, and review privacy and export rules before uploading copyrighted or unreleased audio.
Why do vocals sound damaged after drum removal?
Vocals and drums may share reverb, compression, and nearby frequencies in the original mix. Try another separation model, use a higher quality source, or reduce the drum stem instead of muting it completely.
Conclusion
The best way to remove drums from a song is to use the original multitrack session when available. For a stereo file, AI stem separation offers the most practical results, while phase cancellation works well only with closely matched audio versions. EQ and manual editing can reduce drum sounds, but they rarely remove a full kit without affecting other instruments.
Start with a high quality file, test more than one method, and listen for artifacts in the loudest parts of the track. If you are making a practice mix, a quieter drum stem may sound more natural than total silence. Try the workflow on a copy of your song, explore your DAW’s tools, and share your results or questions in the comments.

Senior Music Reviewer
Alex Carter is a seasoned music reviewer with over a decade of experience in the world of sound and instruments. Passionate about helping musicians and enthusiasts make informed choices, he brings sharp insights and in-depth knowledge to every review. From classical instruments to modern gear, Alex combines technical expertise with a love for music to deliver content that resonates with readers.
As a Senior Music Reviewer and expert author on Tuneluma.com, Alex is dedicated to sharing honest evaluations, practical advice, and thoughtful commentary to guide readers in their musical journey.