Drum playing techniques are the methods drummers use to create sound, control time, shape dynamics, and move around the kit. In the United States, most drum lessons build these skills through a mix of basic strokes, rudiments, foot control, coordination, groove work, and musical listening.
The main techniques include the full stroke, downstroke, tap, upstroke, rebound stroke, double stroke, buzz roll, flams, drags, ghost notes, rimshots, cross-stick, heel-up, heel-down, slide, swivel, brush patterns, linear playing, and polyrhythms. You do not need to learn all of them at once. Start with control, timing, and sound quality.

The Main Categories of Drum Playing Techniques
Drum techniques fit into a few clear groups. Each group solves a different playing problem.


| Technique group | Main purpose | Common examples |
|---|---|---|
| Hand strokes | Control stick movement and volume | Full stroke, tap, downstroke, upstroke |
| Rudiments | Build hand control and coordination | Single strokes, double strokes, paradiddles |
| Roll techniques | Create smooth or sustained sounds | Double-stroke roll, buzz roll |
| Accent techniques | Add strong notes and contrast | Flam, drag, rimshot |
| Foot techniques | Control bass drum and hi-hat pedals | Heel-up, heel-down, slide, swivel |
| Groove techniques | Create feel and texture | Ghost notes, syncopation, linear playing |
| Brush techniques | Produce soft, sweeping sounds | Sweeps, circles, taps |
| Advanced coordination | Combine independent rhythms | Polyrhythms, odd groupings, independence |
A strong drummer does not simply play fast. A strong drummer can play softly, stop cleanly, repeat a part, lock in with other musicians, and make each note sound intentional.
Hand strokes
Hand strokes are the foundation of most drum techniques.
- Full stroke: The stick starts high, strikes the drum, and returns to the same height. It works well for repeated notes at an even volume.
- Downstroke: The stick starts high, strikes the drum, and finishes low. It creates an accent followed by a quiet note.
- Tap stroke: The stick starts low and stays low. It produces a soft note.
- Upstroke: The stick starts low, strikes softly, and rises high. It prepares the hand for the next accent.
- Rebound stroke: The stick uses the drumhead’s natural bounce instead of being forced into the head.
These strokes help you control volume and prepare for the next note. They also reduce wasted motion.
Matched grip and traditional grip
Matched grip means both hands hold the sticks in a similar way. It is common in rock, pop, worship, jazz, marching percussion, and studio work.
Traditional grip places the left stick between the thumb and first finger while the right hand uses a matched-style grip. It developed from marching drum practice and remains common in jazz, concert percussion, and some marching traditions.
Neither grip is automatically better. Matched grip often feels direct and easy to use around a modern drum kit. Traditional grip can offer a different angle and touch on the snare. Choose the grip that lets you play with control and without pain.

Essential Rudiments Every Drummer Should Learn
Rudiments are short patterns that train timing, control, accents, and coordination. The Percussive Arts Society lists 40 standard drum rudiments, but you can make strong progress by mastering a smaller core group first.
Single-stroke roll
The single-stroke roll alternates hands:
R L R L or L R L R
Each hand plays one note at a time. Practice it slowly with even spacing. Then increase the speed only when the sound stays clean.


Use single strokes for:
- Fast fills
- Snare patterns
- Tom runs
- Cymbal phrases
- Sixteenth-note grooves
- Linear drum parts
The key goal is not speed. It is even sound between the right and left hands.
Double-stroke roll
The double-stroke roll uses two notes per hand:
R R L L
At slow speeds, play each note with a separate wrist motion. As the tempo rises, allow the stick to rebound for the second note.
Double strokes help with:
- Sustained rolls
- Fast fills
- Soft snare textures
- Drumline patterns
- Large tom movements
If the second note is much quieter than the first, slow down and work on rebound control.
Paradiddle
A basic single paradiddle is:
R L R R L R L L
The first two notes alternate. The last two notes repeat with the same hand.
Paradiddles help you move accents around the kit. For example, you can play the accented first note on a tom while the softer notes stay on the snare. They also improve the connection between your hands and feet.
Flam
A flam has one quiet note just before a louder main note:
small note + main note
The two notes should sound close together, almost like one wide hit. Keep the grace note low and the main note clear.
Flams are useful in:


- Marching patterns
- Rock fills
- Snare solos
- Orchestral parts
- Accented grooves
A common mistake is spacing the two notes too far apart. When that happens, the flam sounds like two separate hits.
Drag or ruff
A drag places two soft grace notes before a louder main note. It creates a thicker sound than a flam.
The soft notes should stay controlled. Do not let them become three equally loud notes unless the music calls for that effect.
Five-stroke roll
A five-stroke roll often uses:
R R L L R or L L R R L
The first four notes are quiet, and the final note is accented. This rudiment is useful for clean fills and strong phrase endings.
Six-stroke roll
A common six-stroke roll pattern is:
R L L R R L
Drummers often use it in funk, fusion, rock, and modern groove playing. It can sound smooth and flowing when the accents are clear.
How to practice rudiments
Use this simple process:
- Play the pattern slowly.
- Use a metronome.
- Keep the soft notes soft.
- Match the sound of both hands.
- Move the pattern from the pad to the snare.
- Move selected notes to toms or cymbals.
- Add the bass drum only after the hand pattern feels steady.
A rudiment becomes musical when you can control its volume, placement, and sound on the kit.
Drum Roll Techniques
A drum roll creates the sense of a long, sustained sound from repeated strokes. The two main approaches are the double-stroke roll and the multiple-bounce, or buzz, roll.
Open roll
An open roll uses clear, separate strokes. The double-stroke roll is the most common example.
It works well when you want:
- A defined sound
- Even note separation
- A marching-style effect
- A roll that can speed up or slow down clearly
The open roll is often easier to hear and control than a buzz roll.


Buzz roll
A buzz roll uses several small rebounds from one stroke. The stick stays close to the drumhead, and the fingers control the rebound.
Buzz rolls can create a smooth sound on the snare. They are common in concert percussion, jazz, ballads, and orchestral music.
The sound depends on the drum, head tension, stick choice, hand pressure, and playing surface. A buzz roll does not need to contain a fixed number of bounces. The goal is a connected sound, not a mathematical count.
Press roll
A press roll is a controlled form of multiple-bounce playing. The drummer applies enough pressure to create a dense roll but avoids forcing the stick into the head.
Too much pressure can stop the rebound and make the roll sound flat. Too little pressure can make the notes too open.
Practice rolls at several volumes. A useful test is to play a soft roll, swell it louder, and return to soft without changing the basic pulse.
Accent, Texture, and Articulation Techniques
These techniques change how a drum note speaks. They help a groove sound clear instead of flat.
Rimshot
A rimshot strikes the drumhead and rim at nearly the same time. It produces a louder and sharper sound than a normal snare hit.
Use rimshots for:
- Backbeats
- Strong accents
- Rock choruses
- Dramatic fills
- Musical peaks
The striking point changes the sound. A hit near the center can sound thick, while a hit closer to the edge may sound brighter.
Avoid using a rimshot for every note. If every backbeat is at maximum intensity, the groove may lose contrast.
Cross-stick or sidestick
A cross-stick places the stick across the snare. The butt end or shaft strikes the rim while the stick rests on the head.
This creates a short, woody click. It is common in:
- Country
- Latin music
- Ballads
- Acoustic pop
- Soft worship music
- Quiet jazz passages
Cross-stick sound changes with the stick position and snare design. Move the stick until you find a clear click.
Ghost notes
Ghost notes are very soft notes, often played on the snare. They sit between louder backbeats and add motion to a groove.


A funk pattern may use a strong snare on beats 2 and 4 with quiet notes before or after those hits. The quiet notes should support the groove, not cover the main beat.
To practice ghost notes:
- Play a simple backbeat.
- Add one quiet snare note before beat 2.
- Keep the main backbeat strong.
- Add more soft notes only when the pulse remains clear.
- Record yourself and listen for volume balance.
Ghost notes are about touch. Playing more notes does not always make a groove better.
Rim clicks and shell sounds
Some drummers strike the rim, shell, or hoop to create sounds that are less open than a normal drum hit. These sounds can add color in acoustic settings and low-volume arrangements.
Use them with care. The exact sound depends on the drum’s hardware and the stick angle.
Bass Drum and Hi-Hat Foot Techniques
Foot technique controls the low end of the kit and helps connect the groove.
Heel-down technique
With heel-down playing, the heel rests on or near the pedal plate while the ankle moves the foot.
This method offers:
- Fine volume control
- A relaxed motion
- Good control at low to medium volume
- Useful practice for beginners
Heel-down is common in jazz, soft pop, and quiet playing. It can also help you learn balance before moving to stronger foot motions.
Heel-up technique
With heel-up playing, the heel lifts while the leg helps drive the pedal.
This can produce more volume and power. It is common in rock, metal, marching-style bass drum parts, and loud band settings.
The sound should come from a controlled drop of the foot, not from stiff tension in the leg. Keep the ankle and knee loose.
Slide technique
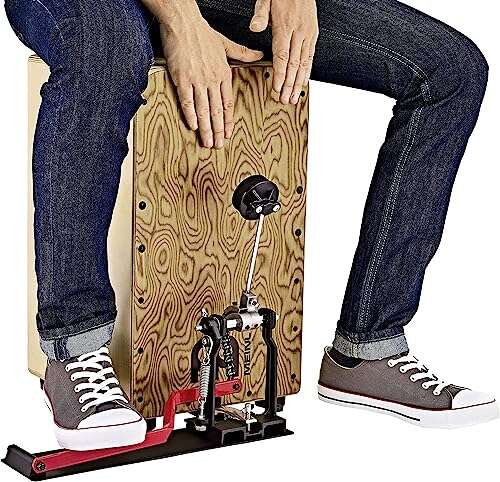
The slide technique allows two bass drum notes from one continuous foot motion. The foot begins near the front or middle of the pedal, strikes the first note, then slides toward the heel area for the second.
It can help with fast double notes. It also requires a pedal setup that gives you enough room to move.
Swivel technique
The swivel technique moves the heel or foot slightly from side to side while the ankle produces repeated bass drum notes. It is often used for fast double bass playing.


This technique takes time to develop. Start with small movements and low volume. If the motion causes pain, stop and adjust your posture or seek guidance from a qualified teacher.
Heel-toe technique
Heel-toe playing uses the heel for one note and the toe for another. Some drummers use it for quick double strokes or repeated bass drum patterns.
The motion should remain small. Large movements make it harder to stay even.
Hi-hat foot control
The hi-hat pedal can do more than open and close the cymbals.
You can use the foot to:
- Close the hats on beats 2 and 4
- Create a short chick sound
- Control partial openings
- Add splashes
- Keep time during a fill
- Play independent rhythmic patterns
Practice opening the hi-hat slightly and closing it without striking the cymbals. Small changes in pressure create different sounds.
Groove, Coordination, and Independence Techniques
These techniques help you combine limbs while keeping the beat stable.
Four-limb coordination
Most drum kit patterns use some combination of:
- Right hand
- Left hand
- Right foot
- Left foot
Begin with a basic rock beat:
- Right hand: steady eighth notes on the hi-hat
- Bass drum: beats 1 and 3
- Snare: beats 2 and 4
Once this feels steady, change one limb at a time. Do not change all four parts at once.
Syncopation
Syncopation places notes away from the strongest beats. A bass drum hit just before beat 2 is one simple example.
Syncopation can make a groove feel more active. It can also make the time feel weak if the drummer loses the main pulse.
Count aloud or use a metronome. Make sure you can still feel beats 1, 2, 3, and 4 even when the notes fall between them.
Linear drumming
Linear drumming avoids playing certain limbs at the same time. For example, a pattern may alternate between a hi-hat, snare, and bass drum.
This creates space between notes. It is common in funk, fusion, gospel, and modern drum fills.
Start with three-note groups. Play them slowly and keep each note the same distance from the next. Add accents after the basic pattern is even.
Orchestration
Orchestration means choosing where each note is played on the kit.
A simple sticking pattern can sound very different when you move notes between:
- Snare
- High tom
- Floor tom
- Ride cymbal
- Crash cymbal
- Closed hi-hat
Orchestration helps a drummer shape musical phrases. Move only one note at a time so you can hear the effect.
Polyrhythms
A polyrhythm combines two different rhythmic groupings at once. A common example is three notes against two notes.
Polyrhythms are used in jazz, fusion, progressive rock, classical percussion, and many global music styles. Learn each rhythm alone first. Then combine them at a slow speed.
Do not treat polyrhythms as a speed test. The pulse must stay clear.
Brush Playing Techniques
Brushes create a softer and more flowing sound than sticks. They are common in jazz, blues, ballads, lounge music, and quiet acoustic settings.
Sweeping circles
A drummer can sweep the brush around the snare in a circular motion. One hand may keep a steady sweep while the other plays accents or taps.
The sweep does not need to be large. A small, even motion often gives better control.
Brush taps
Brushes can also tap the snare like soft sticks. Use the fingers and wrist to control the sound.
Taps help create clear rhythmic patterns when a full sweep would sound too smooth.
Figure-eight motion
A figure-eight brush motion can create a continuous texture. It requires relaxed movement and steady time.
Practice the motion without worrying about speed. The brush should glide rather than scrape with force.
Brush transitions
Many songs require a move from brushes to sticks. Keep the sticks within easy reach and plan the change during a rest or simple phrase.
A smooth transition is part of the technique. It should not interrupt the tempo.
Dynamic Control: Playing Soft and Loud
Dynamic control is the ability to change volume without losing time or sound quality. It may be the most useful drum technique for playing with other musicians.
Accent and tap exercises
Use a pattern such as:
R l R l
The capital letter represents an accent. The lowercase letter represents a soft tap.
Keep the accented note higher and the soft note close to the head. Repeat the pattern with both hands.
Crescendo and decrescendo
A crescendo gradually increases volume. A decrescendo gradually reduces it.
Practice a roll or simple single-stroke pattern that grows from very soft to loud, then returns to soft. Keep the pulse steady throughout.
Why dynamics matter
A drummer who plays every note at one volume can make a song feel flat. Good dynamics help define:
- Verses and choruses
- Musical builds
- Fills
- Vocal support
- Instrumental space
- Emotional changes
Volume should serve the song. More force is not always more musical.
How to Practice Drum Techniques Effectively
A useful practice routine balances skill work with real music.
A simple 30-minute routine
Minutes 1–5: Warm-up
Play slow single strokes, double strokes, and light foot patterns. Focus on relaxed movement.
Minutes 6–12: Rudiments
Choose one or two rudiments. Use a metronome and practice at three volume levels.
Minutes 13–20: Coordination
Play a basic groove. Add one new bass drum or hi-hat note at a time.
Minutes 21–26: Musical application
Use the technique in a fill, song section, or backing track.
Minutes 27–30: Review
Record a short take. Listen for timing, volume balance, unwanted tension, and uneven notes.
How to choose a practice speed
Start at a speed where you can play the pattern correctly several times in a row. If the pattern breaks down, lower the tempo.
Increase speed in small steps. A faster tempo is useful only when the sound remains controlled.
Signs that a technique is working
You are making progress when:
- Both hands sound more alike
- Soft notes stay soft
- Accents are easy to hear
- You can repeat the pattern without stopping
- You can play it with a metronome
- You can use it inside a groove
- Your shoulders, wrists, and legs stay relaxed
If a technique feels painful, stop. Check your seat height, drum position, grip, and motion. Persistent pain should be assessed by a qualified medical professional.
Common Drum Technique Mistakes
Many problems come from using too much force or trying to advance too quickly.
Chasing speed too soon
Speed can hide poor control. Practice slowly enough to hear every note.
Gripping the sticks too tightly
A tight grip limits rebound and can cause fatigue. Hold the stick firmly enough to control it, but allow it to move.
Ignoring the weak hand
Many players practice patterns with the dominant hand leading every time. Reverse the sticking and begin patterns with the other hand.
Playing every note at the same volume
Use accents and taps. Music needs contrast.
Using large motions
Large arm motions can look impressive but often waste energy. Use the smallest motion that gives the needed sound.
Practicing only on a pad
A practice pad is useful for hand control, but the kit adds cymbals, pedals, spacing, and sound balance. Move new skills to the kit as soon as you can.
Losing the pulse during fills
Count through the fill. Land the next groove on time. A simple fill that supports the beat is better than a complex fill that changes the song’s timing.
Neglecting hearing protection
Drums and cymbals can produce high sound levels, especially in small rooms. Use musician earplugs or other suitable hearing protection during loud practice and performances. Take breaks and turn down amplified instruments when possible.
How Drum Techniques Differ by Music Style
The same technique can serve different musical goals.
| Style | Techniques often used | Main sound goal |
|---|---|---|
| Rock | Rimshots, strong bass drum, crash accents | Power and clear backbeats |
| Pop | Controlled dynamics, simple grooves, clean fills | Support for the song |
| Funk | Ghost notes, syncopation, linear patterns | Tight, detailed groove |
| Jazz | Brushes, ride patterns, comping, light touch | Flow and interaction |
| Metal | Double bass, fast singles, strong accents | Speed, precision, and intensity |
| Country | Cross-stick, steady kick, restrained fills | Clear pulse and space |
| Latin | Cross-stick, syncopation, cascara-style patterns | Interlocking rhythm |
| Marching percussion | Rudiments, flams, drags, open rolls | Projection and precision |
| Gospel and fusion | Linear ideas, dense coordination, dynamic shifts | Complex movement and contrast |
These are broad patterns, not strict rules. Drummers often mix techniques across styles.
Which Drum Techniques Should Beginners Learn First?
Beginners should learn basic grip, rebound, single strokes, double strokes, simple bass drum patterns, hi-hat control, and steady eighth-note grooves first.
A good order is:
- Learn a relaxed matched grip.
- Practice single strokes.
- Learn full, down, tap, and upstrokes.
- Build a basic rock beat.
- Add double strokes.
- Practice paradiddles.
- Learn ghost notes and rimshots.
- Add fills and tom movement.
- Develop bass drum control.
- Explore brushes, polyrhythms, and advanced foot methods.
This order builds control before complexity. You can change it to match your musical goals, but do not skip the basics of timing and sound.
Frequently Asked Questions
What is the most important drum technique?
Time control is the most important skill. A drummer who keeps a steady pulse can support a band even with simple parts. Build timing alongside every other technique.
How long does it take to learn drum rudiments?
Many rudiments can be learned in a few practice sessions, but control takes much longer. Aim to use each rudiment at different speeds, volumes, lead hands, and positions around the kit.
Should I learn matched grip or traditional grip?
Matched grip is often the simplest starting point for a full drum kit. Traditional grip is useful if you want to study marching percussion, concert snare, or certain jazz approaches. Comfort and control matter more than choosing the “correct” grip.
How can I play drums faster?
Practice slowly with a metronome, use relaxed motions, and increase the tempo in small steps. Work on rebound rather than forcing every stroke. If the notes become uneven, return to a slower speed.
Why do my ghost notes sound too loud?
Your soft notes may be too high, too tense, or too close in volume to your accents. Lower the stick height, relax the grip, and practice the main backbeat separately from the ghost notes.
Are drum techniques different for electronic and acoustic drums?
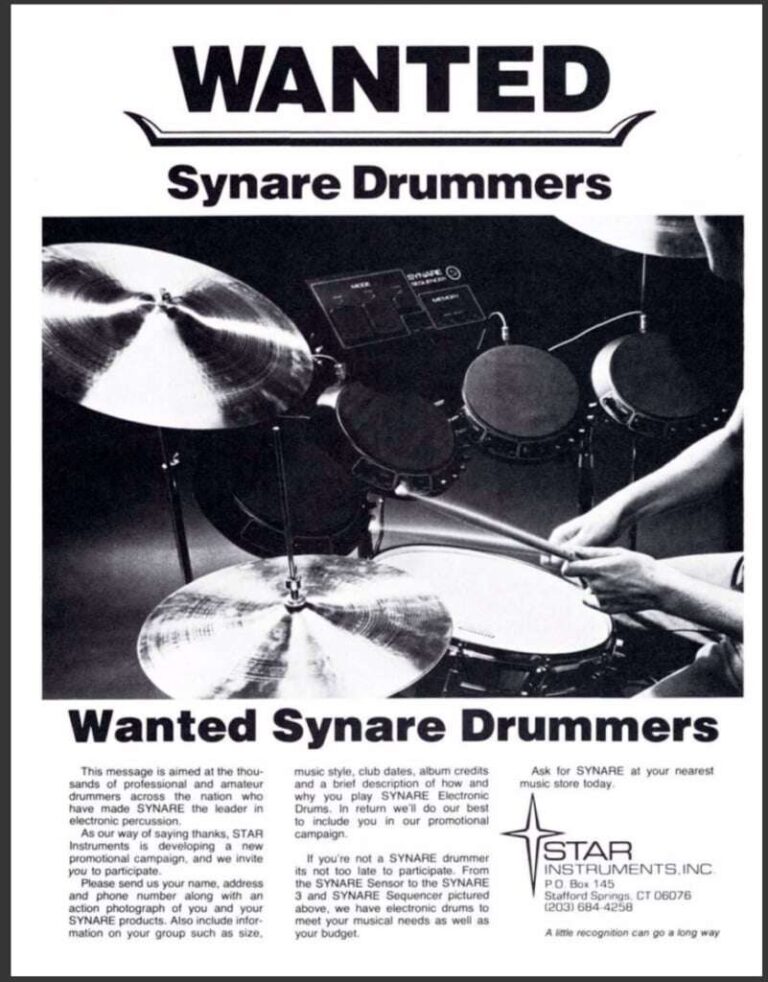
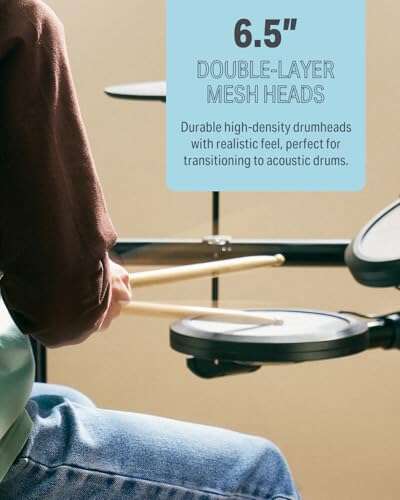
The basic motions are similar, but the rebound and sound can differ. Electronic pads may feel harder or more uniform than acoustic heads. Practice on both when possible, especially if you perform on an acoustic kit.
Can drumming cause hearing damage?
Loud drum and cymbal sounds can contribute to hearing damage. Use suitable hearing protection, take breaks, and reduce nearby monitor or amplifier volume. Seek medical advice if you notice pain, ringing, muffled hearing, or sound sensitivity.
Key Takeaways
- Drum techniques include hand strokes, rudiments, rolls, accents, foot methods, groove skills, brush work, and coordination patterns.
- Start with timing, relaxed grip, rebound, and dynamic control.
- Learn single strokes, double strokes, paradiddles, flams, and drags before moving to harder combinations.
- Use ghost notes, rimshots, cross-stick, and orchestration to shape the sound of a groove.
- Build bass drum and hi-hat foot control with small, steady motions.
- Practice slowly, use a metronome, and apply each technique to real music.
- Stop if you feel pain and protect your hearing during loud practice.
Conclusion
The different drum playing techniques are tools for solving different musical problems. Basic strokes create control. Rudiments build coordination. Ghost notes and accents add texture. Foot techniques strengthen the groove, while brushes, rolls, and polyrhythms expand your sound.
Choose one technique, practice it slowly, and use it in a simple beat. Then listen to the result. Good drumming grows from clear time, relaxed movement, and a sound that fits the music.

Senior Music Reviewer
Alex Carter is a seasoned music reviewer with over a decade of experience in the world of sound and instruments. Passionate about helping musicians and enthusiasts make informed choices, he brings sharp insights and in-depth knowledge to every review. From classical instruments to modern gear, Alex combines technical expertise with a love for music to deliver content that resonates with readers.
As a Senior Music Reviewer and expert author on Tuneluma.com, Alex is dedicated to sharing honest evaluations, practical advice, and thoughtful commentary to guide readers in their musical journey.