How To Make A Steel Pan Drum: DIY Guide
To make a steel pan drum, shape a steel bowl, tune its notes, and finish it with care.
Learning how to make a steel pan drum takes patience, good tools, and a strong sense of pitch. The craft blends metalwork, acoustics, and Caribbean musical tradition. This guide explains the full process, from choosing a steel shell to shaping, tuning, and protecting the finished instrument.

What Is a Steel Pan Drum?
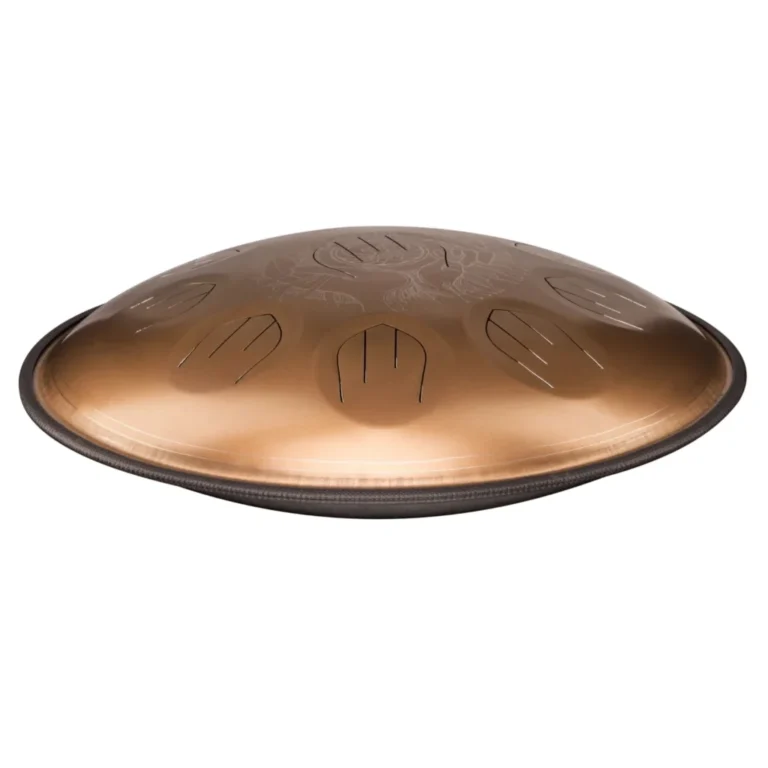
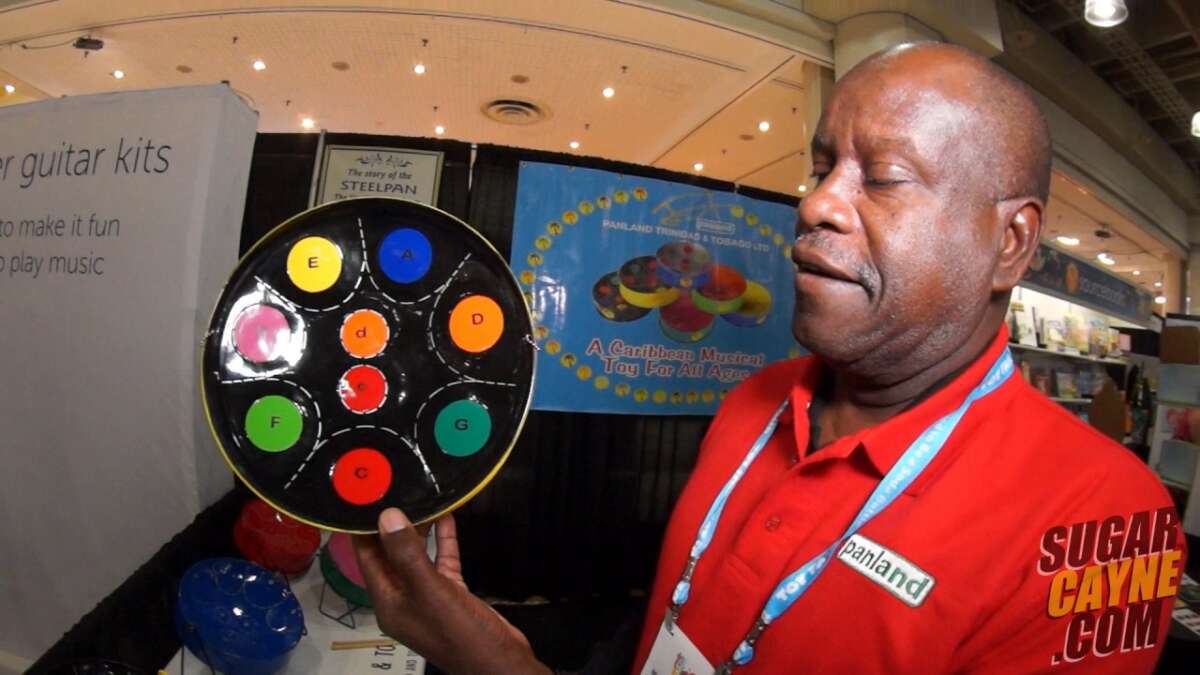
A steel pan drum is a tuned percussion instrument made from a steel surface. It has raised or lowered sections called notes. Players strike these notes with soft-tipped sticks to create melodies, chords, and rhythms.
The instrument began in Trinidad and Tobago during the early 20th century. Early makers used discarded oil drums and other metal containers. Over time, builders developed more accurate layouts, stronger steel treatments, and advanced tuning methods.
The name can cause some confusion. A steel pan is not shaped like a typical drum. It has a curved playing surface, while its sound comes from carefully formed metal zones that vibrate at set pitches.
A well-made pan can produce:
• Clear musical notes
• Warm or bright tones
• Strong bass sounds
• Long sustain
• Good volume without electronic help
The quality depends on more than the steel. The shell shape, note size, metal thickness, hammer work, heat treatment, and tuning all affect the final sound.

Tools and Materials You Need
Before learning how to make a steel pan drum, gather the right tools. A simple practice pan may require fewer tools, but a professional instrument needs precise equipment.
Main materials
• A low-carbon steel drum or steel sheet
• Heat-resistant paint or protective coating
• Fine sandpaper or abrasive pads
• Rust-resistant primer
• Small rubber or nylon mallets
• Tuning markers or chalk
• Optional decorative paint
A used 55-gallon steel drum is common for larger pans. Choose one that is clean and free from chemical residue. Do not use a drum that held toxic, flammable, or unknown materials.
Hand tools
• Ball-peen hammers in several sizes
• Small forming hammers
• Flat and rounded punches
• A center punch
• Metal files
• Measuring tape
• Compass or circle templates
• Permanent marker
• Straightedge
• Work gloves
• Ear protection
• Safety glasses
Workshop tools
• Angle grinder with cutting and sanding discs
• Drill
• Bench vise
• Propane torch or suitable heating system
• Heat-resistant work surface
• Fire extinguisher
• Stable metal stand
A torch is useful for controlled heat treatment, but it creates serious fire and burn risks. Work outdoors or in a well-ventilated metal shop. Keep fuel, wood, cloth, and other flammable items far from the work area.
Choosing and Preparing the Steel Shell
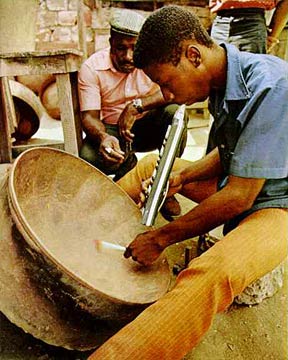
The shell is the body of the steel pan drum. Its size affects the range, tone, weight, and number of notes. A smaller shell may suit a compact tenor pan, while a larger shell can support bass notes.
Inspect the steel before you begin. Avoid deep rust, sharp dents, large cracks, and weak seams. Light surface rust can often be removed, but serious corrosion may cause unstable notes.
Prepare the shell
- Remove the top and bottom sections if you are using a barrel.
- Cut slowly with an angle grinder or metal cutting tool.
- File every sharp edge.
- Clean oil, dirt, labels, and residue from the steel.
- Sand the surface until it is smooth enough to mark.
- Check the shell for dents or uneven areas.
- Place the shell on a stable stand.
Wear eye protection when cutting or grinding. Small metal fragments can travel quickly and can cause lasting eye injuries.
Some builders use a shallow section of the barrel for the playing surface. Others cut a steel circle and form it into a bowl. The first method is often easier for beginners because the steel already has a curved shape.

How to Shape the Playing Surface
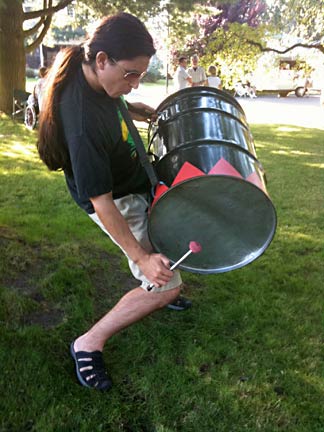
The most important part of how to make a steel pan drum is forming the playing surface. You need to create a smooth, even bowl without thinning the metal too much.
Place the shell on a firm support. A sandbag, hardwood block, or rounded metal form can support the steel while you work. The support should hold the metal but still allow it to move under the hammer.
Start near the outer edge and work toward the center. Use light blows at first. Heavy strikes can create sharp dents, cracks, or uneven tension.
Basic shaping method
- Mark the center of the steel.
- Draw several circles around the center.
- Heat a small section if the steel needs softening.
- Tap around the outer area with a rounded hammer.
- Move inward in small, even steps.
- Turn the shell often.
- Check the curve from several angles.
- Smooth high spots before creating note zones.
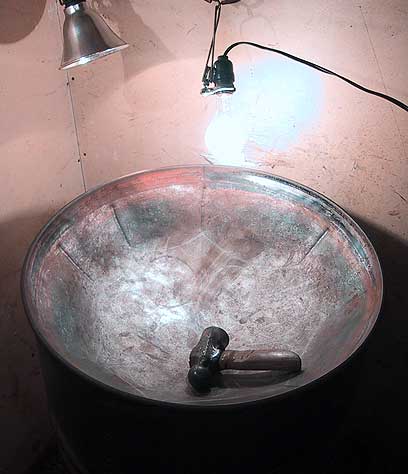
The goal is a smooth concave surface. Think of the process as stretching a blanket over a round frame. If you pull one area too hard, wrinkles appear elsewhere.
Do not rush the bowl shape. A poor curve makes tuning difficult and can cause notes to sound weak or unstable.
Marking the Note Layout
Once the bowl is smooth, mark the notes. The layout depends on the type of pan you want to build.
A tenor pan often has a higher range and many smaller notes. A double tenor has two playing surfaces. Bass pans use larger shells and larger note areas.
For a first project, a simple pan with fewer notes is easier to manage. You can use a basic diatonic scale, such as the notes of a major scale. This reduces crowding and makes tuning more practical.
Marking tips
• Use a paper template when possible.
• Keep similar notes evenly spaced.
• Leave enough metal between note areas.
• Avoid placing notes too close to the rim.
• Mark each note with its intended pitch.
• Use curved shapes rather than sharp corners.
Note shapes are often oval, rounded, or irregular. Their shape affects tone and sustain. Larger notes usually produce lower sounds, while smaller notes tend to produce higher sounds.
Do not copy a layout without checking its scale and range. A drawing made for one shell size may not work on another shell. The curve, diameter, and metal thickness all change the result.

Cutting and Separating the Notes
After marking the layout, form shallow grooves around each note. These grooves help separate the vibrating areas.
Use a narrow punch or small hammer to define the borders. Work with controlled taps. You are creating a boundary, not cutting deeply through the steel.
A note should vibrate without taking too much movement from its neighbors. If the borders are too shallow, notes may blend together. If they are too deep, the steel may weaken.
Important forming rules
- Support the steel from below.
- Use small hammer strokes.
- Follow the marked curve.
- Keep the groove depth even.
- Stop often and inspect the surface.
- Smooth dents that appear outside the note.
- Avoid sharp corners at the ends of grooves.
This stage requires a good eye. Experienced builders often spend more time correcting small distortions than making the first marks.
One common mistake is hitting the note area too hard before its border is complete. That can stretch the metal in the wrong direction and make later tuning harder.
Heat Treatment and Tempering
Heat treatment helps adjust the metal’s hardness and tension. Traditional steel pan making often includes heating, cooling, and repeated hammering. The exact process varies by builder, steel type, shell size, and desired tone.
Heat the steel gradually and evenly. Avoid creating bright hot spots. Excessive heat can warp the shell, damage the metal, or create unsafe fumes from coatings and residue.
A safe general approach is:
• Clean the steel before heating.
• Remove paint and unknown coatings.
• Use heat-resistant gloves and eye protection.
• Keep a fire extinguisher nearby.
• Heat only in a suitable ventilated space.
• Let the metal cool in a controlled way.
• Inspect the shell for cracks or distortion.
Do not heat a sealed container. A closed drum can hold pressure and may rupture. Any barrel used for this project must be fully open, cleaned, and confirmed safe.
Heat treatment is not a shortcut for poor shaping. It cannot fix badly placed notes or a badly curved bowl. It works best as part of a controlled process.
How to Tune a Steel Pan Drum
Tuning is the most sensitive part of how to make a steel pan drum. The aim is to make each note vibrate at its target pitch while keeping a pleasant tone and steady sustain.
Use an electronic chromatic tuner or a reliable tuning app. Test the note with a soft mallet and listen from several angles. The pitch may change depending on where and how you strike it.
A simple tuning process
- Choose one note.
- Strike its center gently.
- Check the pitch with a tuner.
- Decide whether the note is sharp or flat.
- Make a small adjustment with the hammer.
- Test the center and edge again.
- Repeat until the pitch settles.
- Move to the next note.
If a note is flat, carefully raise its pitch by adjusting the tension around the note. If it is sharp, you may need to relax or reshape the surrounding area. The exact hammer point depends on the design and the maker’s method.
Use very small changes. One extra hammer blow can move a note farther than expected. This is one of the key lessons in how to make a steel pan drum: tuning is gradual, not forceful.
Tune the notes several times during the build. Shaping one area can change nearby notes. Final tuning should happen after the shell is stable and all major forming work is complete.
Testing Tone, Sustain, and Note Separation
A tuner tells you the pitch, but it does not tell you everything about sound quality. A note can show the correct frequency and still sound harsh, weak, nasal, or unstable.
Test each note for:
• Pitch accuracy
• Volume
• Sustain
• Attack
• Brightness
• Warmth
• Buzzing
• Interference from nearby notes
Play each note softly and firmly. A good note should respond at more than one playing strength. Listen for unwanted rattles and false tones.
Walk around the pan while someone else plays it, if possible. The sound can change across the room. This simple test often reveals problems that are hard to hear while standing directly over the instrument.
Keep notes of each adjustment. Write down the hammer location, direction, and result. A tuning log helps you learn faster and prevents you from repeating the same mistake.