How Do I Paint A Guitar

How Do I Paint A Guitar: Easy DIY Guide

Painting a guitar means removing its hardware, preparing the surface, applying thin paint coats, and protecting the finish.

Learning how to paint a guitar can turn a plain instrument into a personal work of art. The best results come from patience, careful sanding, compatible products, and a clean workspace. This guide explains each step, from choosing paint to polishing the final coat, so you can avoid the common mistakes that ruin guitar finishes.

Before You Paint a Guitar

Before learning how to paint a guitar, decide whether the instrument is a good candidate for refinishing. A solid-body electric guitar is usually the easiest choice because its body is stable and has fewer delicate parts. A bass guitar can also work well, although its larger body needs more paint and more drying space.

An acoustic guitar is much harder to paint. Its thin wood top affects vibration, and added paint can change its tone. Never spray thick paint over the soundboard without understanding how the finish may affect the instrument.

Also consider the guitar’s value. A cheap project guitar is a safe place to experiment. A rare vintage guitar may lose value if you remove its original finish. If the instrument has collector value, ask a professional repair shop for advice first.
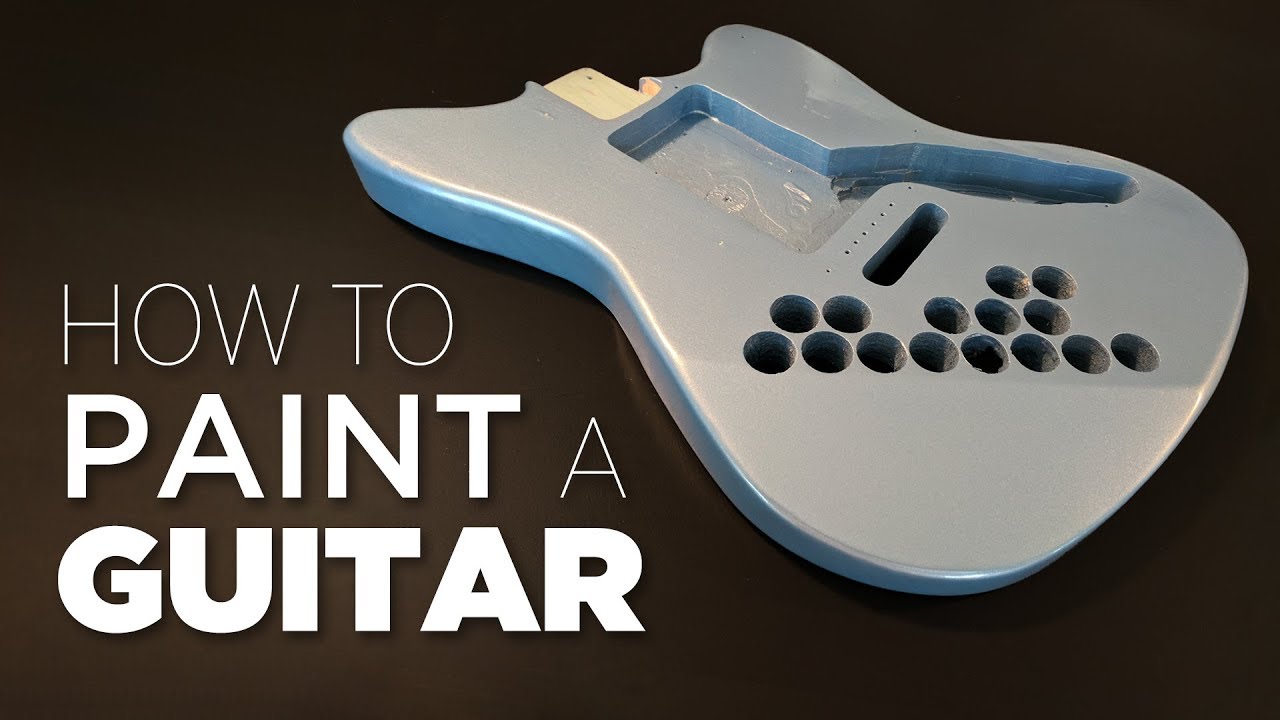
Before You Paint a Guitar
Source: youtube.com

Tools and Materials You Need

The right tools make the process easier and safer. You do not need an expensive spray booth, but you do need clean equipment and products that work together.

Gather these basic supplies:

• Screwdrivers and small containers for hardware

• Painter’s tape and masking paper

• Nitrile gloves and safety glasses

• A respirator rated for paint vapors

• Sandpaper in 180, 240, 320, 600, and 800 grits

• Sanding blocks or flexible sanding pads

• Wood filler for dents and deep scratches

• Tack cloths and clean lint-free cloths

• Compatible primer

Guitar-safe color paint

• Clear coat

• A spray gun, aerosol cans, or a suitable brush

• A guitar stand, hanging hook, or stable support

• Polishing compound and soft polishing cloths

For indoor work, use strong ventilation and keep paint away from flames, heaters, and sparks. Many solvent-based products release harmful vapors and can catch fire. Always read the product label and safety data sheet before use.

A useful rule is to stay within one finish system. For example, use a lacquer primer, lacquer color coat, and lacquer clear coat unless the manufacturer confirms that the products can be mixed. Incompatible layers may wrinkle, crack, or stay soft.

Tools and Materials You Need
Source: beccadwyer.com

How to Prepare the Guitar

Preparation is the most important part of learning how to paint a guitar. Paint does not hide poor preparation for long. Scratches, dents, dust, and oily fingerprints often become more visible after the color coat is applied.

Follow these steps:

  1. Remove the strings, pickups, bridge, knobs, tuners, neck plate, jack plate, and other hardware.

  2. Take clear photos before disconnecting wires.

  3. Label wires and screws in small bags.

  4. Remove the neck if the guitar has a bolt-on design.

  5. Cover any part that you cannot remove with painter’s tape.

  6. Clean the body with a product approved for the existing finish.

  7. Inspect the wood for dents, cracks, holes, and loose areas.

If the guitar has a glued-in neck, do not try to remove it. Mask the neck joint carefully. The same rule applies to truss rod openings, fretboards, bridge posts, and pickup cavities.

Deep dents may need wood filler. Apply a small amount, let it dry fully, and sand it level. Do not use household wall filler on a guitar body because it may shrink or crack under the finish.

How to Prepare the Guitar
Source: youtube.com

Sanding the Original Finish

Sanding gives the new finish a surface that can grip. It does not always mean removing every layer of the old finish. In many cases, scuff sanding the existing finish is safer than sanding down to bare wood.

Start with 180 or 240 grit if the old finish is thick or damaged. Use a sanding block on flat areas. A block helps prevent uneven dips and waves. Sand with steady, even strokes rather than pressing hard.

Move to 320 grit when the surface feels even. Stop when the glossy shine is gone and the body has a consistent dull look. If you see bare wood in a few areas, that is usually fine, but large uneven patches may need a sealer or primer.

Be careful around body edges. It is easy to sand through them because they receive more pressure. Rounded edges also hold less paint, so avoid making them too sharp.

One common workshop lesson is that over-sanding creates more work than it solves. It can expose soft wood, change the body shape, or reveal glue lines. Sand only as much as needed for a smooth, clean surface.

Sanding the Original Finish
Source: beccadwyer.com

Applying Filler, Sealer, and Primer

Wood grain can show through a painted finish, especially on ash, mahogany, and other open-grain woods. If you want a flat, factory-style finish, use grain filler before primer.

Apply grain filler according to its label. Work it across the grain, allow it to dry, and sand it smooth. Several thin applications may work better than one thick layer.

A sealer helps control how the wood absorbs primer. Primer then creates an even base and makes the color coat more consistent. Light colors often need a light primer, while dark colors may work better over gray or dark primer.

Spray primer in thin passes. Keep the can or spray gun moving before you begin and after you pass the body. Overlapping each pass by about half helps create even coverage.

Allow the primer to dry for the time listed by the manufacturer. Dry to the touch does not always mean fully cured. Once dry, sand lightly with 320 or 400 grit until the surface is smooth.

Clean the body with a tack cloth before painting. Do not use a wet rag that leaves moisture or lint behind.

Applying Filler, Sealer, and Primer
Source: wikihow.com

Choosing the Best Paint for a Guitar

The best paint for a guitar depends on the existing finish, your tools, and the look you want. Common choices include nitrocellulose lacquer, acrylic lacquer, polyurethane, and water-based finishes.

Nitrocellulose lacquer can create a classic look and is common on some vintage-style instruments. It takes time to cure and releases strong vapors. It also needs careful handling because it remains more sensitive to heat and chemicals than many modern finishes.

Polyurethane and polyester finishes are durable and common on modern guitars. They can produce a thick, hard finish, but they are less forgiving when you need to repair mistakes. Water-based products have lower odor and easier cleanup, but they still require proper ventilation and a compatible clear coat.

When choosing paint, check these points:

• The paint must bond to the primer.

• The clear coat must be compatible with the color coat.

• The product must be suitable for wood or finished wood.

• The color coat should not react with the old finish.

• The product should be legal and safe to use in your area.

Test the full paint system on scrap wood first. This small test can reveal wrinkling, poor adhesion, slow drying, or an unexpected color change.
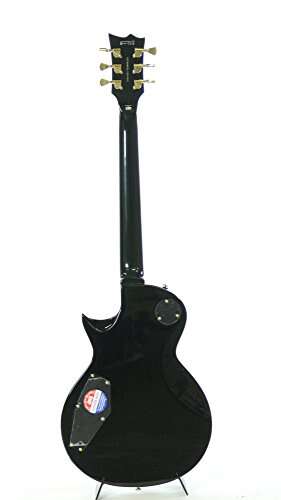

Choosing the Best Paint for a Guitar
Source: youtube.com

How to Paint a Guitar Body

Now you can begin the color coats. Learning how to paint a guitar is mostly an exercise in control. Thin layers are safer than one heavy layer.

Set the body on a stand or hang it in a clean area. Keep the surface free from dust. If you use aerosol cans, warm them in room-temperature water for a short time if the label allows it. Never heat paint with a flame or hot device.

Use this process:

  1. Shake or mix the paint as directed.

  2. Spray a light tack coat over the body.

  3. Wait for the label’s recommended time.

  4. Apply another thin coat with smooth, overlapping passes.

  5. Change the direction slightly on the next coat.

  6. Inspect the body under bright light.

  7. Allow the paint to flash or dry before adding more coats.

A tack coat is a light first layer that helps later coats grip. It should not look fully covered. Heavy coats often cause runs, sagging, trapped solvent, and long cure times.

Keep the spray distance consistent. Too close creates wet spots and runs. Too far creates dry, rough texture. If you use a spray gun, practice on cardboard until the fan pattern and paint flow feel steady.

Most guitars need several color coats, but the exact number depends on the paint and the desired opacity. Stop when the color looks even. More paint does not always mean a better finish.

How to Paint a Guitar Body
Source: co.uk

Adding Designs, Graphics, or a Burst

A custom guitar may include stripes, decals, stencils, or a sunburst effect. Let the base color dry enough before masking it. If the surface is soft, tape can pull up the paint.

Use low-tack painter’s tape and press only the tape edge that defines the design. Remove the tape slowly while the new paint is still slightly soft, unless the product instructions say otherwise. This can help reduce sharp flakes along the edge.

For decals, clean the surface first and apply the decal without trapping air. A clear coat can protect the design, but the decal must be compatible with that clear coat.

A burst finish takes practice. Start with the lighter center color and build the darker edge in small passes. Keep the spray moving around the edge so the dark band stays gradual rather than forming a hard line.

If you make a mistake, do not immediately wipe the paint. Let it dry, sand the area smooth, and repair it with light coats. Rushing usually spreads the problem.

Adding Designs, Graphics, or a Burst
Source: youtube.com

Applying the Clear Coat

Clear coat protects the color and gives the guitar its final sheen. It may produce a gloss, satin, or matte finish, depending on the product.

Apply several thin clear coats rather than one thick coat. Allow the correct flash time between coats. Too little time can trap solvent, while too much time may reduce chemical bonding between layers, depending on the finish system.

Pay attention to edges and corners. They need coverage, but they also collect excess material. Spray past the edge instead of stopping directly on it.

After the final clear coat, let the body cure fully. Cure time may range from several days to several weeks. The label’s stated drying time may describe handling time, not complete hardness.

Do not rush to reassemble the guitar. A finish that feels dry can still dent under a screw, strap button, or bridge. Patience at this stage protects all the work you have already done.

Applying the Clear Coat
Source: guitarkitworld.com

Wet Sanding and Polishing

Wet sanding can remove orange peel, dust specks, and small surface flaws. Do not wet sand until the clear coat has cured enough to resist pressure.

Start with 600 or 800 grit wet-and-dry paper. Use clean water with a small drop of dish soap if the finish manufacturer permits it. Wrap the paper around a soft block and sand gently.

Keep the paper and body clean. If a hard particle gets under the paper, it can create a deep scratch. Sand until the surface has a smooth, even haze, but avoid sanding through the clear coat.

Move to 1000, 1500, and 2000 grit for a finer surface. Then use polishing compound with a clean cloth or polishing machine set to a low speed. Excess heat can soften the finish or damage edges.

A satin finish usually should not be polished to a high gloss. Follow the finish maker’s instructions and stop when the surface matches your goal.

Reassembling and Setting Up the Guitar

Once the finish has cured, remove the masking tape and inspect every cavity. Clean dust from the pickup routes and screw holes. If paint has entered a threaded hole, clear it carefully with the correct tool.

Reinstall the hardware without forcing screws. New paint can make holes tighter, and excessive force may crack the finish. A hand screwdriver gives you more control than a power drill.

Reconnect the electronics by following your photos and labels. Check the output jack, pickups, controls, and ground wires before putting on new strings.

After reassembly, the guitar may need a full setup. Check the neck relief, action, intonation, pickup height, and tuning stability. A refinish does not automatically change the setup, but removing and reinstalling hardware can affect it.

Play the guitar at low volume first. Listen for weak pickups, crackling controls, or grounding noise. Fix electrical issues before tightening the final covers.

Common Mistakes to Avoid

Knowing how to paint a guitar also means knowing what not to do. Most finish problems come from rushing or mixing products without testing them.

Avoid these mistakes:

• Painting in a dusty or humid area

• Skipping surface cleaning

• Applying thick coats

• Sanding through body edges

• Mixing incompatible paint systems

• Touching the surface with bare, oily hands

• Reassembling before the finish cures

• Spraying without proper respiratory protection

• Painting over hardware instead of removing it

• Using a heat source to speed up drying

Humidity can slow drying and create a cloudy finish. Very cold conditions can also affect spray patterns and curing. A clean, dry, well-ventilated space with stable temperature usually gives better results.

If a run appears, leave it alone. Once the finish cures, sand the run level and apply another light coat. Wiping wet paint often creates a larger damaged area.

Safety, Cost, and Time

Paint safety deserves serious attention. Solvent-based products can harm your lungs, eyes, and skin. A paper dust mask does not protect you from paint vapors, so use the respirator type specified for the product.

Work outdoors only when weather conditions are suitable and local rules allow it. Do not spray near pets, children, open flames, cars, food, or neighboring property. Dispose of paint waste according to local hazardous waste guidance.

A basic guitar painting project may cost about $75 to $250 in materials. The final cost depends on the paint system, tools, primer, clear coat, safety gear, and whether you need new hardware.

The active work may take a weekend, but the full project can take much longer. Preparation may take several hours, spraying may take one or two days, and curing may take days or weeks. A good finish rewards patience more than speed.

When to Hire a Professional

A professional refinisher may be the better choice when the guitar is valuable, structurally damaged, or finished with a difficult coating. Professional shops also have spray equipment, controlled work areas, and experience with repairs.

Consider professional help if:

• The guitar has a set neck that needs major repair

• The body has cracks or serious water damage

• You want a complex vintage-style finish

• You need a flawless stage or studio finish

• You are not comfortable handling solvent-based products

• You cannot provide safe ventilation

A home finish can look excellent, but it may not match a factory finish. Every method has limits. The best choice depends on your budget, confidence, tools, and the value of the instrument.

Frequently Asked Questions About How Do I Paint a Guitar

Can I paint a guitar without removing the original finish?

Yes, you can often scuff sand the original finish and apply a compatible primer. However, the old coating must be clean, sound, and free from wax or silicone, and you should test the new products on a hidden area first.

What type of paint should I use on a guitar?

Use a paint made for wood or musical instruments, and choose a compatible primer and clear coat. Acrylic, polyurethane, lacquer, and water-based systems can work, but mixing brands or finish types without testing may cause cracks or wrinkles.

How many coats of paint does a guitar need?

Most guitars need multiple thin color coats and several clear coats. The exact number depends on the paint, color opacity, surface, and desired finish, so follow the product instructions rather than relying on a fixed number.

Can I paint the guitar while it is assembled?

It is possible, but it usually produces poor results and can damage the hardware. Removing the strings and hardware gives you cleaner edges, better coverage, and less risk of paint entering the electronics.

How long should a guitar dry before reassembly?

Wait until the finish has fully cured, not just dried on the surface. Depending on the product, this can take several days or several weeks; pressing a fingernail into an inconspicuous area can help reveal whether the finish is still soft, but always follow the manufacturer’s guidance.

Will painting a guitar change its sound?

A thin, careful finish on a solid-body electric guitar usually has little noticeable effect for most players. Thick coatings or paint on an acoustic soundboard can affect vibration, weight, and tone, so acoustic refinishing requires extra care.

How do I fix a paint run on a guitar?

Let the run cure completely before sanding it level with fine paper. Afterward, apply light color or clear coats as needed instead of trying to wipe away wet paint.

Conclusion

Learning how to paint a guitar is a careful process, not a quick spray job. Remove the hardware, prepare the surface, use compatible products, apply thin coats, and allow plenty of cure time. Good ventilation and proper safety gear are just as important as sanding and polishing.

Start with an affordable solid-body guitar, test your paint system on scrap wood, and work slowly. Your first project may not be perfect, but each step will teach you more about finishes and instrument care. Share your results, explore more guitar-building resources, and enjoy making an instrument that feels truly yours.

Similar Posts

Leave a Reply

Your email address will not be published. Required fields are marked *