How Do You Lower The Action On An Acoustic Guitar: 2026 Guide
To lower the action on an acoustic guitar, you must carefully file the bridge saddle or adjust the truss rod.
Learning how do you lower the action on an acoustic guitar is a rite of passage for every serious player. I remember the first time I tried to fix a high-action guitar that felt like playing a cheese grater; the difference was transformative. Mastering this skill saves you money on shop fees and lets you customize the feel of your instrument to suit your playing style. Whether you are a fingerstyle player needing low, buzz-free strings or a strummer who likes a bit more room, knowing how to lower the action on an acoustic guitar gives you control over tone, comfort, and playability.
Why Proper Action Matters for Your Playing
The action is the distance between the strings and the fretboard. High action makes you press harder. That leads to hand fatigue and poor intonation. Low action can cause fret buzz where the strings hit the frets. The goal is a balance: low enough for easy playing, high enough for clean tone and sustain. Learning how to lower the action on an acoustic guitar effectively means you keep the wood resonating and avoid choking the sound.
Many players blame slow technique when the real issue is setup. I saw that in my own playing. Once I lowered the action correctly, my fingers moved faster. Chords sounded cleaner. Scales ran smoother. If your guitar feels stiff, adjusting the action often eliminates extra tension and opens up the instrument.
Related terms and why they matter
When we talk about action we also mention neck relief, truss rod, saddle, nut slots, bridge height, string gauge, and fret level. All of these affect playability and tone. Knowing the names helps you follow steps and communicate with a tech if you need help.

The Essential Steps to Lower Your Guitar Action
Start by checking neck relief. A bowed neck raises the strings. Tightening the truss rod often fixes this. If the neck is straight and the action is still high, the saddle is the next place to look.
Tools you will need
- Capo or ruler for measuring at the 12th fret
- Feeler gauge or business card for quick gap checks
- Hex wrench or truss rod tool that fits your guitar
- Fine-grit sandpaper (400–800 grit) and a flat sanding block
- Pliers (for removing saddle pins on some bridges)
- Small felt or cloth to protect the finish
- Tuner to check intonation and pitch
- Inspect the neck relief by holding down the low E string at the first and fourteenth frets.
- Check the gap at the seventh fret; it should be very thin, roughly the thickness of a business card.
- If the neck is straight but the action remains high, the saddle is your next target for adjustment.
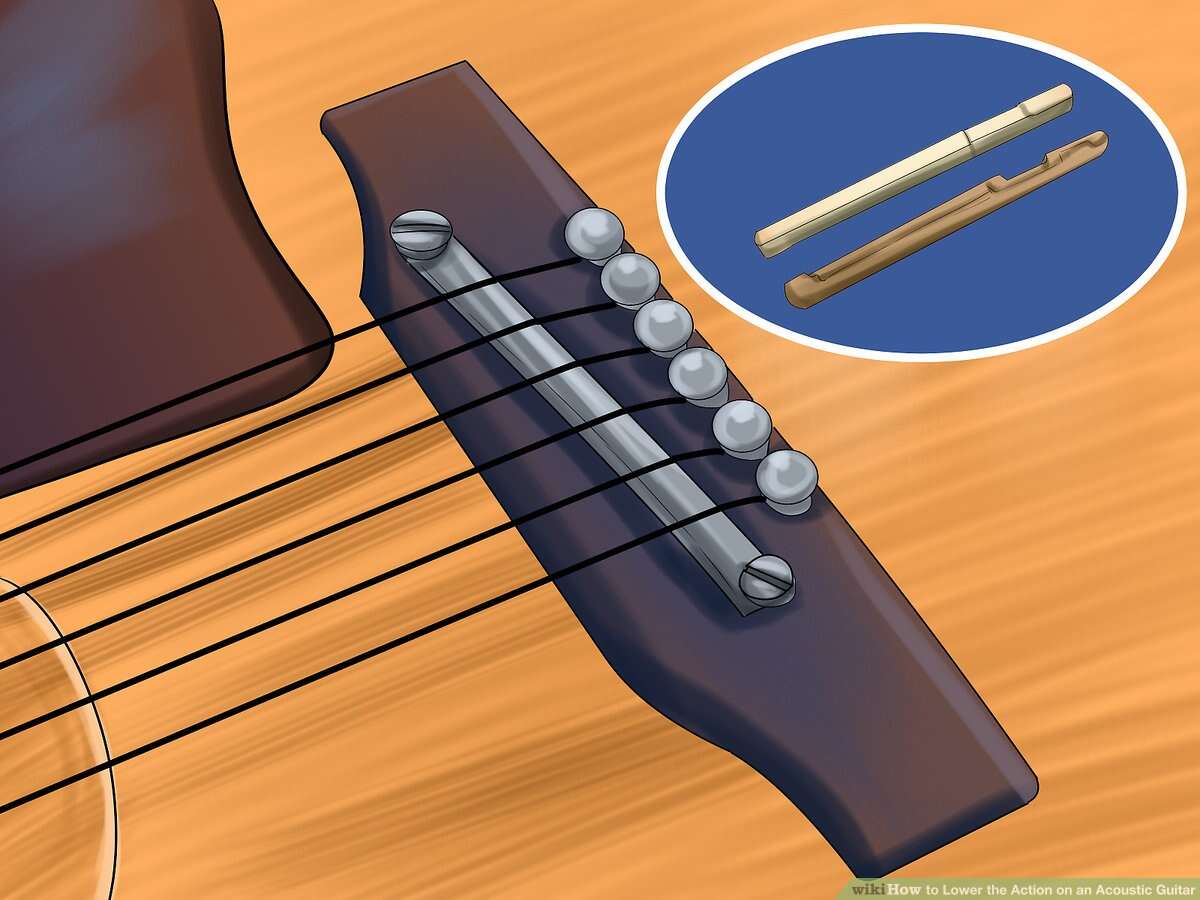
- Remove the saddle carefully from the bridge slot, making sure not to lose any under-saddle pickup components.
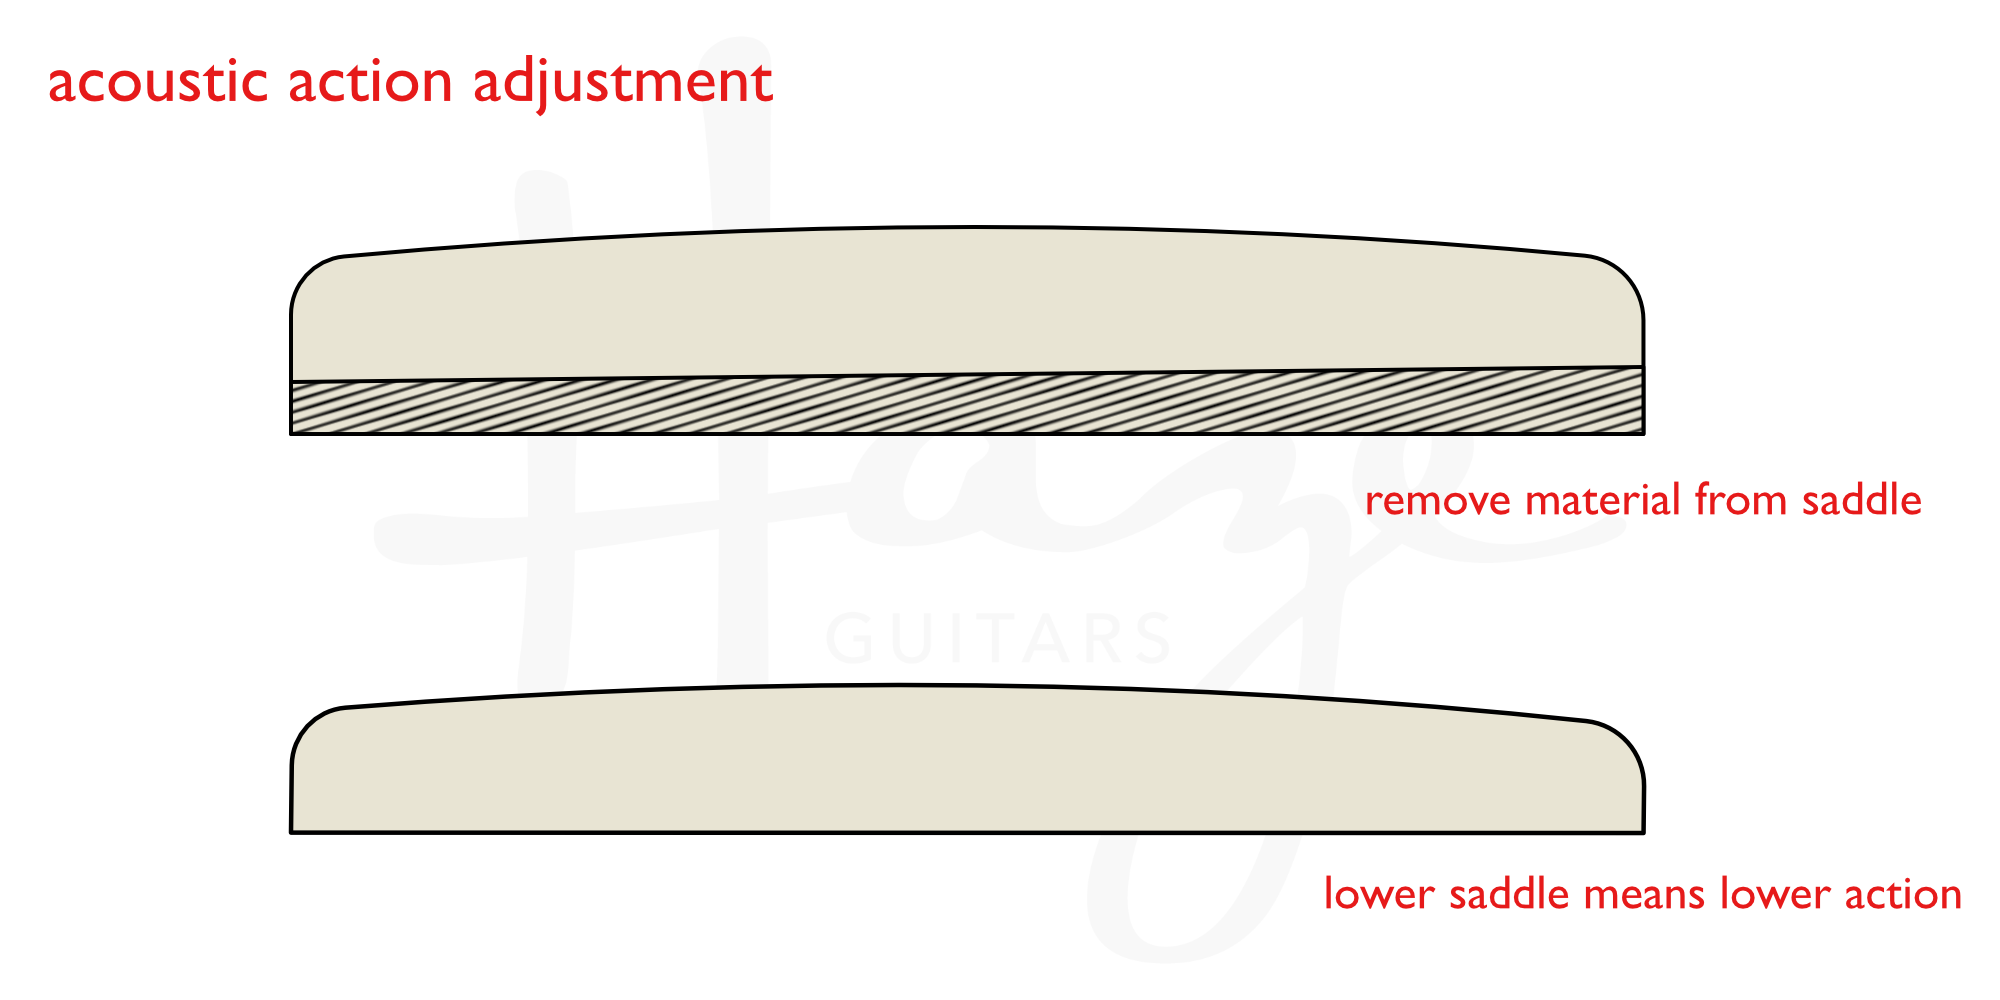
- Use fine-grit sandpaper on a flat surface to sand the bottom of the saddle evenly.
- Reinstall and test the action; take your time, as removing too much material is a permanent mistake.
Step-by-step: Check neck relief first
1. Tune the guitar to pitch. 2. Press the low E at the first and fourteenth frets. 3. Look at the gap at the seventh fret. A gap about the thickness of a business card (0.1–0.3 mm) is normal for many players. 4. If the gap is large, the neck has too much relief (a bow). You can tighten the truss rod to reduce it. Make small turns—about 1/8 to 1/4 turn—then let the neck settle and recheck.
Step-by-step: Adjust the truss rod safely
Turn the truss rod nut slowly and in small increments. Clockwise to reduce relief (flatten the neck). Counterclockwise to add relief (increase bow). After each small turn, tune the guitar and wait a few minutes for the neck to settle. Re-measure and repeat until the desired relief is reached. If you feel resistance or hear cracking, stop and consult a pro.
Step-by-step: Lowering the saddle
If your neck relief is correct and the action is still too high, lower the saddle height. Take the saddle out gently. Keep any pickup wires or saddle pins in place if present. Place the saddle on a flat board. Sand the bottom evenly with fine-grit sandpaper. Remove a little material at a time. Refit the saddle and tune. Test as you go. Play every fret on each string to check for buzz and tone changes. If you sand too much, you must replace the saddle.
Knowing how do you lower the action on an acoustic guitar requires patience. Take tiny steps. Test after each change. Removing too much material is permanent. A new saddle or pro setup will be needed if you go too far.
How to measure final action
Measure string height at the twelfth fret. A common measure is about 2.5mm under the low E and 2.0mm under the high E. These are starting points. Adjust to taste based on your playing style and string gauge. Use a ruler made for guitars or a precise caliper for best results.

Signs That Your Action Needs Adjustment
Not every guitar needs a lower setup. If you enjoy a heavier touch or use a slide, higher action may be better. But lower the action if you see these signs:
- Your hand cramps quickly during practice.
- You must push strings far down just to fret a note, causing sharp pitch.
- Chords buzz or intonation is off across the neck.
- Fast runs feel stiff and sloppy because the strings feel too high.
Pay attention to picking and attack. Aggressive players often need higher action to avoid buzz. Light, fingerstyle players can push action lower for speed. After each adjustment, play across the entire neck. Check each fret for clarity.
When higher action is preferable
If you use alternate tunings, heavy gauge strings, or lap-style playing, you may want higher action. Also, older guitars with worn frets sometimes need higher action until the frets are leveled or replaced.

Frequently Asked Questions of how do you lower the action on an acoustic guitar
Can I damage my guitar while lowering the action?
Yes. Sanding the saddle too much can cause permanent fret buzz and poor tone. Go slowly and test often. If you are unsure, a professional setup is worth the cost.
Does adjusting the truss rod lower the action?
The truss rod controls neck relief. Fixing a bowed neck can lower action indirectly. Always check the truss rod before altering the saddle.
How low should my strings be?
Many players like about 2.5mm under the low E and 2.0mm under the high E at the twelfth fret. These numbers are a guideline. Adjust for string gauge, playing style, and preferred feel to avoid buzzing.
Is it safe to file the nut slots?
Filing the nut is precise work. It needs the right files and experience. Bad nut work causes first-fret buzz or tuning problems. If you lack tools or skill, leave the nut to a tech and stick to saddle or truss rod adjustments.
How do I know if my saddle is too low?
If you hear buzzing on many frets or the strings sit almost flush with the bridge, the saddle is too low. In that case, you likely need a new saddle or a professional setup to restore correct action and tone.
When to call a pro
Seek professional help if any of these apply: major neck warping, cracked top near the bridge, persistent buzz after adjustments, or if you lack the right tools. A tech can also check fret wear, correct intonation, and install a properly shaped saddle if needed.
Common mistakes to avoid
- Removing too much saddle material at once. Take tiny amounts off.
- Over-tightening the truss rod too fast. Make small turns and wait between adjustments.
- Ignoring string gauge changes. Heavier strings change neck relief and action.
- Not checking intonation and playability across the whole neck after changes.
Conclusion
Adjusting your guitar setup is a rewarding step toward better playing. Now that you understand the basics of how do you lower the action on an acoustic guitar, you can make careful changes that improve comfort and tone. Take small, steady steps. Measure often. If you need help, bring your guitar to a trusted tech. Enjoy the process of shaping your instrument to fit your hands and your sound. If you found this guide helpful, try a small, safe adjustment today and notice how much easier the guitar can feel.

Senior Music Reviewer
Alex Carter is a seasoned music reviewer with over a decade of experience in the world of sound and instruments. Passionate about helping musicians and enthusiasts make informed choices, he brings sharp insights and in-depth knowledge to every review. From classical instruments to modern gear, Alex combines technical expertise with a love for music to deliver content that resonates with readers.
As a Senior Music Reviewer and expert author on Tuneluma.com, Alex is dedicated to sharing honest evaluations, practical advice, and thoughtful commentary to guide readers in their musical journey.