Where To Put Piano Stickers: Best Placement Guide
Put piano stickers directly above the keys, centered over each note, and never on the moving key surfaces.
Knowing where to put piano stickers can make early practice much easier. The right placement helps beginners connect letter names, finger movement, and the keyboard layout without creating bad habits. This guide explains safe sticker positions, the best method for different learners, common mistakes, and when to remove them.
Why Piano Stickers Can Help Beginners
Piano stickers are small labels that show note names such as A, B, C, D, E, F, and G. They give beginners a visual guide while they learn the keyboard. For many students, this support reduces stress during the first few weeks of practice.
The piano has repeating patterns. Two black keys sit together, followed by three black keys. The white key just to the left of a group of two black keys is C. Once a learner understands this pattern, the keyboard becomes much less confusing.
Piano stickers work best as a temporary learning tool. They should support memory, not replace it. A student should slowly learn to find notes by using the black-key pattern, intervals, and sheet music.
In my experience helping new players, stickers are most useful during the first stage of learning. They are like training wheels on a bike. They offer support at first, but the goal is to ride without them.
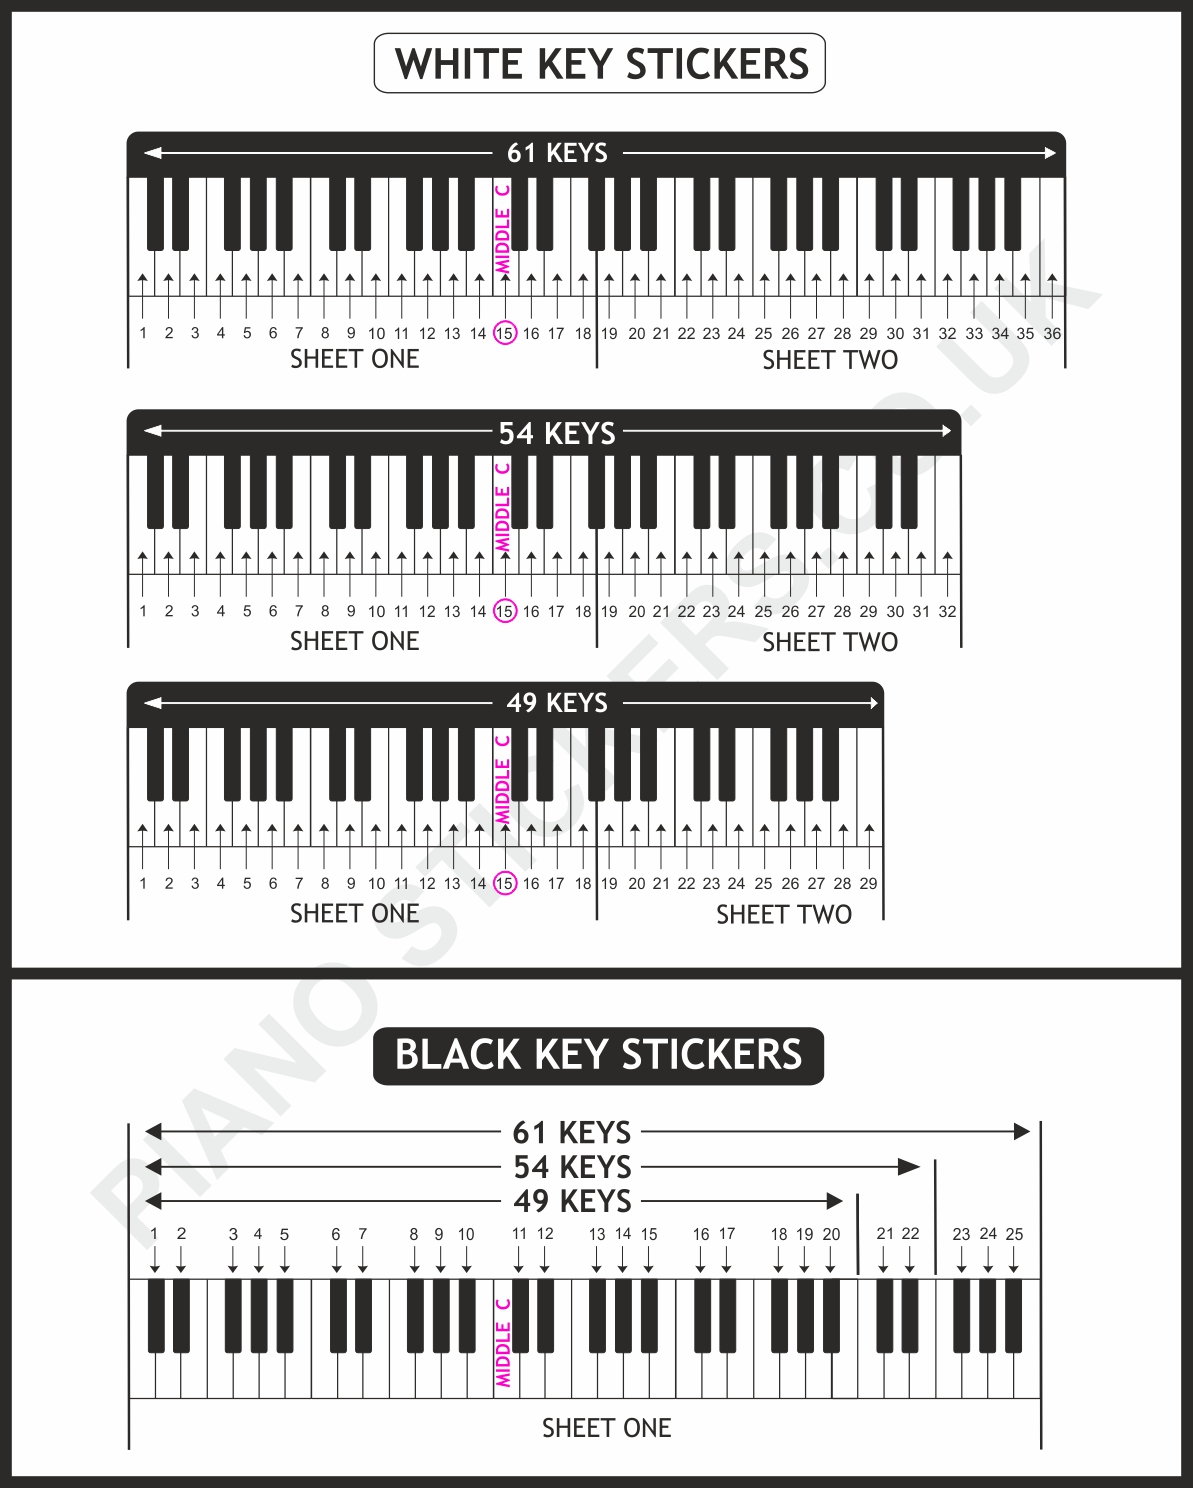
Where to Put Piano Stickers on a Keyboard
The best place for piano stickers is the front edge or upper surface of the white keys, close to the fallboard or back of the keyboard. The label should be easy to see but should not touch the area where the finger presses.
If you are deciding where to put piano stickers, use this simple rule: place each label above the middle of its matching white key. Keep the sticker straight and leave enough space for the finger to press the key naturally.
Follow these steps:
- Clean the key gently with a dry, soft cloth.
- Find the center of the white key.
- Place the sticker near the top edge of the key.
- Press it down lightly.
- Check that the sticker does not cover a gap between keys.
- Test the key by playing it several times.
The label should sit flat. It should not hang over the side of the key. A sticker that overlaps two keys can confuse a learner and may catch on nearby keys.
For most keyboards, the safest position is the upper flat area of the white key. Avoid placing stickers on the front vertical face. That area receives more contact from hands and can make the labels peel faster.

Should Piano Stickers Go on White Keys or Black Keys?
Most beginners should place piano stickers on the white keys only. White keys carry the basic letter names, while black keys represent sharp and flat notes. Labeling every black key can make the keyboard look crowded.
The white keys use seven letter names:
• A
• B
• C
• D
• E
• F
• G
This pattern repeats across the full keyboard. Once the white keys are familiar, students can learn black-key names through the notes around them. For example, the black key between C and D can be called C-sharp or D-flat.
There are a few cases where black-key stickers may help. A teacher may use them for a short lesson on sharps, flats, scales, or key signatures. Even then, use small, removable labels and remove them once the concept is clear.
When considering where to put piano stickers, remember that less is often better. A clean keyboard gives the player room to notice patterns. Too many labels can turn the keyboard into a wall of text.

How to Label the Piano Correctly
Start with middle C. On a standard piano, middle C is near the center of the keyboard. It sits just to the left of a group of two black keys.
From middle C, the white keys move in this order:
• C
• D
• E
• F
• G
• A
• B
• C again
After finding middle C, label the nearby white keys first. You do not always need to label the full keyboard. A small range around middle C is often enough for a beginner.
Use clear letters that are large enough to read but small enough to fit the key. Uppercase letters are usually easiest for young learners. Some families use colored stickers, but color should not replace the note name.
Before labeling, check the keyboard manual. Some digital pianos have textured surfaces, special coatings, or touch controls near the keys. On an acoustic piano, take extra care because the finish may be sensitive to adhesive.
A useful test is to place one sticker on an unseen or less important area first. Leave it for a short time, then remove it gently. If it leaves residue, do not use that sticker set on the instrument.

The Best Sticker Position for Children
Children often look down while they play, so the stickers should be visible from a natural sitting position. Place them high enough on the white keys for the child to see the letters without bending too far forward.
If you are learning where to put piano stickers for a child, avoid placing them close to the front edge. Young players may rub that area with their fingers, which can lift the sticker or leave sticky residue.
Keep the label centered. A child should be able to see one clear letter on one clear key. This simple visual link can make early lessons feel more manageable.
You can also use a gentle learning routine:
- Ask the child to find all the C notes.
- Play a short pattern using C, D, and E.
- Cover one sticker and ask the child to name the note.
- Remove one or two stickers each week.
- Practice finding notes through the black-key groups.
This method turns stickers into a bridge toward independent playing. It also helps prevent the child from staring at every label during a song.

Where to Put Piano Stickers on a Digital Piano
Digital pianos often have smooth plastic keys, so removable stickers may work well. The safest location is still the upper back area of each white key, away from the front edge and away from seams.
Before applying anything, check the digital piano’s care instructions. Some manufacturers warn against adhesive products because glue can damage the surface or leave marks.
For a digital keyboard with narrow keys, choose small stickers. Standard piano stickers may be too wide and can overlap nearby keys. Overlapping labels are one of the most common placement errors.
For a portable keyboard, place stickers only on the keys used in the lesson. A beginner may need just one octave. This keeps the instrument neat and makes it easier to remove the labels later.
If the keyboard has built-in lights or touch-sensitive controls, do not cover them. Keep stickers away from buttons, display panels, and moving parts.

Where Not to Put Piano Stickers
Correct placement matters because piano keys need to move freely. Avoid any location that can interfere with the key mechanism or the player’s hand position.
Do not place stickers:
• Between two keys
• Across the gap between white and black keys
• On the black keys unless necessary
• On the front vertical edge of the keys
• Under the keys
• On pedals or control buttons
• Over chipped, cracked, or damaged surfaces
• On areas that become warm from lights or electronics
Never push a sticker into a key gap. Even a small piece of adhesive can collect dust. It may also become difficult to remove.
Avoid permanent labels on an acoustic piano unless a qualified technician approves them. Piano keys are designed to remain smooth and clean. Permanent adhesive can affect the finish and may reduce the instrument’s appearance.
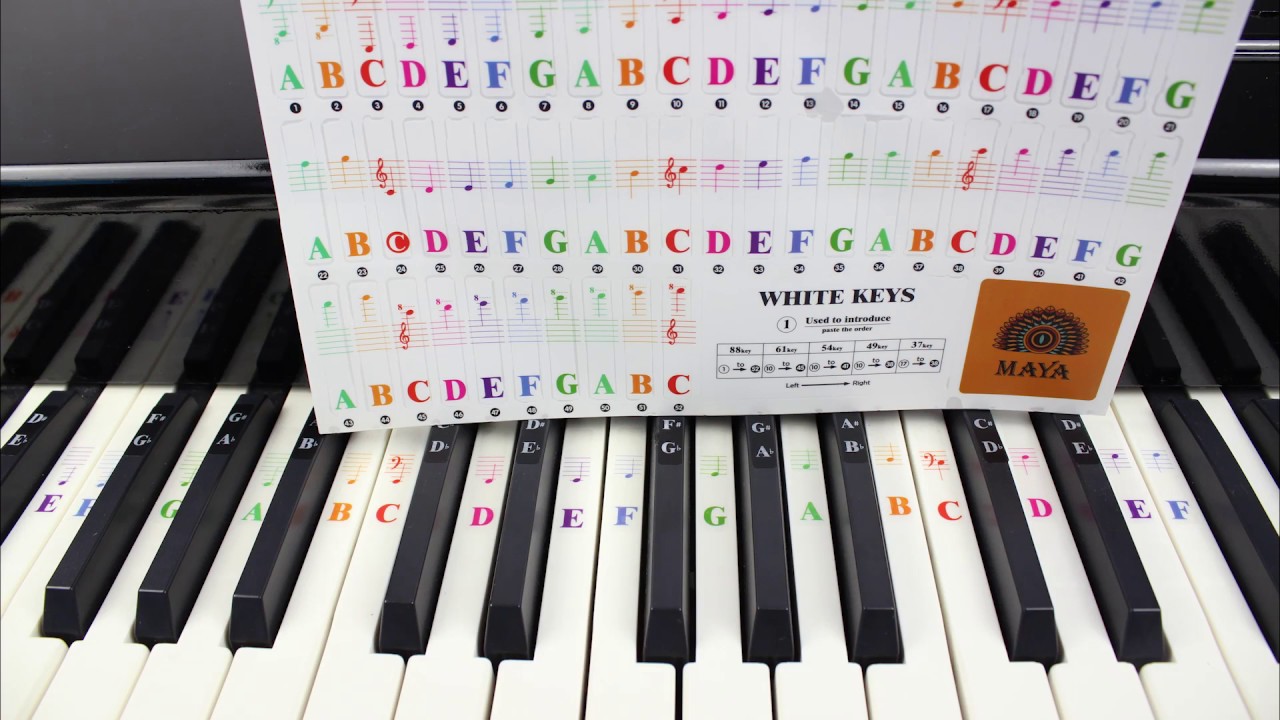
Removable Stickers Versus Permanent Labels
Removable piano stickers are usually the better choice for beginners. They allow students to use visual help for a short period and then remove it as their skills improve.
Look for labels that are:
• Made for musical instruments
• Easy to read
• Thin and smooth
• Clearly marked with note names
• Removable without strong adhesive
• Sized for the keyboard you own
Permanent labels may seem convenient, but they can create long-term problems. They may leave glue behind, fade over time, or make the player dependent on written letters.
A practical approach is to use removable stickers for two to eight weeks. The exact time depends on the learner. Some students need only a few practice sessions, while others benefit from a longer transition.
The goal is not to remove every sticker quickly. The goal is to remove them when the player can find common notes with less help.

Common Mistakes When Applying Piano Stickers
One common mistake is labeling the keys before finding middle C. If the first label is wrong, every other label may be wrong too. Always identify the black-key pattern first.
Another mistake is putting the stickers too low. Labels near the front edge are more likely to peel and may feel uncomfortable under the fingers.
Some people also use too many colors. While color can make notes fun for children, a complicated color system may distract from reading music. Use color as a small aid, not as the main learning system.
Other errors include:
• Using labels that are too large
• Covering the black-key spaces
• Applying stickers to dirty keys
• Pressing labels down too firmly at first
• Leaving stickers on for years without a plan
• Failing to teach note patterns
In my experience, the biggest issue is not the sticker itself. It is relying on the sticker instead of learning the keyboard layout. I have seen beginners improve faster when teachers cover one label at a time and ask them to find the note by pattern.
How to Remove Piano Stickers Safely
Remove stickers slowly and gently. Start at one corner and pull at a low angle rather than lifting straight up. This reduces the chance of leaving adhesive behind.
If a sticker feels difficult to remove, stop pulling. Do not scrape the key with a knife, fingernail, or metal tool. Sharp objects can scratch the surface.
For residue, use a soft, dry cloth first. If the keyboard maker allows mild cleaning products, follow the manufacturer’s instructions. Never spray liquid directly onto piano keys.
An acoustic piano may need extra care. Natural wood finishes, plastic keytops, and painted surfaces can react differently to cleaners. When unsure, ask a piano technician before using any product.
After removal, play each key and check that it moves normally. A clean, smooth key is ready for regular practice.
When Should You Remove Piano Stickers?
Remove piano stickers when the player can find basic notes without looking at every label. This may happen after a few weeks or after several months.
Good signs include:
• The player finds middle C quickly
• The player recognizes groups of two and three black keys
• The player reads simple notes from sheet music
• The player can play short patterns without stopping
• The player checks fewer labels during practice
You can also remove stickers in stages. Take off the notes used most often first. Leave a few labels for support, then remove the rest later.
Teachers often use this gradual approach because it builds confidence without creating a sudden challenge. The learner keeps moving forward while slowly developing memory.
Do Piano Stickers Help Adults Learn?
Yes. Adults can also benefit from piano stickers, especially when learning basic note names or returning to music after many years. The labels can reduce the mental load during early practice.
However, adults should also learn keyboard patterns and music reading from the beginning. Stickers are helpful reminders, but they should not become the only way to find notes.
Adults may prefer small, discreet labels placed near the top of the keys. This keeps the piano looking clean while still offering visual support during practice.
The best choice depends on the learner’s goal. A hobby player may use stickers for comfort, while a serious student may remove them sooner to build stronger note recognition.
Frequently Asked Questions About Where to Put Piano Stickers
Where exactly should piano stickers go?
Place each sticker near the upper center of its matching white key. Keep it away from the front edge, key gaps, and moving parts.
Should I put stickers on all piano keys?
Usually, no. Start with the white keys around middle C and expand only if the learner needs more help.
Can piano stickers damage the keys?
Removable stickers made for instruments are usually safer, but damage is still possible on sensitive finishes. Test one sticker first and follow the piano manufacturer’s care instructions.
Should middle C have a sticker?
Yes, middle C is a useful starting point. Find it just to the left of the pair of black keys near the center of the keyboard.
How long should piano stickers stay on?
Keep them on until the learner can find common notes with less help. Remove them gradually rather than waiting until the player becomes fully dependent on them.
Can I use regular office stickers?
It is better to use removable stickers designed for keyboards or musical instruments. Office stickers may leave residue, peel easily, or use adhesive that is too strong.
Conclusion
The safest answer to where to put piano stickers is simple: place small, removable labels near the upper center of the white keys, away from gaps and moving surfaces. Start with middle C, use the black-key pattern as a guide, and label only the notes the learner needs.
Piano stickers can build early confidence, but they should support learning rather than replace it. Use them as temporary training wheels, remove them in stages, and keep practicing note patterns without visual help.
Try the placement method today, test one sticker before labeling the full keyboard, and share your learning experience or explore more beginner piano resources.

Senior Music Reviewer
Alex Carter is a seasoned music reviewer with over a decade of experience in the world of sound and instruments. Passionate about helping musicians and enthusiasts make informed choices, he brings sharp insights and in-depth knowledge to every review. From classical instruments to modern gear, Alex combines technical expertise with a love for music to deliver content that resonates with readers.
As a Senior Music Reviewer and expert author on Tuneluma.com, Alex is dedicated to sharing honest evaluations, practical advice, and thoughtful commentary to guide readers in their musical journey.