How To EQ A Drum Set: Pro Mixing Tips
To EQ a drum set, balance each drum’s tone, control harsh frequencies, and make the kit fit the full mix.
Learning how to EQ a drum set is less about making every drum loud and more about giving each part a clear role. A kick drum needs weight and attack, while a snare needs body and crack. Toms should sound full without clouding the bass, and cymbals should stay bright without becoming painful. This guide explains a practical drum EQ method for live sound, home recording, and studio mixing.
What EQ Does for a Drum Set
EQ, or equalization, changes the level of selected frequency ranges. It can add warmth, remove mud, improve attack, or reduce harsh tones. EQ does not fix every drum problem, though. Poor tuning, bad microphone placement, room noise, and uneven playing often need attention first.
Think of a drum mix like a busy kitchen. Every ingredient must have space. If the kick, bass guitar, floor tom, and low room sound all occupy the same range, the mix may feel thick and unclear. Smart EQ creates room without making the kit sound thin.
When you EQ a drum set, focus on these four goals:
• Remove unwanted rumble and noise.
• Shape the drum’s natural tone.
• Create space between nearby instruments.
• Make the kit sound balanced at a normal listening level.
A good EQ move is often small. A cut of 2 to 4 decibels can solve a problem that a large boost may make worse. Always listen before and after the change, and match the volume when comparing settings.

Prepare the Drum Tracks Before EQ
The best drum EQ starts before you open an equalizer. A well-tuned kit and a clean recording need far less processing. This saves time and keeps the drums natural.
Tune and damp the drums
Tune the kick, snare, and toms before recording or soundcheck. Each drum should produce a clear note without excessive ringing. Use small amounts of dampening when needed, but avoid covering the head with too much tape or heavy material.
A kick drum with a loose head may produce a long, boomy tail. A snare with a worn head may sound dull and unstable. EQ cannot fully repair these issues.
Check phase and polarity
When you use more than one microphone on a drum, the signals may interact. If the waveforms are out of alignment, the drum can lose low end or sound hollow. Flip the polarity on one microphone and listen for a stronger, fuller sound.
For overheads and room microphones, check the entire kit in mono. If the drums become much smaller in mono, phase problems may be affecting the recording.
Set gain before EQ
Keep healthy levels during recording and mixing. Avoid clipping the preamp or channel input. Digital systems often sound best when you leave enough headroom for loud hits and later processing.
I once spent nearly an hour trying to add punch to a kick track that was simply recorded too hot. Lowering the gain and resetting the compressor solved more than any EQ curve could. This is a common lesson: fix the signal path before shaping the sound.
Clean unnecessary noise
Use high pass filters to remove low rumble from microphones that do not need deep bass. Check for stand noise, headphone bleed, air conditioning, and unwanted cymbal spill. Do not remove useful low frequencies just because they look busy on a spectrum analyzer.
How to EQ a Kick Drum
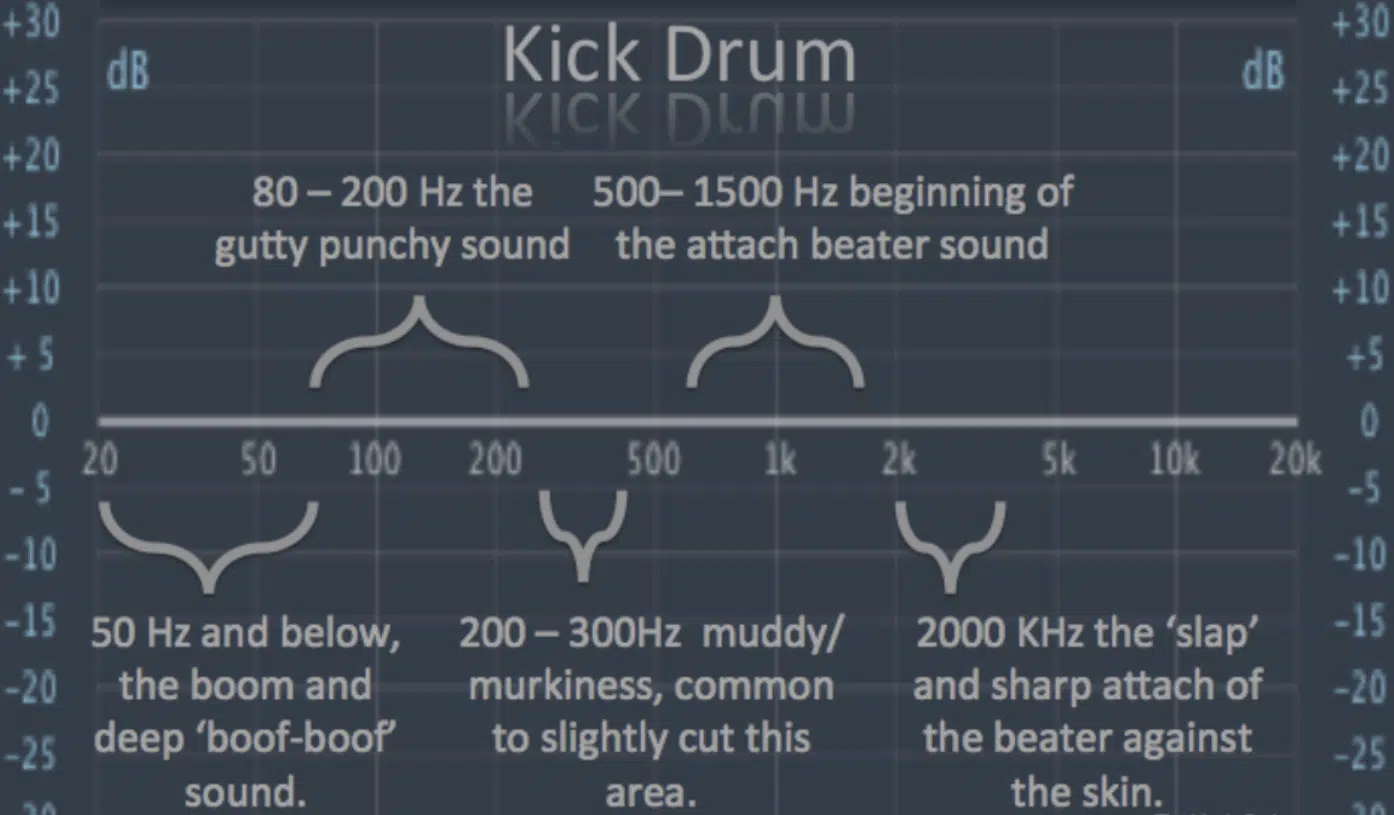
The kick drum usually provides low end, pulse, and impact. Its ideal tone depends on the song, the tuning, the microphone, and the bass instrument. A rock kick may need deep weight and a sharp beater click. A jazz kick may need a round, open tone with less aggressive attack.
A practical kick drum EQ approach looks like this:
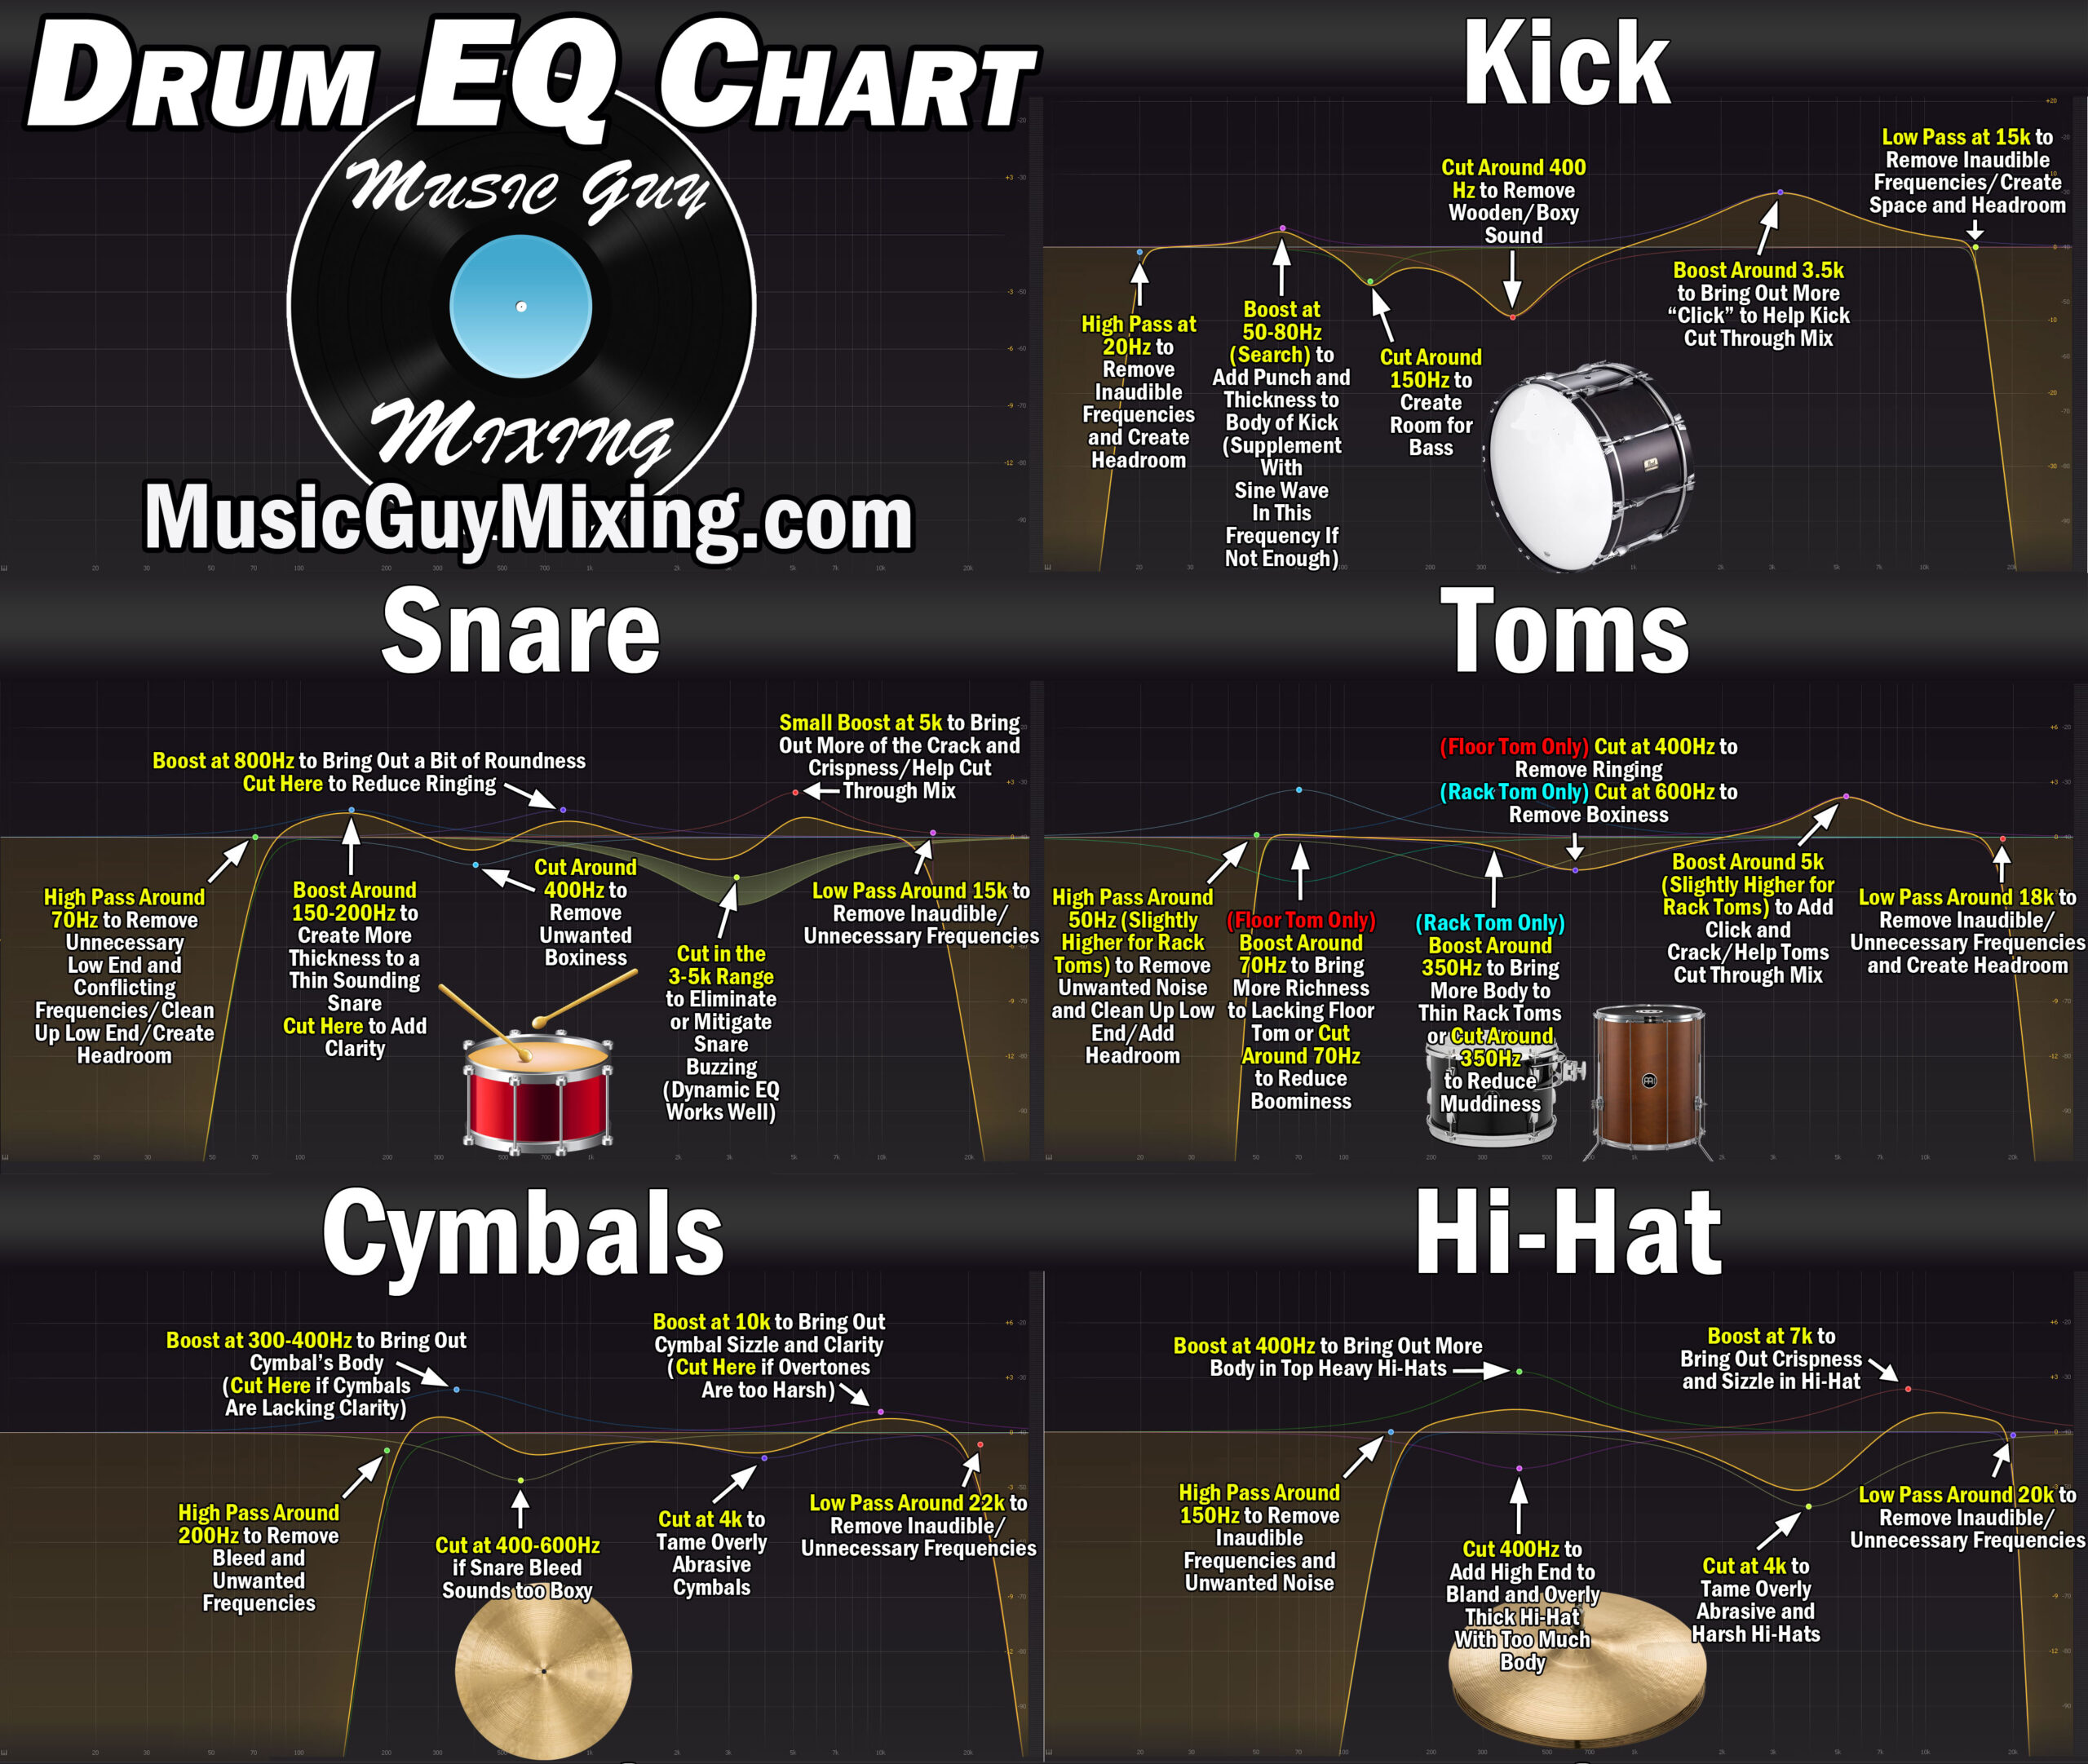
• Start with a high pass filter around 25 to 35 Hz to remove subsonic rumble.
• Search around 50 to 80 Hz for the main low end and body.
• Cut around 200 to 350 Hz if the kick sounds muddy or boxy.
• Boost around 2.5 to 5 kHz for beater attack and definition.
• Reduce 5 to 8 kHz if the beater sounds too hard or clicky.
The exact frequency depends on the drum. A large kick may feel strongest near the lower end of that range. A small kick may have more useful punch higher up.
Do not boost low end automatically. First, listen to the bass guitar and kick together. If both instruments fight around 60 Hz, choose which one should own that area. You may cut the bass slightly at the kick’s main frequency, or shape the kick so its attack speaks above the bass.
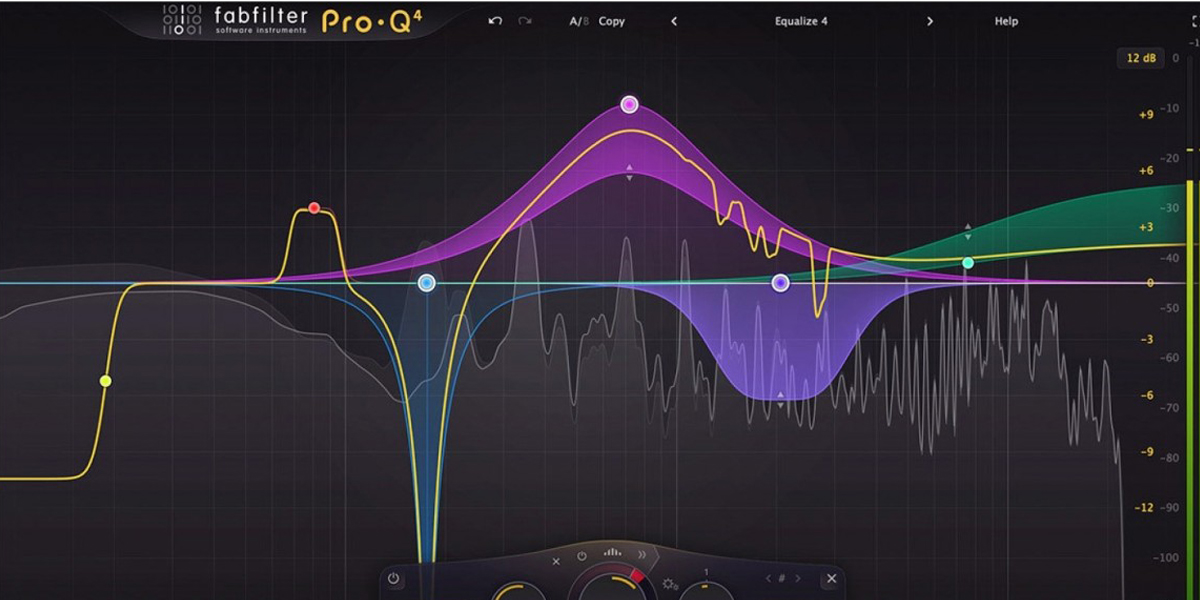
A narrow cut can remove a ringing tone, but a wide, gentle move often sounds more natural. Use a spectrum analyzer as a guide, not as a judge. Your ears decide whether the kick works.

How to EQ a Snare Drum
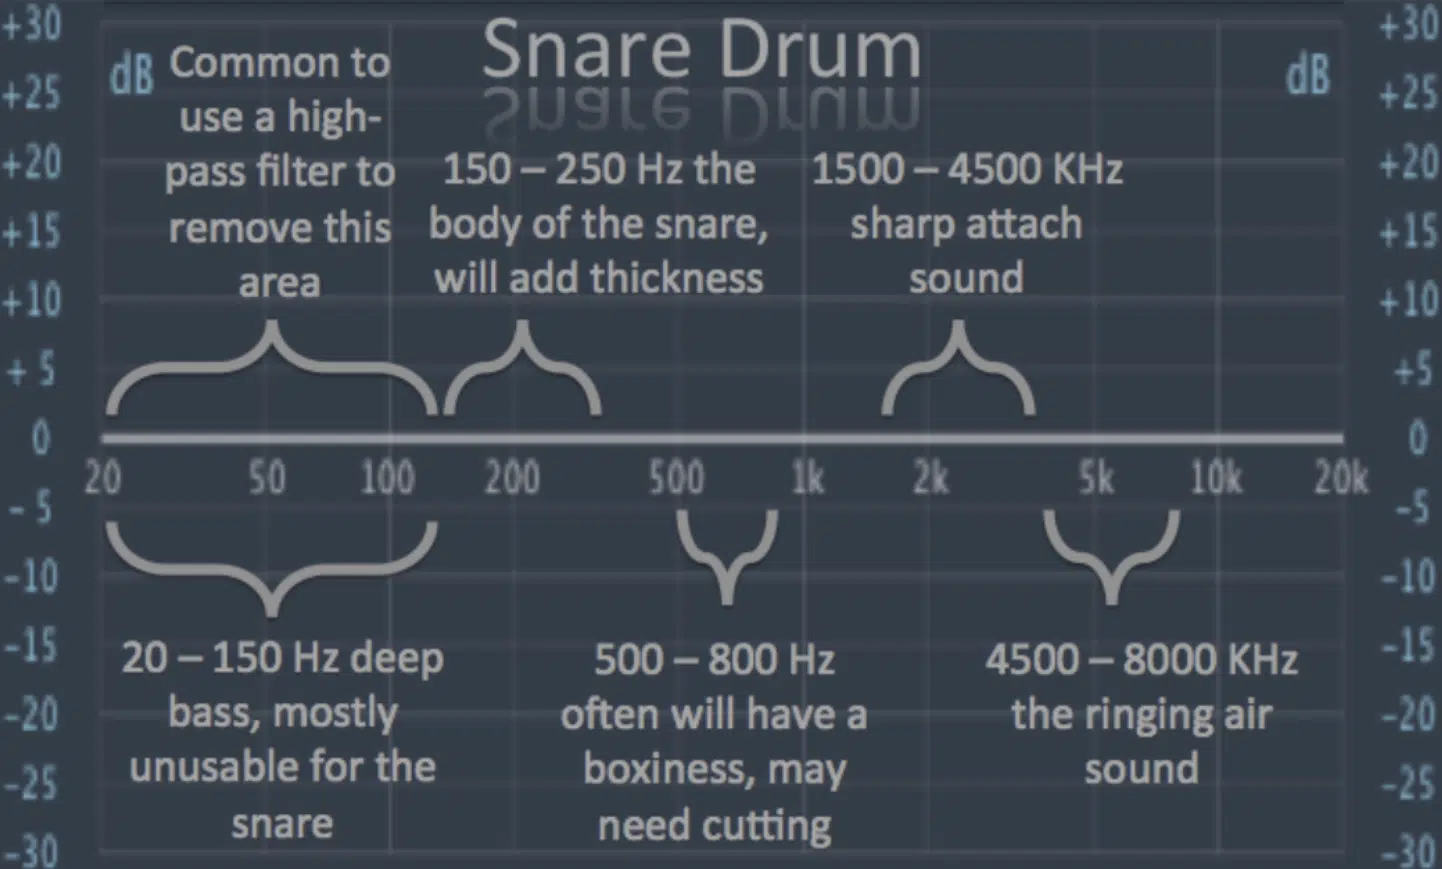
The snare often carries the backbeat, so it must remain clear and energetic. A useful snare sound has some body, a strong midrange voice, and enough top end for wires and stick attack.
When you EQ a snare drum, try these starting points:
• Use a high pass filter around 70 to 100 Hz to remove rumble.
• Look around 120 to 220 Hz for body and fullness.
• Cut around 300 to 600 Hz if the snare sounds boxy or cloudy.
• Boost around 1 to 2.5 kHz for note and stick presence.
• Boost around 4 to 8 kHz for snap and brightness.
• Reduce 7 to 10 kHz if the wires sound sharp or fizzy.
The snare’s fundamental pitch can change with tuning. A low-tuned snare may need more support in the lower mids, while a tight, high-tuned snare may need less body and more control in the upper range.
Be careful with large high-frequency boosts. They may make the snare sound exciting for a few seconds, but they can also increase cymbal bleed and listener fatigue. I prefer to remove a small amount of boxiness before adding top end. The result usually feels louder without actually using more level.
For a live mix, consider the vocal. If the snare and vocal both dominate the upper mids, a small cut in one source can make the whole mix clearer.
How to EQ Toms
Toms should sound deep, clear, and musical. They often need less EQ than people expect. Start by removing noise between hits with editing, gates, or careful automation. Then shape the tone only when the toms need help.
Useful tom EQ ranges include:
• High pass filtering below 50 to 80 Hz, depending on the tom size.
• Low and low-mid body around 80 to 180 Hz.
• Mud control around 250 to 500 Hz.
• Attack and stick definition around 3 to 6 kHz.
• Ring control in the midrange when a specific note becomes distracting.
Large floor toms may have useful energy near 60 to 100 Hz. Rack toms often speak higher, between roughly 100 and 220 Hz. These are starting points, not fixed rules.
To remove a ringing note, sweep a narrow EQ band until the problem becomes obvious. Then cut that frequency moderately. Do not leave the boost in place. This sweep-and-cut method helps identify unwanted resonance without guessing.
Listen to tom fills in the full song. A tom may sound slightly plain by itself but sit perfectly in the mix. Solo mode is useful for finding problems, but the final decision should happen with the entire arrangement playing.
How to EQ Cymbals and Overheads
Overhead microphones capture cymbals, stereo width, and much of the kit’s natural balance. They are not just “cymbal microphones.” Heavy EQ changes can affect the whole drum set.
Start with a high pass filter around 150 to 300 Hz if the overheads contain too much kick, tom, or room buildup. The correct point depends on whether the overheads provide important low-end information.
If the cymbals sound harsh, look in the upper mids and highs:
• Reduce 2.5 to 5 kHz for aggressive stick attack.
• Reduce 5 to 8 kHz for sharp or brittle cymbals.
• Reduce 8 to 12 kHz for excessive hiss or fizz.
• Add a small high shelf above 10 kHz only when the overheads sound dull.
Avoid boosting the high end simply because bright cymbals sound impressive in solo mode. In a full mix, too much treble can mask vocals and make the listener tired.
I once mixed a kit where the overheads sounded dull when soloed. I added a wide high shelf, then played the vocal. The vocal became hard and thin. Removing most of the boost made the entire mix feel warmer, even though the cymbals sounded less dramatic alone.
How to EQ Room and Mono Drum Tracks
Room microphones add size, depth, and character. They can also add low-end buildup, boxiness, and harsh reflections. Treat room tracks as tone and space, not as a requirement for every mix.
For room microphones, try these moves:
• Use a high pass filter to reduce floor rumble and uncontrolled low end.
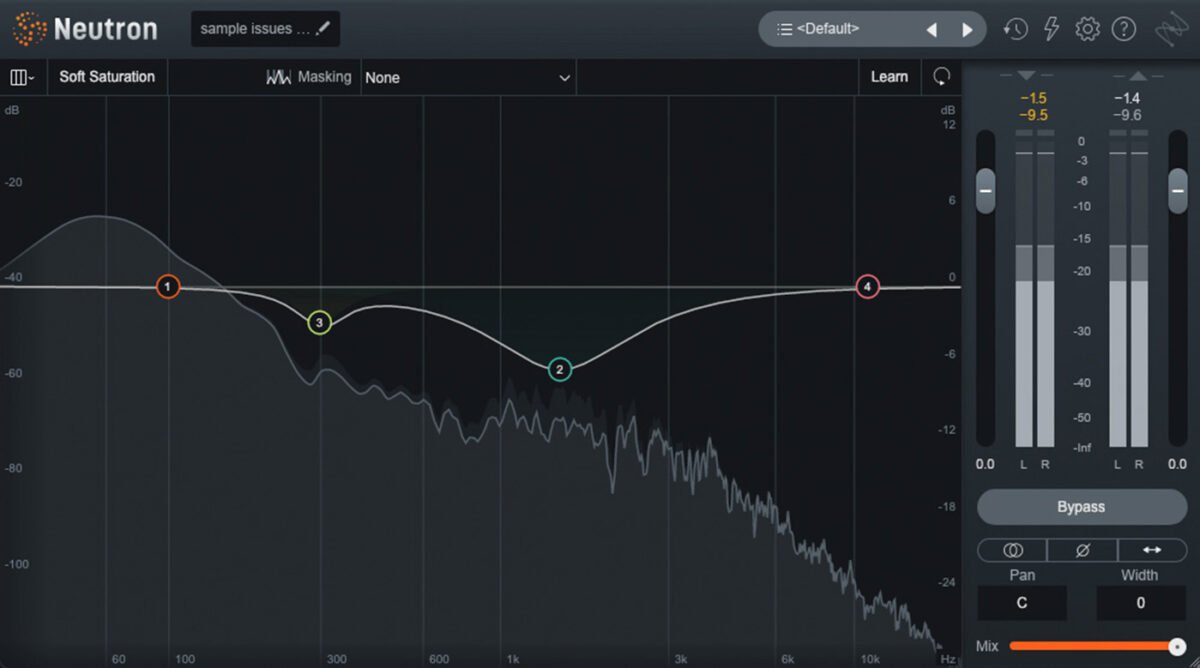
• Cut muddy areas around 200 to 400 Hz when the kit sounds cloudy.
• Reduce harsh reflections around 2 to 5 kHz if the room sounds hard.
• Add a gentle high shelf only when the room needs more air.
A mono room track can make a drum set feel powerful when compressed. However, compression also brings up cymbal wash and background noise. EQ before compression can prevent the compressor from reacting too strongly to unwanted low or high frequencies.
If the room sounds bad, use less of it. A dry close-mic mix with a short, controlled reverb may sound better than a loud room track. Every recording space has limits, and honest mixing means working with those limits instead of hiding them with extreme processing.

Use Subtractive EQ Before Boosting
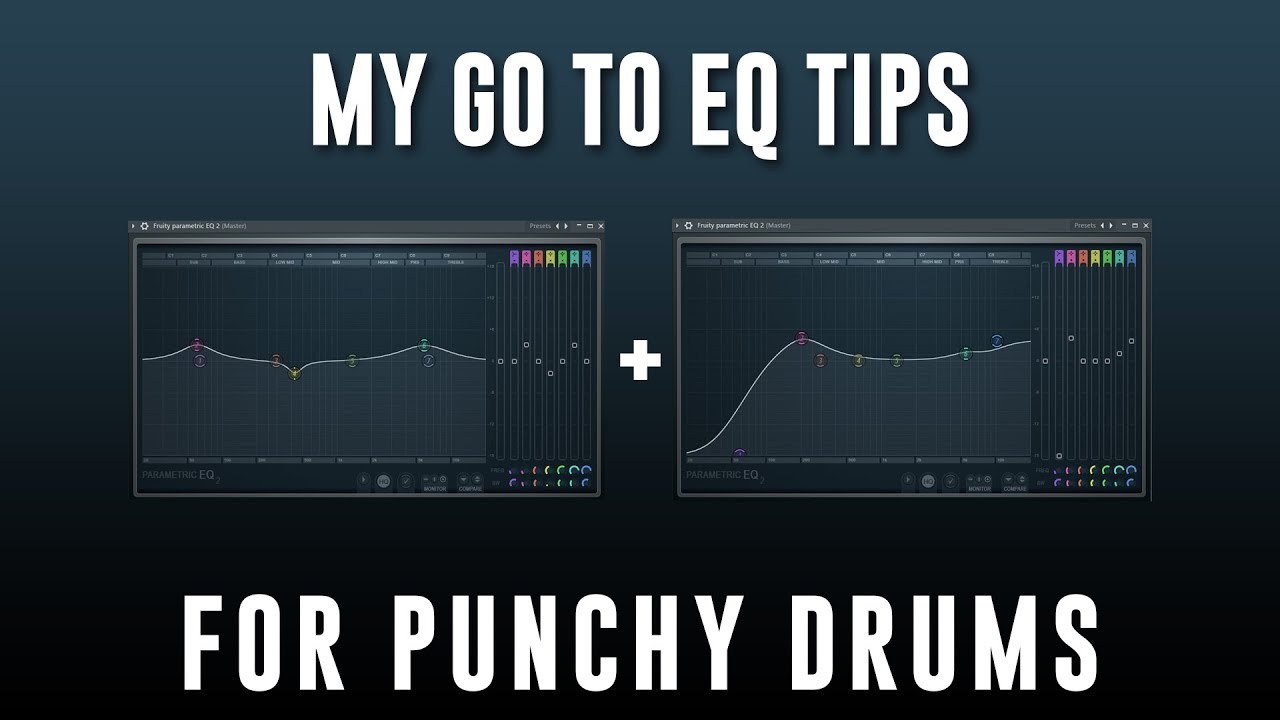
Subtractive EQ means cutting unwanted frequencies rather than adding many boosts. It is often the fastest way to make a drum set sound cleaner.
A simple process is:
-
Solo the drum and listen for the main problem.
-
Use a narrow band to find the harsh, muddy, or ringing area.
-
Cut that area by 2 to 5 decibels.
-
Widen the EQ band if the cut sounds too surgical.
-
Bring the full mix back in and adjust the amount.
Large cuts can make a drum sound unnatural. If you need to remove 10 decibels or more, check the microphone position, drum tuning, phase, and source recording.
Boosting can still be useful. A gentle low shelf may add weight to a kick. A wide upper-mid boost may improve snare presence. The key is to boost with a clear purpose, not because the EQ curve looks more exciting.
Create Space Between Drums and Other Instruments
Drum EQ is part of the full arrangement. A kick can sound excellent alone but fail when the bass enters. A snare can sound bright alone but cover the vocal in the chorus.
Use these questions while mixing:
• Which instrument should lead the low end?
• Does the kick need deep weight or upper attack?
• Is the bass covering the kick’s punch?
• Are guitars hiding the snare’s presence?
• Are cymbals competing with the vocal?
You do not need to carve every instrument aggressively. Small, complementary cuts can create space. For example, you might reduce a little low midrange from a rhythm guitar while keeping the snare natural.
Sidechain compression can also help. A bass compressor may reduce slightly when the kick hits, allowing the kick to speak without a large EQ boost. This is not always needed, but it can help in dense modern productions.
Remember that arrangement matters. If every instrument plays in the same register, EQ can only do so much. Sometimes muting a part or changing its octave creates more clarity than another plugin.
A Step-by-Step Drum EQ Workflow
This workflow works well for home studios, rehearsal recordings, and live drum channels.
-
Listen to the full kit without EQ. Write down the main problems.
-
Check tuning, microphone placement, phase, and gain levels.
-
Apply high pass filters where low-end information is not useful.
-
Remove obvious mud, boxiness, ringing, or harshness.
-
Shape each drum for its role in the song.
-
Balance the close microphones with overheads and room tracks.
-
Bring in the bass, guitars, keys, and vocals.
-
Make small EQ changes to create space between instruments.
-
Bypass the EQ often to confirm that the change helps.
-
Compare at low volume and at a moderate level.
-
Check the mix in mono, headphones, speakers, and a normal consumer system.
-
Save a version before major changes so you can return to a trusted point.
When you EQ a drum set, avoid making decisions in isolation for too long. The full mix is the final test. A drum that sounds plain alone may be exactly right once the song is playing.
Common Drum EQ Mistakes to Avoid
Boosting every drum
If every channel receives a low boost and a high boost, the mix can become crowded and tiring. Give each drum a different job instead.
Cutting too much low end
High pass filters are useful, but aggressive filtering can remove the natural body of toms, kick, and room microphones. Raise the filter only until unwanted rumble disappears.
Chasing a frequency by sight
A spectrum analyzer shows energy, not quality. A strong peak may be the drum’s musical note. Use your ears and the arrangement to decide what stays.
Mixing only in solo
Solo mode helps you identify problems. It does not tell you whether the drum fits the song. Make final EQ choices with the full mix playing.
Adding too much treble
Cymbals and snare wires already contain strong high frequencies. Too much top end can cause hiss, fatigue, and harshness after mastering.
Using EQ to fix bad performances
Uneven hits, poor tuning, and unwanted bleed may need editing, retuning, gating, or better microphone placement. EQ is powerful, but it is not magic.
EQ Settings for Different Drum Styles
There is no universal drum EQ preset. Genre, room, player, and production goals all change the right answer.
Rock and pop
Rock and pop drums often benefit from a punchy kick, a clear snare, controlled toms, and bright overheads. Moderate cuts in the low mids can help the kit stay clear beside guitars and bass.
Hip-hop and electronic-influenced music
The kick may need deep sub weight and a defined attack. Tight editing, samples, or layered drums are common, but the low end still needs control so it works with the bass.
Jazz and acoustic music
Jazz drums often sound best with natural overheads and gentle close-mic processing. Avoid removing too much room tone or adding excessive high end. The kit should feel like one instrument.
Metal and dense rock
Fast playing needs clear kick attack, controlled cymbals, and focused toms. Editing and noise control may be just as important as EQ. Too much upper-mid boost can make the mix painful.
Live sound
A live drum mix needs feedback control, stage bleed management, and consistent translation across the venue. Make narrow cuts for feedback problems, then use broad, gentle moves for tone.
How Compression and EQ Work Together
EQ and compression affect each other. If a compressor receives too much low end, it may pump or reduce the drum’s attack. If it receives too much cymbal energy, it may clamp down whenever the drummer hits a crash.
A common workflow is to make basic corrective EQ before compression. Then use compression to control level and shape movement. After compression, make small tone adjustments if needed.
For example, a kick may need a low cut below the useful range before compression. A snare may need some boxiness removed so the compressor responds more evenly. On overheads, a high frequency cut before compression can reduce harsh cymbal pumping.
There is no strict rule about EQ order. Try both positions and listen. What matters is how the processors interact and whether the result sounds natural.
Practical Drum EQ Example
Imagine a four-piece rock kit recorded in a small room. The kick is boomy, the snare sounds like a cardboard box, and the cymbals are sharp.
A sensible approach could be:
• Apply a gentle high pass filter to the kick below its useful low end.
• Cut a muddy kick area around 250 Hz.
• Add a small boost around 3 kHz for beater clarity.
• Remove some snare boxiness around 400 Hz.
• Add moderate snare presence near 2 kHz.
• High pass the toms between 60 and 90 Hz based on their size.
• Reduce harsh overhead energy around 4 to 7 kHz.
• Use less room microphone level if the small room creates a hard reflection.
The numbers are only starting points. The final settings depend on the drummer, drum shells, heads, tuning, microphones, and arrangement. Copying a preset rarely works as well as listening with purpose.
Safe Listening and Final Checks
Drum mixing often involves loud peaks, especially from cymbals. Protect your hearing by taking breaks and monitoring at a comfortable level. Hearing fatigue can make bright sounds seem dull, which may lead you to add too much treble.
Check the drum mix in several ways:
• Listen at low volume for balance.
• Listen at moderate volume for tone and impact.
• Check mono compatibility.
• Use headphones to hear ringing and harshness.
• Use speakers to judge low-end movement.
• Compare the mix with a few trusted commercial tracks at matched loudness.
Do not compare your mix while it is much louder than the reference. Louder usually seems better, even when it is less balanced. Level matching creates a fairer test.
Also leave enough headroom for mastering or live processing. A healthy mix does not need to be pushed into clipping to sound powerful.
Frequently Asked Questions About How to EQ a Drum Set
What is the best EQ setting for a drum set?
There is no single best setting because every kit, room, microphone, and song is different. Start with cleanup, then shape the kick, snare, toms, overheads, and room tracks while listening to the full mix.
Should I boost or cut frequencies when I EQ drums?
Start with small cuts for mud, boxiness, ringing, or harshness. Add gentle boosts only when you know which quality is missing and the source recording is already healthy.
What frequency should I boost on a kick drum?
Many kick drums benefit from body around 50 to 80 Hz and attack around 2.5 to 5 kHz. Use these ranges as starting points, then adjust by ear so the kick works with the bass.
How do I make a snare drum sound more powerful with EQ?
Reduce boxiness around 300 to 600 Hz when needed, then add modest presence around 1 to 2.5 kHz. A small boost around 4 to 8 kHz can add snap, but too much may make the snare harsh.
Should I use a high pass filter on drum tracks?
Usually, yes, on tracks that contain unnecessary rumble or bleed. Set the filter carefully so you remove unwanted noise without weakening the useful body of the kick, toms, overheads, or room.
Why do my drums sound good solo but bad in the mix?
Solo listening hides frequency conflicts with bass, guitars, vocals, and keys. Make final EQ choices in context, and remember that a slightly less impressive solo sound may fit the full song better.
Can EQ fix poorly tuned drums?
EQ can reduce some unwanted tones, but it cannot fully correct poor tuning, damaged heads, bad room reflections, or inconsistent playing. Retune or improve the recording source whenever possible.
Conclusion
To EQ a drum set well, start with the source, remove problems, and shape each drum for its place in the song. Use gentle moves, compare at matched volume, and listen to the full kit with the rest of the arrangement. The kick needs space, the snare needs presence, toms need clarity, and cymbals need control.
The best results come from patient listening rather than fixed presets. Try these steps on your next session, save versions as you work, and keep notes on what helps. Explore more mixing techniques, share your results, and keep training your ears with every drum set you EQ.

Senior Music Reviewer
Alex Carter is a seasoned music reviewer with over a decade of experience in the world of sound and instruments. Passionate about helping musicians and enthusiasts make informed choices, he brings sharp insights and in-depth knowledge to every review. From classical instruments to modern gear, Alex combines technical expertise with a love for music to deliver content that resonates with readers.
As a Senior Music Reviewer and expert author on Tuneluma.com, Alex is dedicated to sharing honest evaluations, practical advice, and thoughtful commentary to guide readers in their musical journey.