How To String And Tune A Violin: Easy Step-By-Step Guide
Stringing and tuning a violin safely means fitting each string correctly, then adjusting G, D, A, and E to pitch.
Learning how to string and tune a violin can feel stressful at first. The strings hold strong tension, the bridge must stay upright, and a small peg movement can change the pitch quickly. This guide explains the full process in simple steps, based on standard violin setup practice and hands-on lessons from restringing and tuning instruments.

What You Need Before You Start
Gather your tools before removing any string. A calm setup helps you work slowly and avoid sudden changes in tension.
You will need:
• A full set of violin strings made for your instrument
• A digital chromatic tuner or a reliable tuning app
• Peg compound, if the pegs slip or feel rough
• A soft cloth
• A pencil
• Fine tuners, if your tailpiece uses them
• A bridge straightening tool, or clean hands
Use strings that match your violin size. A full-size violin needs full-size strings, while a small student violin needs strings made for its scale. The wrong length can create poor tension and make tuning difficult.
Before learning how to string and tune a violin, inspect the instrument. Look for cracks, loose fittings, sharp edges near the bridge, or a peg that will not hold. A damaged violin may need a professional repair before you install new strings.
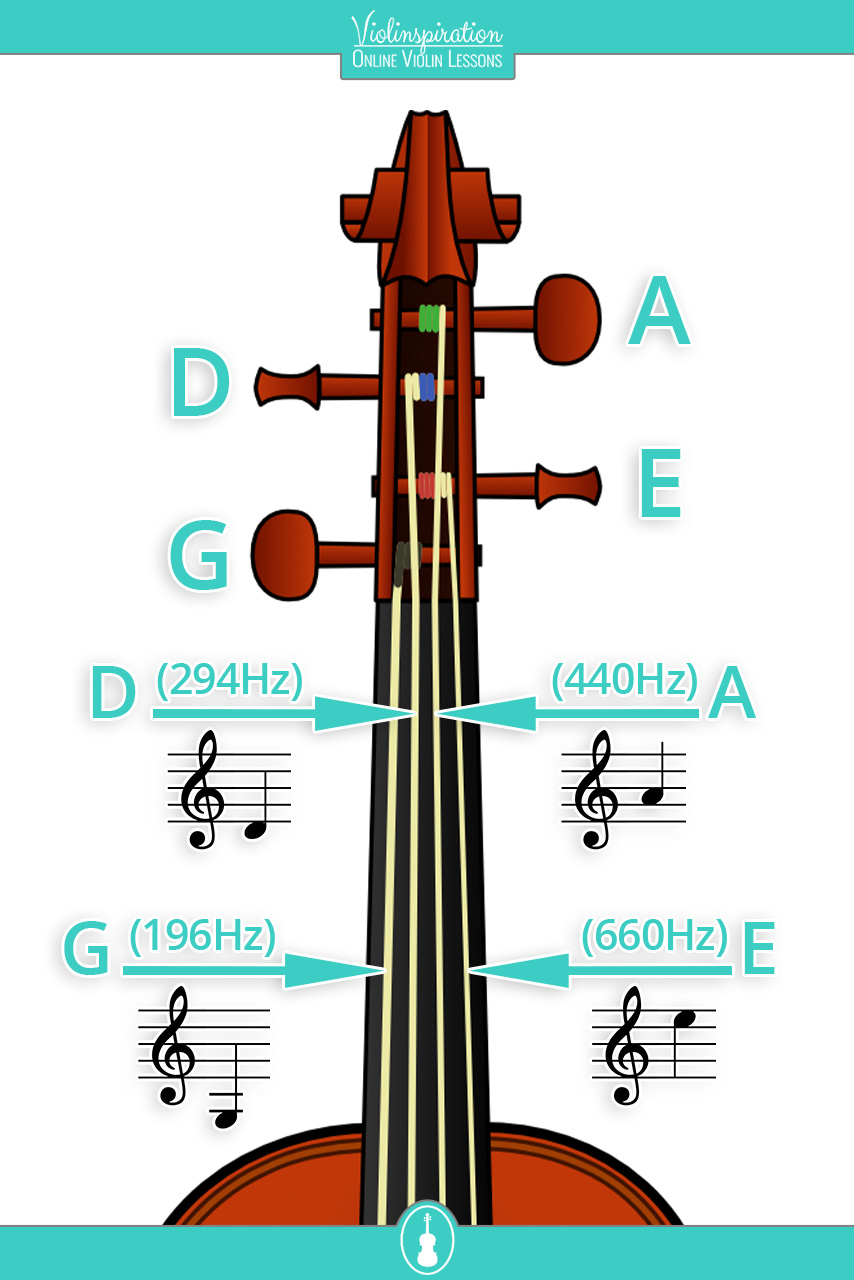
Learn the Violin String Names and Notes
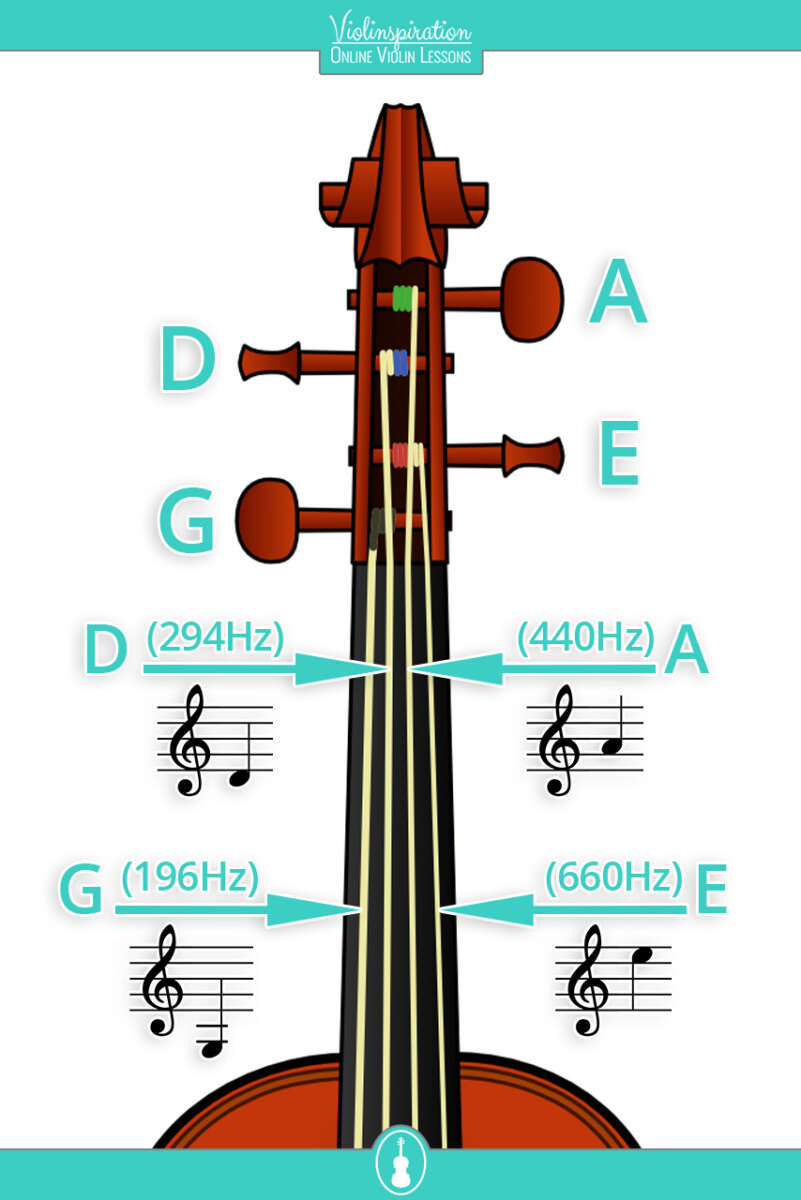
A violin has four strings. From lowest pitch to highest pitch, they are:
• G string
• D string
• A string
• E string
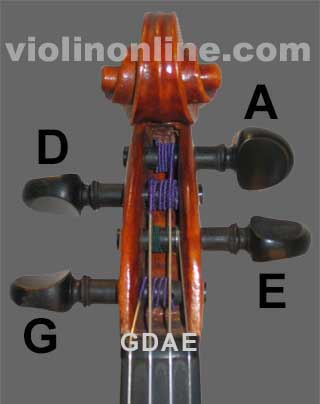
When you hold the violin in playing position, the G string sits on your left side and the E string sits on your right side. The strings rise in pitch from G to D, D to A, and A to E.
The standard tuning is:
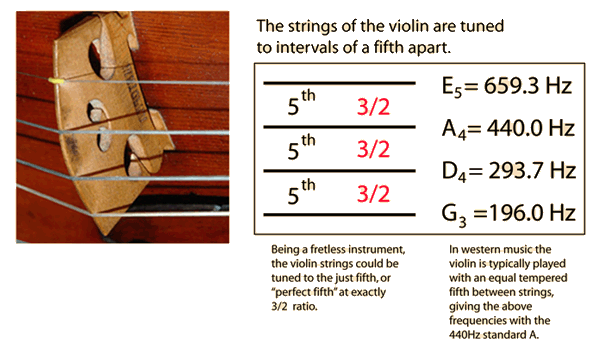
• G3, about 196 Hz
• D4, about 293.66 Hz
• A4, 440 Hz
• E5, about 659.25 Hz
Most players tune the A string first. The A string provides a shared reference pitch for orchestras, teachers, and ensembles. Many tuners use A4 at 440 Hz, although some orchestras use a slightly higher pitch.
The gap between neighboring violin strings is a perfect fifth. This means each string has a clear, ringing relationship with the next one. After using a tuner, you can check the fifths by playing two open strings together.
Understanding these notes makes how to string and tune a violin much easier. You are not guessing at four separate sounds. You are building a set pattern from low G to high E.
How to Remove Old Violin Strings
Replace one string at a time whenever possible. This keeps the bridge, soundpost, and tailpiece more stable.
Follow these steps:
-
Place the violin on a clean, padded surface.
-
Loosen the first string by turning its peg toward you slowly.
-
Remove the string from the peg hole.
-
Lift the string out of the tailpiece or fine tuner.
-
Wipe away dust near the bridge and fingerboard.
Start with the string that needs replacement. If you are replacing the full set, many violinists begin with the G string and move upward. You can also replace the strings one at a time in any order, as long as you keep the bridge stable.
Do not cut a tight string with wire cutters. A sudden release can make the string whip, move the bridge, or damage the finish. Loosen the string fully before removing it.
While the string is off, check the bridge. Its feet should sit flat on the violin top, and its upper edge should lean slightly toward the tailpiece. The bridge must not lean toward the fingerboard.
In my own setup work, the most common beginner mistake is removing all four strings at once. The bridge often falls or shifts, and the player then spends more time correcting the instrument than changing the strings. One string at a time is safer and faster.
How to Install a New Violin String
New strings stretch during their first hours of use. Install them with neat windings and moderate tension.
Step 1: Identify the Correct String
String sets usually mark each string with a color or label. Match the string to the correct position:
• G goes closest to the left side in playing position
• D goes next to G
• A goes next to D
• E goes closest to the right side
Some strings look similar, especially D and A strings. Check the package before installing one.
Step 2: Insert the String at the Tailpiece
Place the ball end of the string into the correct hole or fine tuner. Make sure it sits fully in place.
If the tailpiece has fine tuners, guide the string through the tuner slot. Turn the fine tuner outward before installation so you have room for later adjustments. Do not turn it so far that it comes out of the tuner.
Step 3: Guide the String Across the Bridge
Lay the string in the correct bridge groove. The groove should hold the string without trapping it.
Check that the string runs in a straight line from the tailpiece, across the bridge, over the fingerboard, and into the pegbox. It should not rub against another string or press against the wrong side of the bridge groove.
Apply a small amount of pencil graphite to the bridge groove and the nut groove. Graphite acts as a dry lubricant and helps the string move smoothly during tuning. Do not use oil or liquid lubricant on the violin.
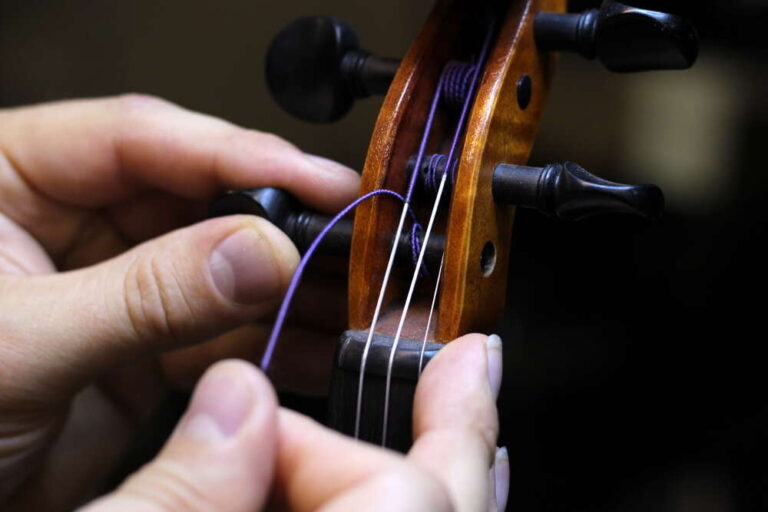
Step 4: Insert the String Into the Peg
Turn the peg until its hole faces the string. Push the string through the hole by about one-quarter inch.
Begin turning the peg slowly. Keep light tension on the string with your free hand so it stays in the groove and does not form loose loops.
The string should wind neatly toward the inside of the pegbox. Each turn should sit beside the last turn, not cross over it. Leave enough space near the peg wall so the winding does not rub against the pegbox.
Step 5: Bring the String to Low Tension
Turn the peg until the string has light tension. Stop before bringing it to the correct pitch.
Check three things:
• The string rests in the bridge groove