How To Mic A Cajon Drum: Pro Setup Tips
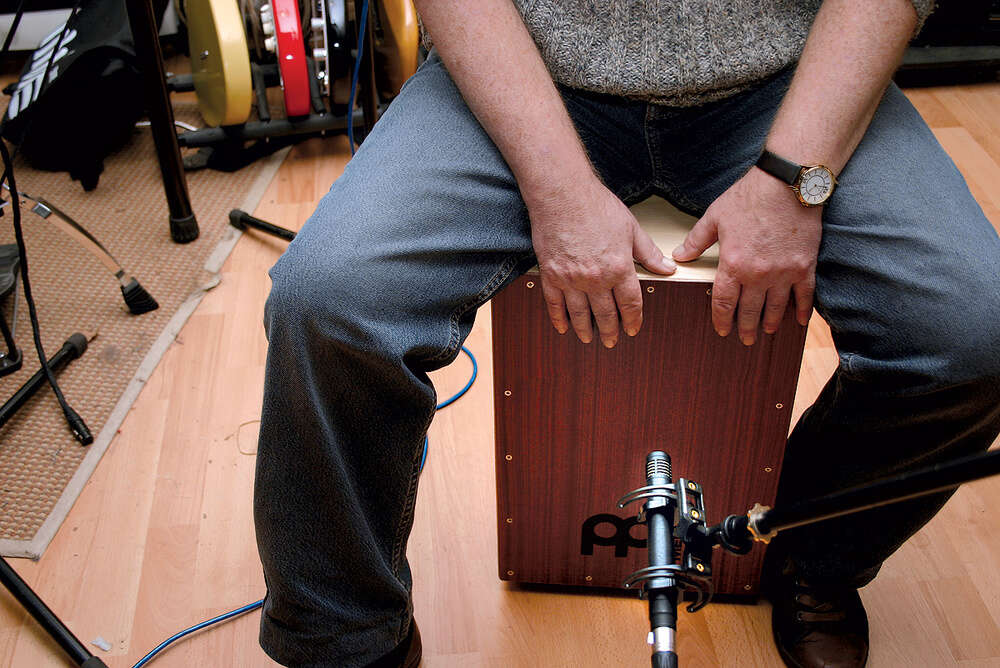
Place a dynamic microphone inside or just outside the cajon’s sound hole, then shape tone with EQ.
Learning how to mic a cajon drum is less about using expensive gear and more about hearing the instrument clearly. The right mic position captures both the deep bass tone and the sharp slap without making the cajon sound boxy, dull, or boomy. This guide explains proven microphone placements, useful gear, common mistakes, and practical mixing tips for live shows, rehearsals, and studio sessions.
Understanding the Cajon’s Sound
A cajon has two main voices: the bass tone and the slap tone. The bass comes from the larger wooden body and is strongest near the sound hole. The slap comes from the front playing surface, often called the tapa, and has more attack and high-frequency detail.
When you mic a cajon drum, you are balancing these two sounds. A microphone near the sound hole gives you more low end. A microphone aimed at the front face gives you more slap and finger detail.
The cajon is also a resonant wooden box. Like an acoustic guitar, it can produce strong room reflections and unwanted low frequencies. This is why small changes in microphone distance can make a large difference.
The best microphone position depends on the cajon, the player, the room, and the music. A soft acoustic set may need warmth and detail, while a loud rock show may need more attack and isolation.

Choosing the Right Microphone
You can mic a cajon drum with one microphone, two microphones, or a pickup system. Each method has benefits and limits.
Dynamic microphones
Dynamic microphones are a strong choice for live performances. They can handle high sound pressure levels and usually reject more room noise than sensitive condenser microphones.
Good uses include:
• Placing the microphone near the sound hole for punchy bass
• Recording in untreated rooms
• Performing on loud stages
• Capturing a focused cajon sound with less feedback risk
A kick drum microphone can work well near the sound hole. A general-purpose dynamic microphone can also produce useful results.
Condenser microphones
Condenser microphones capture more detail and air. They can reveal subtle finger taps, brush sounds, and the natural wood tone.
They work best when:
• The room sounds good
• The performance is controlled
• You want a natural studio recording
• The microphone can stay far enough from the cajon to avoid excessive bass
Small-diaphragm condensers often capture crisp attack. Large-diaphragm condensers can give a fuller and more polished sound.
Ribbon microphones
Ribbon microphones can deliver a smooth and warm tone. However, they are more delicate and may not be ideal for a loud stage or close placement. Use one only when you understand its handling limits and phantom power requirements.
Contact pickups and internal systems
Some cajons include internal pickups or contact microphones. These systems offer excellent isolation from stage noise, but they may sound less natural than an external microphone.
A pickup can be useful when feedback is a major problem. It often works best when blended with a microphone rather than used alone.

The Best Single-Microphone Placement
For many players, one microphone is enough. A single microphone keeps setup simple and avoids phase problems.
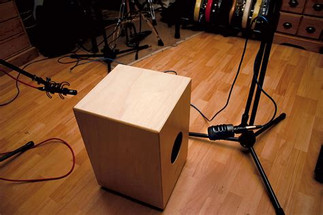
Start by placing a dynamic microphone 3 to 6 inches outside the sound hole. Aim it slightly toward the center of the hole, but do not push it directly against the opening.
This position usually creates:
• Strong bass
• Good low-mid body
• Useful isolation
• Fast setup
If the sound is too boomy, move the microphone farther away. If the sound lacks power, move it closer or aim it more directly at the hole.
You can also place the microphone 6 to 12 inches in front of the cajon. This gives a more balanced sound with less extreme bass. It also captures more of the room and the front playing surface.
A practical starting point is to place the microphone outside the sound hole, then rotate it slightly toward the player’s striking area. Small angle changes can reduce boom and improve slap detail.
How to Use Two Microphones
Two microphones let you capture the cajon’s low end and high-end attack separately. This method can sound more complete, but it requires careful placement and phase checking.
Microphone one: bass position
Place the first microphone 3 to 6 inches outside the sound hole. Use a dynamic or kick drum microphone for a strong, focused low end.
Move it closer for more bass and farther away for a more open tone.
Microphone two: slap position
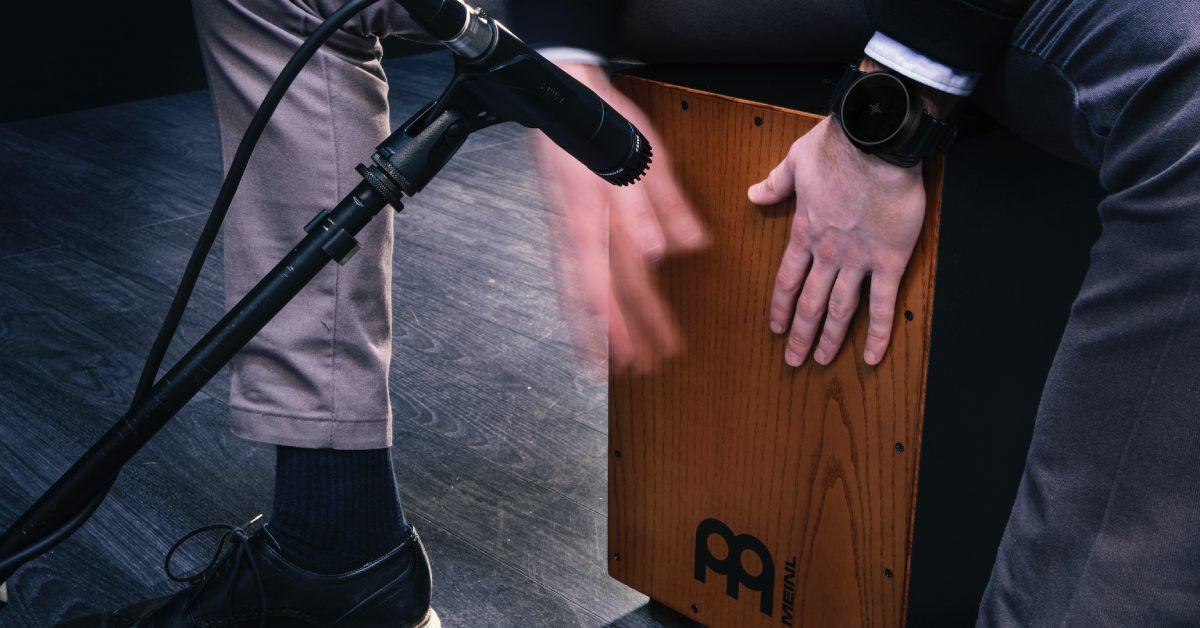
Place the second microphone 6 to 12 inches in front of the tapa. Aim it at the upper half of the front panel, where the player creates the sharpest slap.
A small-diaphragm condenser can capture detail well. A dynamic microphone is safer in a loud room or on stage.
Avoid pointing the second microphone straight at the center of the playing surface. That spot can sound harsh or overly aggressive. Aim slightly off center and listen for a smoother balance.
Checking phase
Two microphones can hear the same sound at different times. This may cause phase cancellation, which makes the cajon sound thin when both tracks play together.
To check phase:
-
Record or monitor both microphones.
-
Listen with both channels centered.
-
Flip the polarity on one channel.
-
Keep the setting that produces stronger, fuller bass.
-
Adjust the microphone distance if the tone still feels hollow.
Polarity reversal does not fix every phase problem. Physical distance matters most. Try to keep the microphones at reasonable distances from the sound source and avoid extreme spacing.
Step-by-Step Guide to Mic a Cajon Drum
Use this setup process when recording at home, in a studio, or at a live venue.
-
Place the cajon on a stable surface. Keep it away from walls and corners when possible.
-
Ask the player to perform the loudest part of the song.
-
Start with one dynamic microphone near the sound hole.
-
Set the input gain so loud hits do not clip. Leave several decibels of headroom.
-
Listen for bass, slap, and room noise.
-
Move the microphone in small steps. A change of one or two inches can be significant.
-
Record a short test take.