How To Set Up A Drum Kit: Step-By-Step Guide
Place the bass drum, mount toms, set snare and hi-hat height, then tune and adjust for comfort.
I’ve set up hundreds of kits in studios, clubs, and dorm rooms, so I know what works fast and what wastes time. This guide walks you through exactly how to set up a drum kit step by step, from parts and placement to tuning, ergonomics, and common mistakes. Expect clear instructions, pro tips I learned on gigs, and simple diagrams you can imagine while you work.

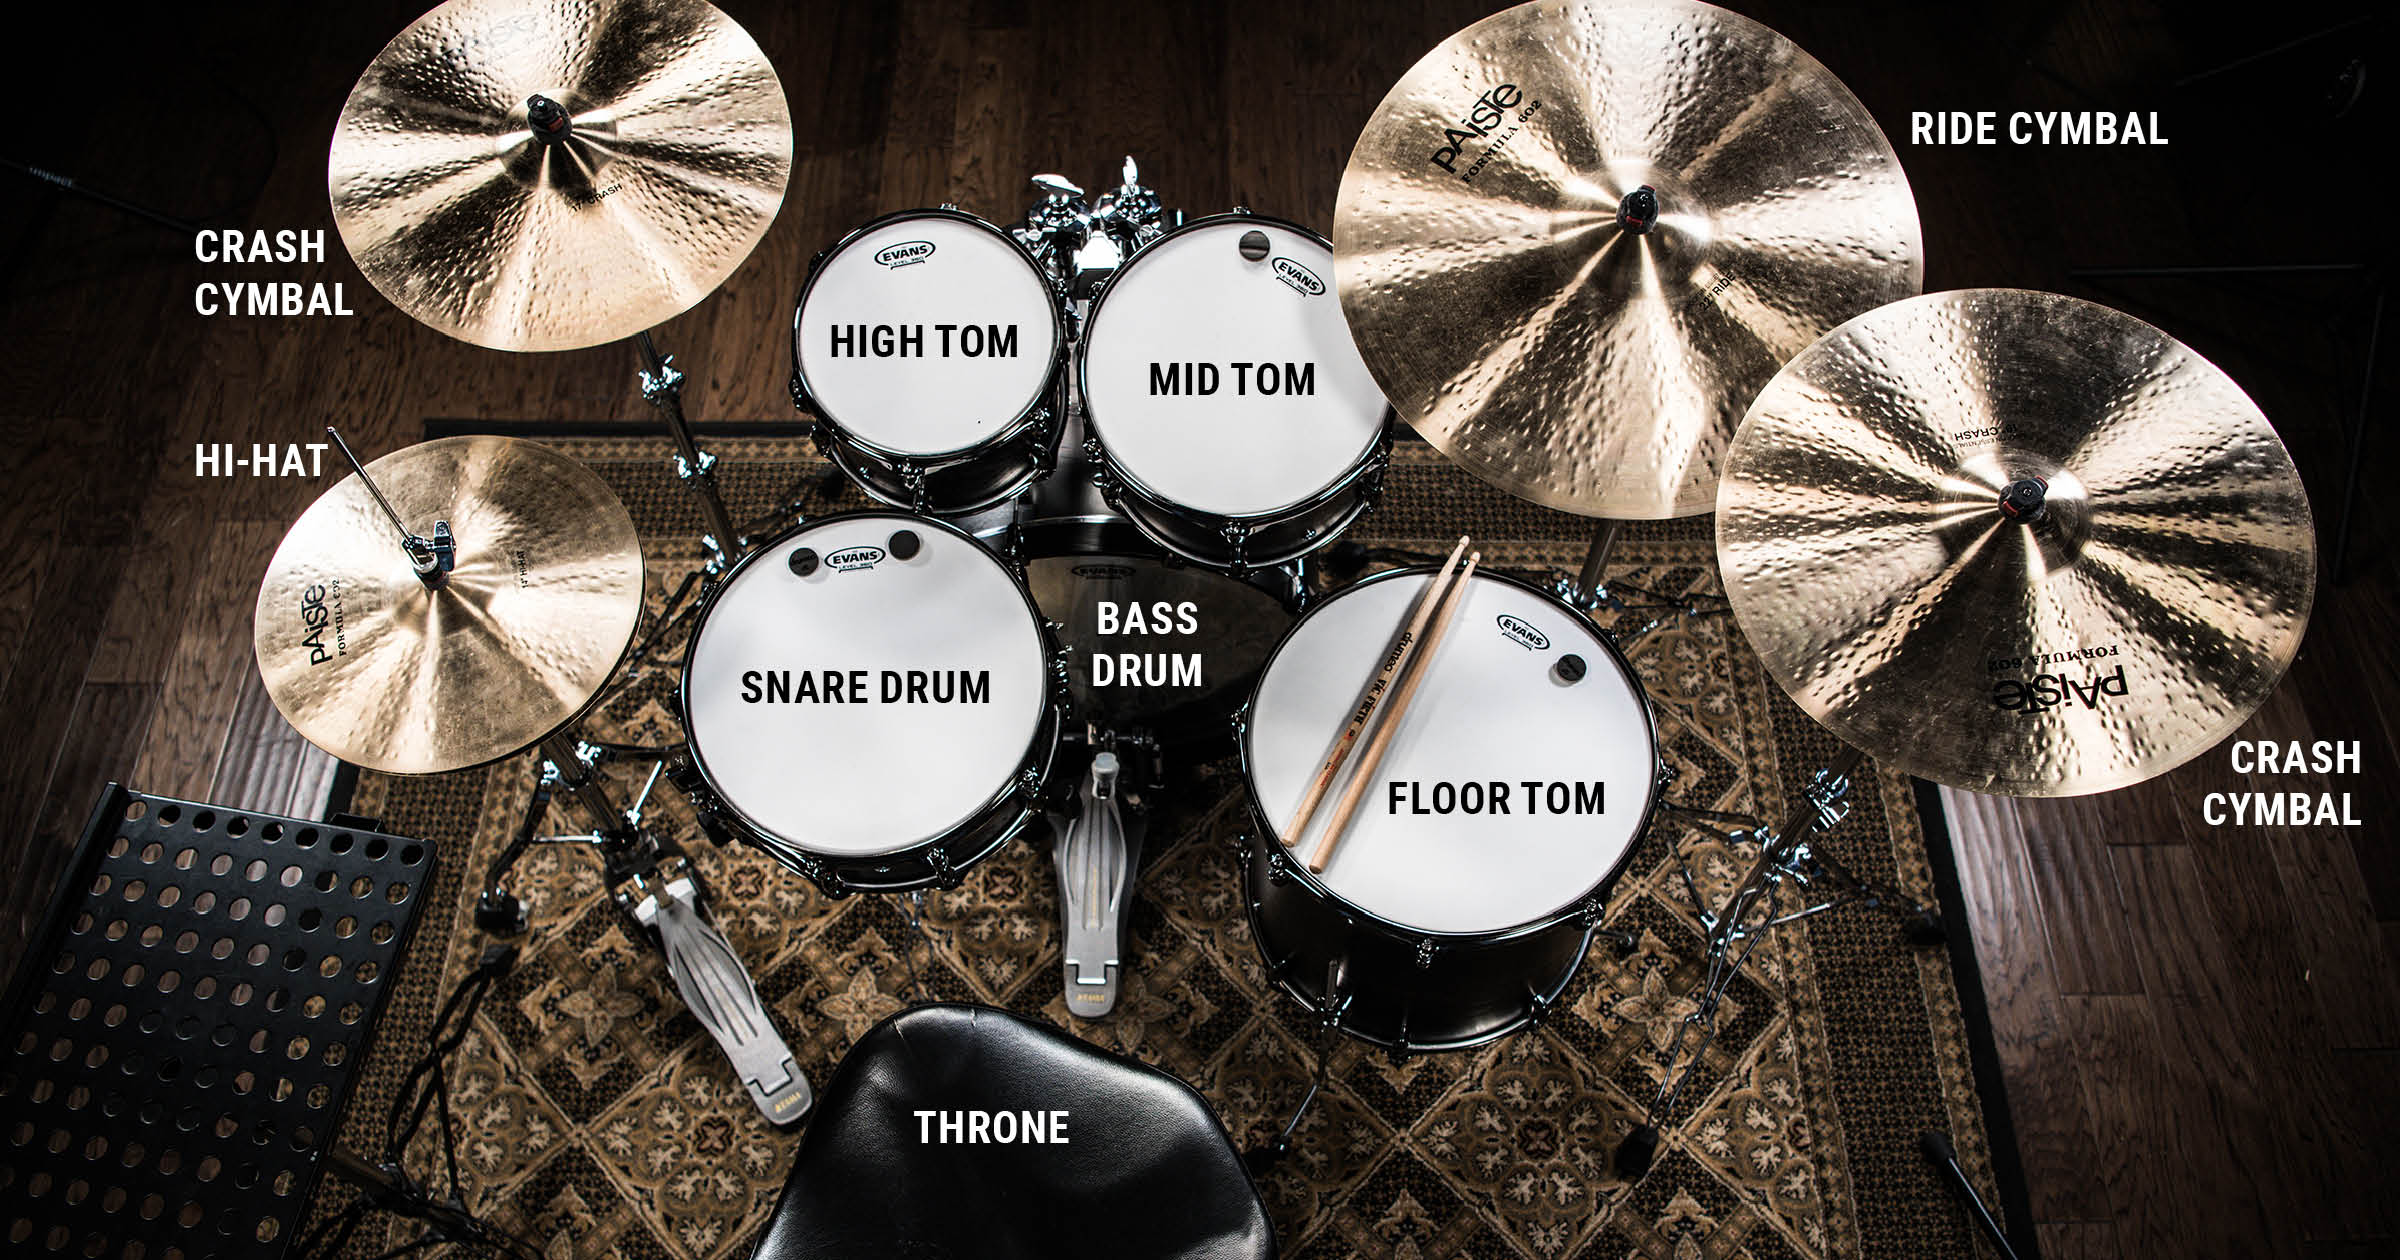
Essential parts of a drum kit
A drum kit is a group of drums and cymbals with hardware that you arrange to play. Basic parts are easy to list, but understanding each item helps when you set up a kit.
- Bass drum
- The large floor drum. It anchors the kit and holds the pedal.
- Snare drum
- The sharp, cutting drum used for backbeats and accents.
- Rack toms and floor tom
- Smaller drums that add melodic fills and texture.
- Hi-hat
- Two cymbals on a stand controlled by a pedal.
- Ride and crash cymbals
- Cymbals for timekeeping and accents.
- Hardware
- Stands, pedals, clamps, throne, and mounting parts.
- Drumheads and sticks
- Heads change tone. Sticks change feel.
Knowing these parts makes the process of how to set up a drum kit faster. My first kits were missing clamps, so I learned to inventory gear before I start. Check that every stand and wing nut works before tuning.

Before you start: room, throne, and tools
Preparation saves time. A small change now prevents bigger fixes later.
- Choose your room
- Hard floors give bright sound. Carpets dampen boom. Think about neighbors.
- Set the throne
- Adjust height so your thighs are parallel to the floor or slightly angled down.
- Gather tools
- Drum key, hex wrench, towel, small screwdriver, and a notebook for settings.
- Check your pedals and cables
- Test pedals and clip on any drum triggers or mics you’ll use.
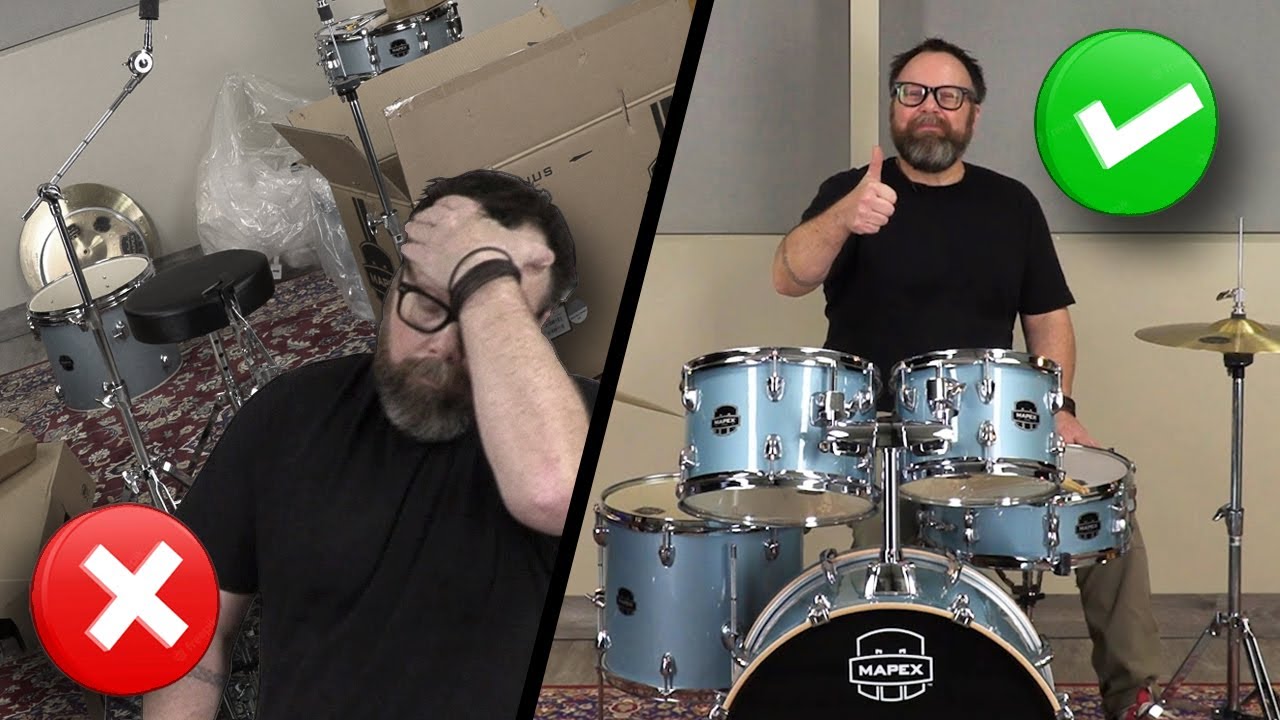
I learned this the hard way: I set up in a tight corner once and had to move the whole kit mid-soundcheck. Give yourself a little space. Preparing the throne and tools makes the whole process smoother and safer.
Step-by-step: how to set up a drum kit
This section gives a logical order to set up your kit. Follow each step slowly and keep testing positions.
- Place the bass drum
- Set the bass drum where you want it to point. Put its legs (spurs) down to stop sliding.
- Attach the hoop and pedal
- Fit the bass pedal to the hoop. Make sure the beater hits the center of the head.
- Position the snare
- Put the snare stand in front of the throne. Angle the snare slightly toward you.
- Mount rack toms
- Attach tom holders to the bass drum or stand. Place toms at a comfortable angle and reach.
- Add the floor tom
- Set its legs so it sits solidly and lines up with the toms.
- Set hi-hat and cymbal stands
- Place the hi-hat to your left and the ride to your right. Position crash cymbals within easy reach.
- Adjust heights and angles
- Sit and reach each piece; adjust to minimize strain.
- Tune roughly
- Get the drumheads at a good tension before fine tuning.
Tips from the road:
- Work in rounds: set positions first, then tighten hardware, then tune.
- Use a small tape mark on the floor to remember placements for future shows.
- Keep a record of settings for each kit or venue; it saves setup time.
How long does it take to set up a drum kit?
A basic setup takes 15–30 minutes for one person. For careful tuning and mic placement expect 45–90 minutes.
Do toms go on top of the bass drum or on stands?
Toms can mount on the bass drum or on dedicated stands. Mounting on the bass saves stands; stands give more flexibility.
Should I tune before I place cymbals?
Place and position parts first, then do rough tuning. Cymbals don’t affect drum tuning but they affect feel and reach.
Practice this order a few times and the steps become muscle memory. I can set a basic kit in 10–15 minutes now because I follow the same routine.

Tuning and tone: how to set up a drum kit for best sound
Tuning makes your kit sound musical. It also affects how comfortable it is to play.
- Understand heads and pitch
- Tight heads give higher pitch and more attack. Looser heads give low tone and boom.
- Start with even tension
- Use a cross pattern when tightening lugs to keep tension even.
- Tune the snare
- Tight batter head for crisp attack. Bottom head slightly tighter for snare sensitivity.
- Tune toms for musical intervals
- Tune toms so they have clear pitch relationships—root, mid, and higher tones.
- Check the bass drum
- Tune to support the bass guitar or song. Add damping like a pillow if it’s too boomy.
A simple tuning routine I use:
- Finger-tighten all lugs.
- Bring each lug up to the same tension with the drum key using a cross pattern.
- Tap near each lug and adjust until tones match.
- Fine-tune for the song or room.
Limitations and trade-offs:
- Room size changes how drums sound. Small rooms need less low end.
- Different heads and shells change tone greatly. Choose heads to match the music style.
I once changed heads before a recording and the whole song came alive. Tuning takes practice. Start simple and learn how small changes affect the sound.
Cymbals and hardware placement
Good cymbal placement saves wrists and improves sound.
- Hi-hat position
- Close to the snare and at a comfortable height for foot control.
- Ride placement
- Should be reachable without overextending; angle slightly toward you.
- Crash placement
- Place crashes where your arm can move naturally for accents.
- Boom arms vs straight stands
- Boom arms give more placement freedom. Straight stands are stable but less flexible.
- Tighten wing nuts last
- Once you find positions, tighten hardware so it won’t slip during play.
Personal tip: I angle my crashes slightly down so my forearm moves in a natural arc. This reduced fatigue on long gigs. Also, label stands if you change venues frequently.

Ergonomics: sitting, angles, and reach
Comfort affects timing and endurance. Good ergonomics reduce injury risk.
- Seat height and posture
- Sit so knees are slightly below hips. Keep a straight but relaxed back.
- Arm and wrist angles
- Keep wrists neutral. Avoid reaching too far for cymbals.
- Foot placement
- Keep heels down for control or use heels-up for power—choose what feels natural.
- Kit symmetry
- Align snare directly in front of you. Keep toms within a 45-degree arc.
Common mistakes:
- Setting the throne too low. This strains the back.
- Overreaching for cymbals. This causes shoulder pain.
- Poor pedal angle. This limits speed and control.
I changed my throne once and doubled my endurance for 3-hour rehearsals. Small adjustments compound over time.

Maintenance, troubleshooting, and common mistakes
Regular care keeps the kit sounding good and reduces setup time.
- Basic maintenance
- Check lugs and screws monthly. Replace worn heads and felts.
- Troubleshooting rattles
- Tighten loose hardware and use gaskets or felt washers where needed.
- Drumhead lifespan
- Change heads when they lose tone or get dents. Frequency depends on use.
- Transport tips
- Use padded bags and label hardware. Pack stands upright and separate fragile cymbals.
Common mistakes to avoid:
- Over-tightening lugs. This can warp rims.
- Ignoring pedal alignment. Misaligned pedals slip and wear unevenly.
- Skipping a soundcheck. Always test volume and tone in the room.
When a ride once loosened mid-set, I learned to torque wing nuts to a safe level. Keep spares—extra heads, felts, and a drum key—on hand for gigs.

Frequently Asked Questions of how to set up a drum kit
How do I position my snare drum?
Position the snare directly in front of you so that your stick hits the center without strain. Angle it slightly toward you for natural wrist motion.
What’s the best order to mount drums and cymbals?
Start with the bass drum and pedal, then snare, toms, floor tom, hi-hat, and cymbals. Finish by adjusting heights and tuning.
How tight should drum heads be?
Heads should be even in tension at each lug and tuned to the tone you want. Tightness varies by drum size, head type, and musical style.
How do I stop my bass drum from sliding?
Extend the drum spurs into the floor and use a rug under the kit to increase traction. Small wedges or non-slip pads under the spurs also help.
Can one person set up a full kit alone?
Yes. With practice you can set up by yourself in 20–45 minutes. Use a checklist and keep hardware organized to speed up the process.
What tools do I need to set up a drum kit?
A drum key, small screwdrivers, hex wrenches, and a towel are essential. Optional tools include a torque wrench for hardware and a tuner app for pitch checks.
How often should I change drum heads?
Change heads when they show dents or lose tone, which can be every few months for gigging players or annually for hobbyists. Replace sooner if heads crack.
Conclusion
You now have a clear, practical path for how to set up a drum kit—from parts and placement to tuning and ergonomics. Start with simple placement, tighten hardware last, and tune with small, even adjustments. Practice setup routines and keep a spare parts kit to save time on gigs.
Try setting up and breaking down your kit three times this week. Note what changed and keep a short setup log. If this guide helped, subscribe for more tips, share your setup photos, or leave a comment with questions — I’ll reply with practical advice.

Senior Music Reviewer
Alex Carter is a seasoned music reviewer with over a decade of experience in the world of sound and instruments. Passionate about helping musicians and enthusiasts make informed choices, he brings sharp insights and in-depth knowledge to every review. From classical instruments to modern gear, Alex combines technical expertise with a love for music to deliver content that resonates with readers.
As a Senior Music Reviewer and expert author on Tuneluma.com, Alex is dedicated to sharing honest evaluations, practical advice, and thoughtful commentary to guide readers in their musical journey.