How To Make A Drum Kit: Easy DIY Guide
You can make a drum kit by building or adapting shells, adding hardware, fitting heads, and tuning each drum.
Learning how to make a drum kit is part woodworking, part music, and part careful setup. A good homemade kit does not need expensive tools or rare parts, but it does need strong shells, accurate holes, safe edges, and patient tuning. This guide explains the process from planning and materials to assembly, sound control, and common mistakes, so you can build a kit that feels musical rather than merely functional.

What a Drum Kit Includes
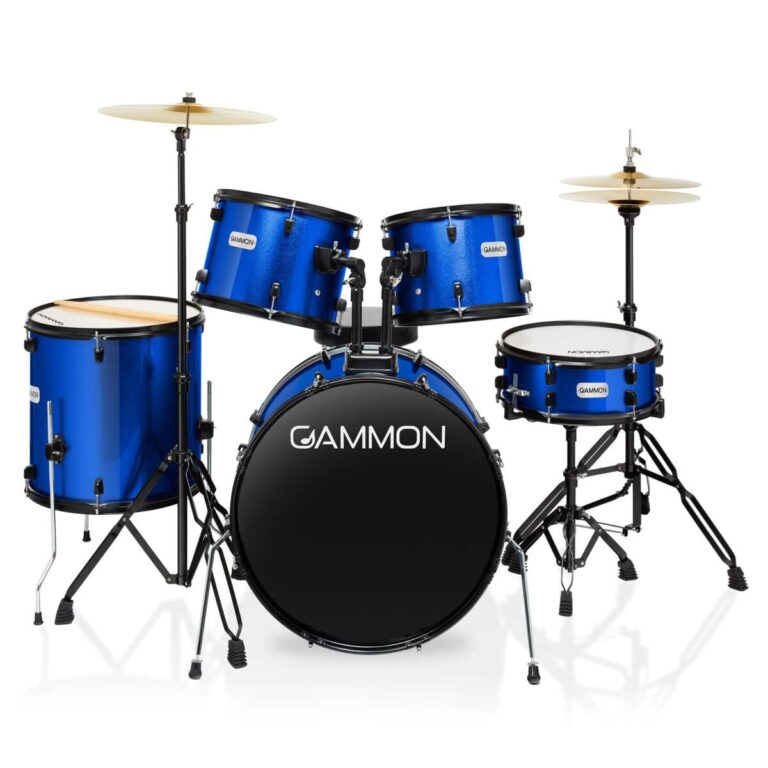
Before learning how to make a drum kit, it helps to understand the parts of a standard acoustic set. Each part has a clear job, and small changes can affect the sound and comfort of the whole kit.
A basic drum kit usually contains:
• Bass drum: The large drum played with a foot pedal. It creates the low pulse.
• Snare drum: The sharp, responsive drum with wire snares under the bottom head.
• Rack toms: Smaller mounted drums used for fills and melodic movement.
• Floor tom: A larger tom that stands on legs and produces a deep, open tone.
• Cymbals: Metal discs such as the hi-hat, crash, and ride.
• Hardware: Stands, mounts, spurs, lugs, hoops, pedals, and tension rods.
• Drumheads: The coated or clear surfaces that vibrate when struck.
A homemade kit can include all of these parts, but you do not have to build every item from raw materials. Many builders make the shells and buy reliable hardware. This saves time and improves safety, especially for the bass pedal, cymbal stands, and snare wires.
The most important idea is balance. A drum kit is not just a group of containers with heads stretched over them. The shell, head, bearing edge, hoop, and tension system work together like parts of a small acoustic instrument.

Choose Your Drum Kit Design
The best answer to how to make a drum kit depends on your tools, budget, and sound goal. You can build a traditional wooden kit, create a low-cost practice kit, or convert everyday objects into playable drums.
Option 1: Build a wooden drum kit
A wooden kit gives you the most control over tone and appearance. You can use plywood shells, stave shells, or solid wood shells.
Plywood shells are often the best choice for a first project. They are stable, affordable, and available in many thicknesses. Birch, maple, and poplar are common choices, but almost any strong, dry wood can work when the shell is designed correctly.
Option 2: Convert existing drums
Buying used drums and rebuilding them is often the most practical way to make a drum kit. You can replace worn heads, clean the hardware, repair bearing edges, and refinish the shells.
This route teaches you how a drum works without requiring advanced woodworking. It also reduces the risk of building a shell that is out of round or too weak.
Option 3: Build a practice kit from containers
Plastic tubs, wooden boxes, and heavy-duty buckets can become useful practice drums. They will not sound like professional maple shells, but they can work well for rhythm practice, school projects, or quiet home playing.
Use thick containers with no cracks. Avoid thin plastic that can split when struck. Add rubber pads or mesh heads if you want less noise.
Common drum sizes
A balanced beginner kit may use:
• Bass drum: 20 or 22 inches in diameter
• Snare drum: 14 inches in diameter
• Rack tom: 10 or 12 inches in diameter
• Floor tom: 14 or 16 inches in diameter
Depth also matters. A 14-inch by 5.5-inch snare sounds brighter and responds quickly. A 14-inch by 8-inch snare usually sounds deeper and fuller.

Plan the Shells Before You Cut
Good planning is the foundation of how to make a drum kit safely and accurately. Draw each shell from the side and top. Mark the diameter, depth, bearing edge, lug positions, vent location, and mounting points.
Start with a simple shell plan. For example:
• Bass drum: 22 inches by 16 inches
• Snare drum: 14 inches by 6 inches
• Rack tom: 12 inches by 8 inches
• Floor tom: 16 inches by 14 inches
These sizes create a familiar rock and pop setup. You can change them, but unusual sizes may require special heads and hardware.
Check shell thickness
Shell thickness affects strength and tone. A thin shell may sound open and lively, but it can flex or crack. A thick shell can produce strong projection, but it may sound less sensitive.
For a first wooden build, a shell around 6 to 10 millimeters thick is a practical range. The exact thickness depends on the wood, shell diameter, construction method, and reinforcement rings.
Plan the hardware layout
Mark the location of:
• Tension lugs
• Throw-off and butt plate on the snare
• Tom mounts
• Floor tom leg brackets
• Bass drum spurs
• Air vents
Keep the layout even around the shell. Uneven lug spacing can pull the hoop at an angle and make tuning difficult.
A paper template is useful here. Wrap it around the shell, align the seam, and transfer the marks. Measure twice before drilling.

Gather Tools and Materials
You do not need a full professional shop to learn how to make a drum kit, but you do need accurate tools. A crooked hole or uneven edge can create problems that tuning cannot fix.
Basic tools
• Tape measure and ruler
• Compass or circle template
• Pencil and marking knife
• Drill and sharp drill bits
• Jigsaw or router
• Sandpaper in several grits
• Clamps
• Square
• Level work surface
• Protective glasses and hearing protection
• Respirator or dust mask for wood dust