A Day In The Life Chords Guitar: Easy Beatles Guide
The best beginner-friendly A Day in the Life chords guitar version uses G, Em, C, Cmaj7, and F.
The Beatles’ “A Day in the Life” is more than a simple chord song. Its gentle verses, shifting moods, and dramatic ending make it a rewarding guitar study. This guide breaks down the A Day in the Life chords guitar players commonly use, explains the song’s structure, and offers practical tips for making your performance sound musical rather than mechanical.
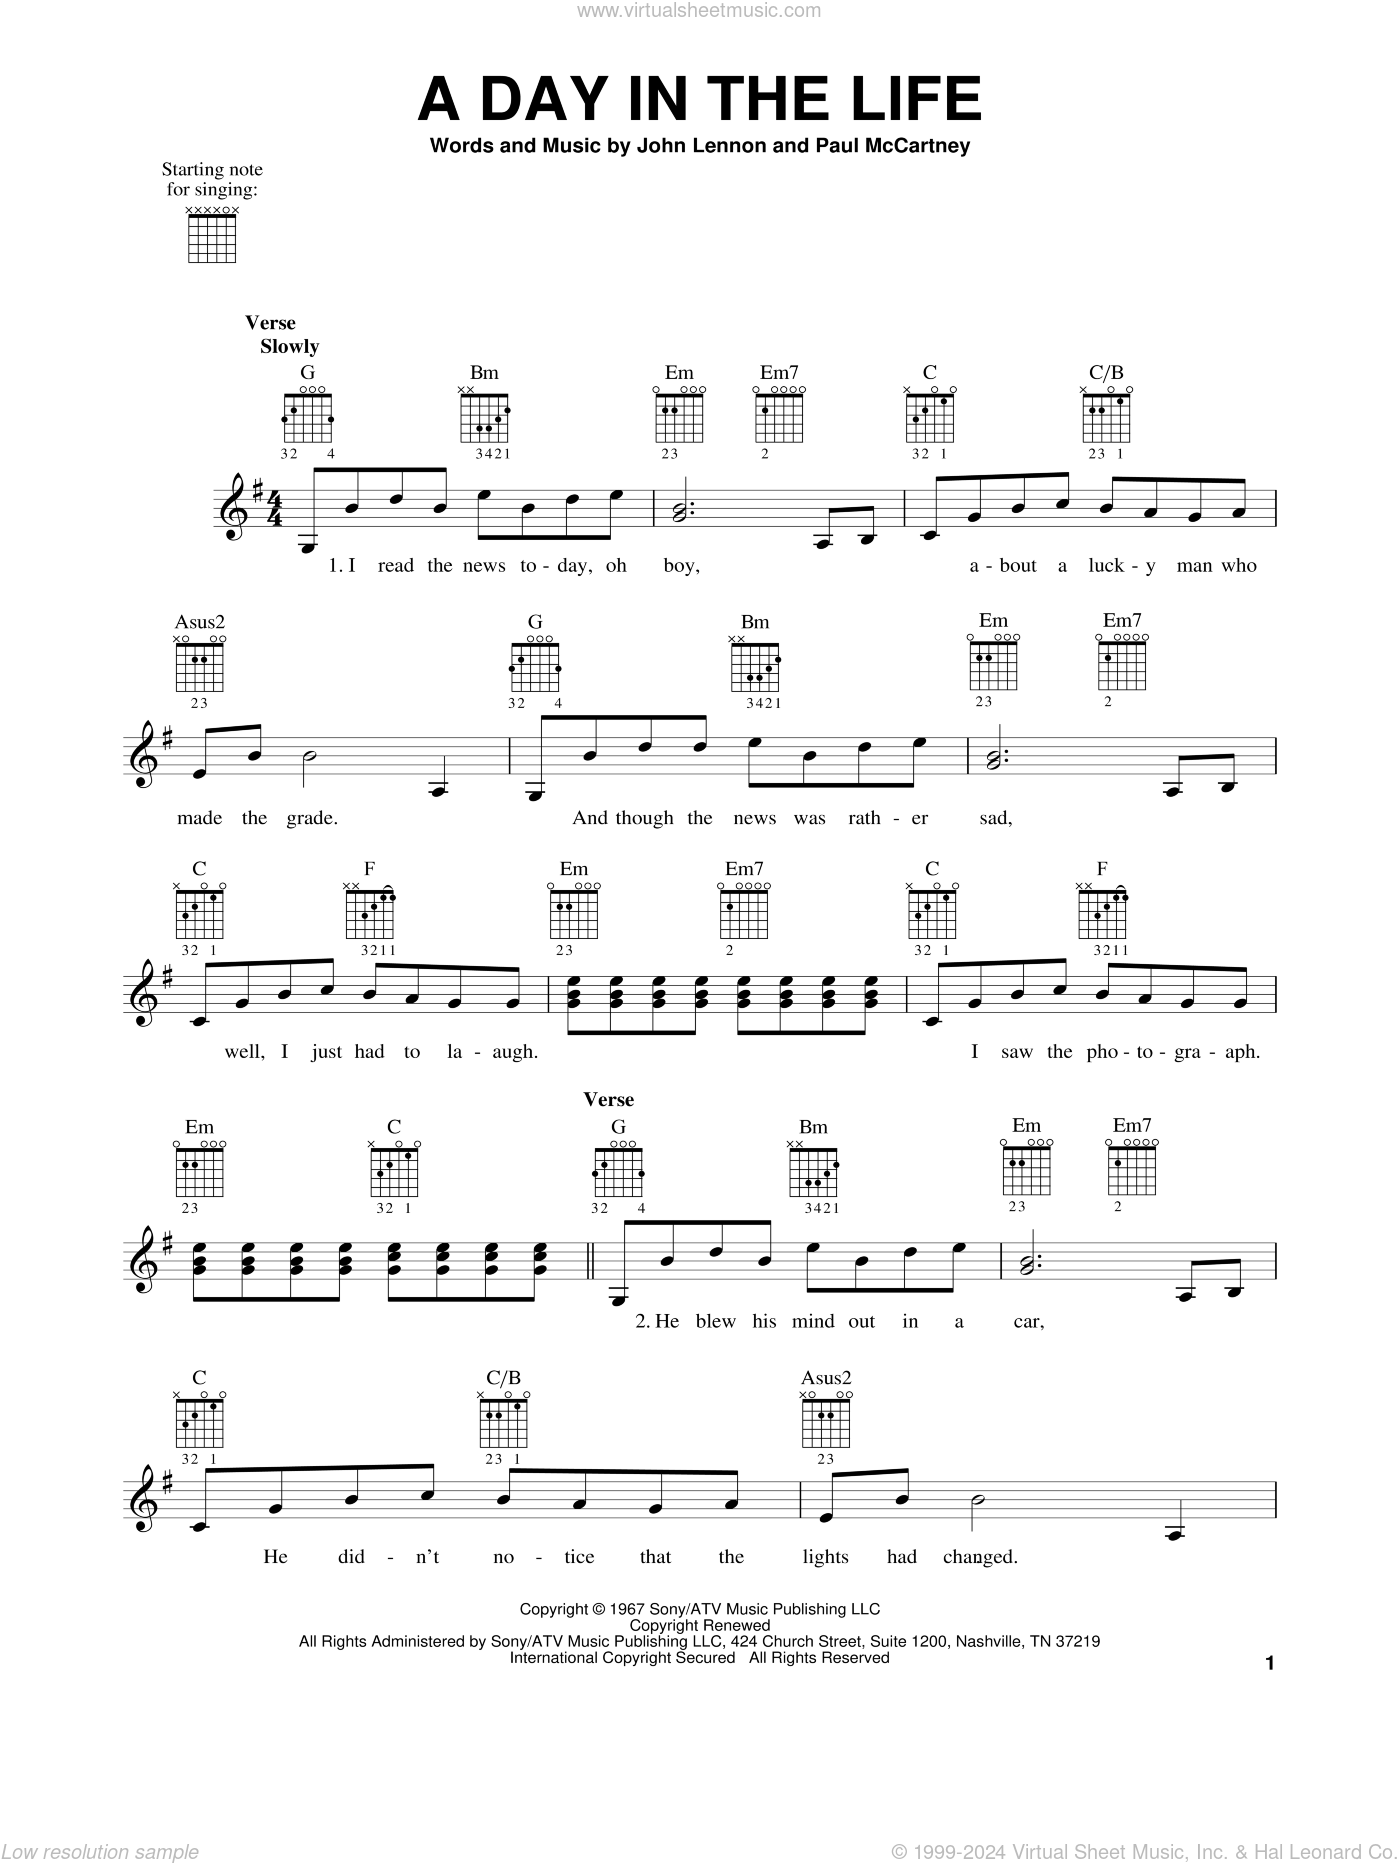
A Day in the Life Chords Guitar Players Should Know
The main guitar-friendly version is played around G major. It keeps the verse simple while using small chord changes to create the song’s thoughtful, unsettled mood.
Here is a common chord set:
• G major
• Em or Em7
• C major
• Cmaj7
• F major
• Am
• E7
• D major
The first four chords are enough for a basic version of the verses. The extra chords help you match more detailed arrangements and cover the song’s contrasting sections.
A simplified progression may look like this:
Verse:
G     Em     C     Cmaj7
G     Em     C     Cmaj7
G     Em     C     F
C     G      D     G
Different chord charts may show slightly different changes. This happens because the recording includes piano voicings, orchestral movement, and layered parts that do not always translate directly to one guitar.

The Chord Progression and Song Structure
Understanding the structure makes the A Day in the Life chords guitar arrangement much easier to learn. The song has several clear parts, but they do not all work in the same way.
The opening verse
The opening verse has a calm, almost spoken quality. Use a soft downstroke or gentle fingerpicking pattern. The harmony stays close to G major, but the move from C to Cmaj7 adds color.
The Cmaj7 chord is especially useful. It changes only one note from C major, yet it sounds more open and reflective. That small movement helps capture the dreamlike tone of the recording.
Try this pattern:
G       Em7       C       Cmaj7
Down    Down      Down    Down
Let each chord ring for a moment. Do not rush to the next change.
The middle section
The instrumental middle section is not a normal verse or chorus. The original recording uses a large orchestral build that rises in intensity before returning to the final vocal section.
On solo guitar, you have several choices:
• Repeat the verse chords softly.
• Play a rising strumming pattern.
• Use a single-note melody between chords.
• Pause and create your own instrumental transition.
There is no single correct guitar version of this section. The important goal is to create tension. Start quietly, then increase your volume and attack.
The final verse
The final verse returns to the familiar chord shape, but it should not sound exactly like the first verse. Play it with more confidence and a slightly fuller strum.
Many players make the mistake of treating the whole song as one repeated loop. The chords may repeat, but the feeling should change. The first verse feels observant, the middle rises with tension, and the final verse feels larger and more emotional.
Easy Chord Shapes for Beginners
If you are new to guitar, start with open chords. They sound natural and keep the arrangement close to the original harmonic feel.
G major
e|---3---
B|---0---
G|---0---
D|---0---
A|---2---
E|---3---
Em7
e|---0---
B|---3---
G|---0---
D|---2---
A|---2---
E|---0---
C major
e|---0---
B|---1---
G|---0---
D|---2---
A|---3---
E|---x---
Cmaj7
e|---0---
B|---0---
G|---0---
D|---2---
A|---3---
E|---x---
F major
Beginners can use an easier Fmaj7 shape:
e|---0---
B|---1---
G|---2---
D|---3---
A|---x---
E|---x---
This version avoids the full barre chord. It is softer and often works well in a solo arrangement.
D major
e|---2---
B|---3---
G|---2---
D|---0---
A|---x---
E|---x---
Practice each shape alone first. Then move between G, Em7, C, and Cmaj7. Those changes form the heart of the A Day in the Life chords guitar arrangement.

Strumming Patterns That Fit the Song
The right rhythm matters as much as the right chords. A loud pop strum can make this song lose its reflective character.
Gentle beginner pattern
Count:
1   2   3   4
D   D   D   D
Use light downstrokes. Allow the chords to ring, and avoid hitting every string with force.
Flowing eighth-note pattern
Count:
1 & 2 & 3 & 4 &
D   D U   U D U
This pattern creates movement without sounding too busy. Keep your picking hand moving even when you skip a stroke.
Fingerpicking pattern
Try this simple pattern:
Thumb, index, middle, ring, middle, index
Use the thumb for the bass note and your fingers for the G, B, and high E strings. Fingerpicking can make the A Day in the Life chords guitar version sound intimate and clear.
When I work through arrangements like this, I find that players often focus too much on changing chords quickly. A slower, controlled change usually sounds better than a fast change with buzzing strings and uneven timing.

How to Play the Chords With the Right Feel
The Beatles recording is powerful because it balances restraint and drama. Your guitar performance should do the same.
Begin quietly
Use a relaxed picking hand. Keep your first verse low in volume. Think of the guitar as supporting a spoken story rather than leading a rock song.
Add small chord colors
The change from C to Cmaj7 is an easy way to add emotion. You can also try Em7 instead of Em. These small variations create a richer sound without making the arrangement difficult.
Build toward the transition
As you approach the instrumental section, increase the strumming strength. You can also move from picking to full chords.
A simple dynamic plan is:
- First verse: fingerpicking or soft downstrokes
- Transition: wider strums with more volume
- Final verse: steady, full strumming
- Ending: slow down and let the final chord ring
Leave space
Silence is part of the arrangement. Do not fill every pause. A short break between phrases can make the next chord feel more important.
This is one of the most useful lessons in the A Day in the Life chords guitar arrangement: musical space often creates more emotion than extra notes.

A Step-by-Step Practice Plan
Learning the full song at once can feel confusing. Break it into small sections instead.
Step 1: Learn the basic shapes
Practice G, Em7, C, and Cmaj7 until you can form them without looking at your fretting hand.
Step 2: Practice chord changes
Set a slow metronome between 55 and 65 beats per minute. Change chords every four beats.
Focus on clean movement rather than speed.
Step 3: Add a steady rhythm
Use four soft downstrokes per bar. Keep your wrist loose and your arm relaxed.
Step 4: Practice the verse loop
Repeat the main progression several times. Listen for buzzing strings, muted notes, and changes that arrive late.
Step 5: Add dynamics
Play one repetition quietly and the next one more strongly. This teaches your hands to shape the song.
Step 6: Create the instrumental section
Repeat the chords, use a rising strum, or pause for a short solo. The section should feel like a gradual lift.
Step 7: Record yourself
A phone recording can reveal timing problems that are hard to notice while playing. Listen for uneven chord changes and a rhythm that speeds up during the louder section.
A practical mistake I often see is starting at the original recording’s emotional intensity. Start much softer than you think. It gives you room to build later.

Common Mistakes to Avoid
Even simple A Day in the Life chords guitar arrangements can sound weak if the technique is rushed.
Playing every chord too loudly
The verses need space. Use less force, especially on the first pass.
Ignoring Cmaj7
You can replace Cmaj7 with C major, but the song may lose some of its gentle color. Learn both shapes and compare them.
Using a barre F too soon
A full F barre chord can slow down beginners. Start with Fmaj7, then learn the barre shape when your hand is ready.
Changing chords before the beat
This usually happens when a player looks ahead and loses the pulse. Count out loud and keep the strumming hand steady.
Treating the transition like a normal chorus
The instrumental build is a mood change. Increase volume and intensity instead of simply repeating the same soft pattern.