How To Store A Drum Set: Best Storage Guide
Store a drum set clean, dry, covered, and off the floor, with each part supported to prevent damage.
Knowing how to store a drum set protects its shells, heads, hardware, cymbals, and sound quality. The right method also saves space and makes setup faster when you are ready to play again. Whether you store a kit for a week, a season, or several years, this guide explains the safest steps, useful gear, common mistakes, and practical lessons from real drum storage.

Why Proper Drum Set Storage Matters
A drum set contains wood, metal, plastic, rubber, and fabric. Each material reacts differently to heat, moisture, pressure, and dust. Poor storage can cause warped shells, rusty stands, cracked cymbals, loose hardware, stained drumheads, and musty cases.
Learning how to store a drum set is especially important when the kit will sit unused for more than a few days. Even a clean basement or garage may have large changes in temperature and humidity. Those changes can affect wood shells and metal parts over time.
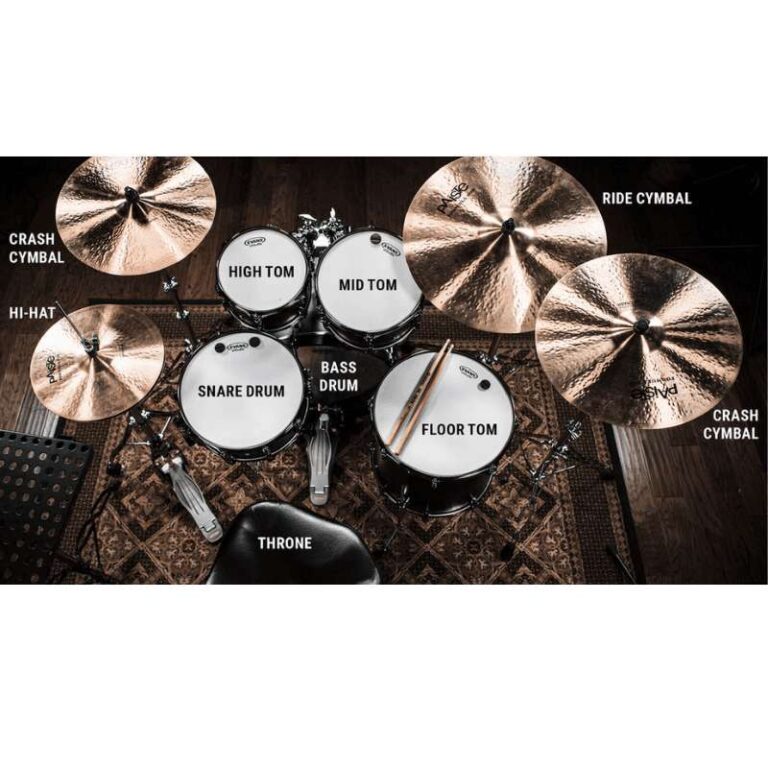
A drum set is also easy to damage during storage because many parts are heavy and oddly shaped. A cymbal placed under a drum can bend. A floor tom stored on its side may roll or fall. A bass drum packed under heavy boxes can lose its shape.
Good storage does three things:
- It controls moisture and temperature.
- It prevents scratches, dents, and pressure damage.
- It keeps the kit organized for easy setup.
In my experience, most storage damage comes from simple mistakes rather than rare accidents. Drummers often leave a kit assembled in a damp room, place cases directly on concrete, or stack loose cymbals together. A few careful steps can prevent nearly all of these problems.

Choose the Best Storage Location
The best place to store a drum set is a clean, dry, stable room inside your home. A spare bedroom, finished basement, music room, or climate-controlled storage unit usually works well.
Avoid areas with rapid temperature changes or high moisture. Garages, sheds, attics, and unfinished basements may seem convenient, but they can expose drums to heat, cold, condensation, and pests.
Look for a location with these qualities:
- Stable indoor temperature
- Low to moderate humidity
- No direct sunlight
- Good air movement
- Protection from leaks and flooding
- Enough space to lift and move cases safely
- No heavy items stored above the drums
The ideal relative humidity for many wood musical instruments is often around 40% to 60%. This range is widely used by instrument makers, museums, and music professionals because very dry air can shrink wood while damp air can encourage swelling and mold.
A small digital hygrometer can help you monitor the room. It is inexpensive and more reliable than guessing by feel. If the humidity stays too high, use a dehumidifier. If the air is very dry, a room humidifier may help, but keep it away from the drum cases and check the room often.
Do not place cases directly on a basement floor. Use a shelf, pallet, rubber mat, or low platform. This creates a barrier against small floods, cold concrete, and moisture that may collect under the cases.
Prepare the Drum Set Before Storage
Before learning how to store a drum set for the long term, prepare every part. Storage should begin with cleaning, inspection, and careful disassembly.
Clean Every Part
Wipe dust from the shells, hoops, lugs, stands, pedals, and cymbals. Use a soft, dry microfiber cloth for routine cleaning. For deeper cleaning, follow the care instructions from the drum and cymbal makers.
Do not spray cleaner directly onto a drum shell or cymbal. Spray a small amount onto a cloth instead. Keep liquid away from tension rods, bearing edges, vents, and moving pedal parts.
Clean cymbals with a product made for cymbals. Household cleaners may contain chemicals that damage the finish or change the surface. Never use abrasive pads or steel wool.
Inspect for Damage
Check each part before packing it away. Look for:
- Cracks in shells or cymbals
- Rust on tension rods or stands
- Bent wing nuts or cymbal sleeves
- Loose lugs
- Frayed pedal chains
- Damaged drumheads
- Torn bags or broken case zippers
Repairing a small issue now is easier than finding a major problem before a performance. A loose screw can also scratch another part while the kit is being moved.
Loosen Drumhead Tension Slightly
For long-term storage, many drummers loosen the tension slightly. This can reduce constant stress on the head and hoop. Do not remove all tension unless the manufacturer recommends it, because a completely loose head may shift or lose its shape.
Turn each tension rod in small, even amounts. The goal is balanced, light tension, not a completely slack drum. For short-term storage, normal tuning is usually fine if the drums remain in a stable indoor room.

Disassemble the Kit Carefully
Disassembly is a key part of how to store a drum set safely. Take photos before you remove parts if you are unsure how the kit fits together. A quick photo of the bass drum pedal, tom mounts, and cymbal stands can save time later.
Use this order:
- Remove sticks, accessories, and small loose items.
- Take off cymbals and place each one in a cymbal bag.
- Remove cymbal stands and fold them carefully.
- Detach toms from their mounts.
- Remove the bass drum pedal.
- Fold or collapse the hardware.
- Pack the shells and hardware in separate cases.
- Label each case before moving it.
Avoid forcing stuck wing nuts or bolts. Apply the correct tool and gentle pressure. If a part is seized, stop and inspect it rather than twisting until it bends.
Keep small parts in labeled bags. Good labels include “hi-hat clutch,” “floor tom legs,” and “bass pedal parts.” Store these bags in the related case, not in a random drawer. This simple habit prevents many lost-part problems.
Do not pack heavy stands on top of drum shells. Hardware cases should have their own compartment or bag. Metal edges can press into a shell or damage a drumhead during transport.

Pack Drums, Cymbals, and Hardware Correctly
The best way to store a drum set is to use cases that match each part. Cases protect against dust, impact, sunlight, and accidental contact. Soft bags are useful for light indoor storage, while padded cases offer better protection during moves or long-term storage.
Store Drum Shells
Place each drum in a properly sized drum bag or hard case. The shell should fit securely without being squeezed. Add light padding if the case has empty space, but do not force thick material around the drum.
Use clean, dry fabric. Do not seal a damp drum inside a plastic bag. Trapped moisture can cause odors, stains, and mold. Let the drum air-dry fully after cleaning before closing the case.
For extra protection:
- Keep the shell away from direct sunlight.
- Do not place objects inside the drum unless they are soft and clean.
- Store drums on a stable shelf or case stand.
- Keep cases upright only when the design supports upright storage.
- Avoid stacking more than the case maker recommends.
Store Cymbals
Cymbals should rest vertically or lie flat in a proper cymbal case. Use dividers or sleeves between cymbals to prevent metal-on-metal scratches.
Do not stack loose cymbals on a concrete floor. Do not store heavy boxes on top of them. Large cymbals can bend when stored under uneven pressure.
Never tighten a cymbal bag so much that the cymbals are compressed. They need support, not pressure.
Store Hardware
Place stands, pedals, clamps, and mounts in a hardware bag. Dry all metal parts before packing them. A small moisture absorber can help inside a hardware case, but replace it as directed and keep it away from children and pets.
Do not overload one bag. A bag that is too heavy can tear, and its contents may fall onto the floor. Divide hardware into two cases if needed.

How to Store a Drum Set in a Small Space
Many drummers do not have a full music room. You can still learn how to store a drum set in an apartment, closet, or shared room without risking damage.
Start by separating the kit into three groups:
- Drum shells
- Cymbals
- Hardware and accessories
Use vertical space for lightweight cases, but secure them so they cannot tip. Store heavier cases low to the ground. Keep a clear path around the cases so you do not trip while moving them.
A drum rack, closet shelf, or rolling storage cart can help. Add felt or rubber padding where cases touch a shelf. Avoid sharp wire shelving because it can leave pressure marks.
If the kit must stay assembled, remove the cymbals and pedals first. Cover the drums with breathable fabric rather than sealing them under plastic. Keep the kit away from heaters, windows, exterior doors, and air-conditioning vents.
An assembled kit takes up more room, but it may be practical for daily use. A covered kit also gathers less dust. However, assembled storage is not ideal for moving, long-term storage, or rooms with unstable humidity.

How to Store a Drum Set Long Term
Long-term storage requires more care than overnight or weekly storage. If you will not play the kit for several months, create a written storage checklist.
Use these steps:
- Clean and dry every part.
- Inspect shells, heads, hardware, and cymbals.
- Loosen drumhead tension slightly and evenly.
- Remove batteries from electronic triggers or accessories.
- Pack shells, cymbals, and hardware separately.
- Add a suitable moisture absorber to hardware cases.
- Label every case.
- Raise cases off the floor.
- Check humidity and temperature.
- Inspect the kit every four to eight weeks.
Open the cases during inspections if the room is humid. Look for condensation, rust, mildew, insect activity, or unusual smells. Early signs are much easier to fix than advanced damage.
For storage longer than one year, consider a climate-controlled unit. Ask the facility about temperature changes, humidity control, leaks, security, and insurance. A standard outdoor storage locker may not offer enough protection for a valuable vintage or professional kit.
Insurance is also worth checking. Some homeowners and renters policies cover musical instruments, but limits and exclusions vary. Photograph the kit and record model names, serial numbers, and purchase records.
Common Drum Storage Mistakes to Avoid
Understanding what not to do is an important part of how to store a drum set. These errors are common because they seem harmless at first.
- Storing drums in a damp garage: Moisture can damage wood, metal, cases, and drumheads.
- Leaving drums uncovered: Dust can enter tension hardware and pedal joints.
- Using airtight plastic for damp parts: Sealed moisture can create mold.
- Stacking heavy gear on shells: Weight can dent hoops or stress shells.
- Letting cymbals touch each other: Movement can cause scratches and edge damage.
- Keeping cases on concrete: Concrete can transfer moisture and cold.
- Over-tightening drumheads: Constant pressure may stress heads and hoops.
- Mixing hardware with shells: Metal parts can scratch finished surfaces.
- Forgetting small parts: Missing washers, sleeves, or wing nuts can delay setup.
- Using harsh cleaners: Strong chemicals can damage finishes and cymbal surfaces.
One mistake I learned to avoid is packing everything into one large case. It may save space, but that case becomes difficult to lift and hard to organize. Separate cases make storage safer and reduce the chance of one fallen bag damaging the entire kit.

How to Store a Drum Set During a Move
Moving creates more risk than ordinary storage. Even a well-packed kit can suffer damage if cases slide, fall, or receive uneven pressure.
Use padded cases for the shells and a strong cymbal case with dividers. Place heavy hardware low in the vehicle. Secure every case so it cannot move during turns or sudden stops.
Never leave a drum set in a hot car for many hours. Extreme heat can soften adhesives, damage wraps, and raise tension inside cases. Freezing conditions can also make some materials brittle. Move the kit into a stable indoor area as soon as possible.