How To Clean Drum Skins: Easy Safe Cleaning Guide
Clean drum skins with a dry, soft cloth first, then use gentle moisture only when needed.
Learning how to clean drum skins helps protect tone, appearance, and playing life. Drum skins, also called drumheads, collect dust, skin oil, sweat, and stick marks during normal use. With the right method, you can remove that buildup without soaking the head, damaging the coating, or changing its sound. This guide explains how to clean drum skins safely, what products to avoid, and when cleaning is no longer enough.
What Are Drum Skins?
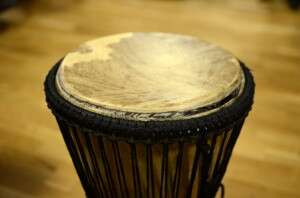
Drum skins are the stretched surfaces that produce sound when struck. Modern drumheads usually use Mylar, a strong polyester film, while some traditional drums use natural calfskin, goatskin, or other animal hide.
The cleaning method depends on the material and finish. A coated drumhead needs more care than a clear head because rough rubbing can wear away its textured surface. Natural skins also react to moisture and humidity, so they need an even gentler approach.
Common types include:
• Coated heads, which have a thin textured layer for a warm, controlled sound
• Clear heads, which have a smooth plastic surface
• Mesh heads, which are made for quiet practice
• Oil-filled or two-ply heads, which may trap dirt around their edges
• Natural hide heads, which can expand or shrink with humidity
Cleaning does not repair a worn, dented, or stretched drumhead. It only removes surface dirt. If the head has deep dents, tears, peeling coating, or a dull tone, replacement may be the better choice.
Why Clean Drum Skins?
Regular cleaning keeps small amounts of dirt from becoming a hard, sticky layer. Sweat and skin oil can build up where your hands touch the head or where sticks land most often. Over time, this buildup may make the surface feel uneven.
Clean drum skins also look better and are easier to inspect. A clean surface helps you spot cracks, loose areas, deep dents, or coating damage before these problems affect a performance.
The main benefits include:
• removing dust, sweat, and light oil
• Reducing sticky residue
• Preserving the look of coated and clear heads
• Making damage easier to see
• Supporting consistent touch and response
• Extending the useful life of a drumhead when it is still in good condition
A clean drumhead will not magically restore its original tone. Sound also depends on tuning, head age, shell condition, room acoustics, and playing style. Still, basic care can prevent avoidable damage.

How to Clean Drum Skins Safely
The safest method is simple. Start dry and use as little moisture as possible. Never flood the drumhead or spray cleaner directly onto it.
What You Need
Gather these items before you begin:
• A clean microfiber cloth
• A second soft, dry cloth
• Lukewarm water
• Mild dish soap, only for stubborn grime
• A soft cotton swab for the rim area
• A clean towel for drying
Avoid paper towels with rough fibers. They can leave lint and may create fine marks on some surfaces. Keep your cloths free from grit, polish, wax, and household chemicals.
Step 1: Remove the Drumhead if Needed
You can clean a lightly dirty head while it is mounted. However, removing it gives you better access to the rim and underside.
If you remove the head, loosen the tension rods in a star pattern. This helps reduce uneven pressure on the hoop. Place the head on a clean, flat towel so the playing surface does not touch grit.
For routine dust removal, removal is not required. Taking off a drumhead too often can waste time and may make tuning more difficult.
Step 2: Remove Loose Dust
Use a dry microfiber cloth to wipe the head with light pressure. Move in small circles or straight passes from the center toward the edge.
Do not press hard. Dust can act like a fine abrasive when pushed across a coated surface. Pay close attention to the area near the rim, where dirt often collects.
For textured heads, wipe gently in one direction first. If the cloth catches on the coating, stop and use less pressure.
Step 3: Use a Slightly Damp Cloth
If dry wiping does not remove the dirt, dampen a cloth with lukewarm water. Wring it out well. It should feel barely damp, not wet.
Wipe a small area first. This test helps you see whether the coating changes color, texture, or feel. If the area looks normal, continue across the head with gentle strokes.
This step is central to how to clean drum skins without causing harm. Moisture should sit on the cloth, not on the drumhead. Do not allow water to pool near the hoop, tension rods, vent holes, or shell.
Step 4: Add Mild Soap Only for Stubborn Dirt
For greasy marks or sticky residue, place one tiny drop of mild dish soap into a cup of water. Dip the cloth into the mixture, then wring it out almost completely.
Wipe the dirty area gently. Do not scrub with a brush, sponge, or abrasive pad. Afterward, use a second cloth dampened with plain water to remove soap residue.
Soap left on the head can attract more dust and may affect the surface feel. Use this method rarely, not as part of every cleaning session.
Step 5: Dry the Drumhead
Use a dry microfiber cloth to remove moisture. Let the head air-dry for a few minutes in a clean room before playing.
Do not use a hair dryer, heat gun, radiator, or direct hot sunlight. Heat can change the tension of a plastic head and can dry or distort a natural hide head.
If you removed the drumhead, make sure both the head and hoop are fully dry before reinstalling them.

How to Clean Coated Drumheads
Coated drumheads need a soft touch because their textured layer can wear down. That coating affects attack, sustain, brush response, and overall tone.
Begin with a dry microfiber cloth. If the head has visible grime, use a barely damp cloth with plain water. Clean small sections rather than rubbing the entire surface with force.
Avoid these products on coated heads:
• Glass cleaner
• Alcohol wipes
• Furniture polish
• Disinfectant sprays
• Automotive cleaners
• Abrasive kitchen products
• Magic erasers
• Rough sponges
Some players use specialized drumhead cleaners. These products may be suitable when the label clearly states that they are safe for the head material. Test any product on a small, less visible area first.
Brush players should take extra care. Repeated hard brushing can wear the coating even without cleaning. If the brush response feels much smoother in one area, the coating may already be worn rather than dirty.
How to Clean Clear Drumheads
Clear drumheads are usually easier to wipe because their surface is smooth. Use a dry cloth for dust, followed by a barely damp cloth for fingerprints and light grime.
Avoid pressing down on the center of the head. Clear heads can show fine scratches, cloudy marks, and circular wear from repeated contact with sticks or mallets.
If a clear head has a cloudy patch that does not disappear after gentle cleaning, it may be scuffed or chemically damaged. More rubbing will not restore the finish. In that case, replacement is often the cleanest solution.
The same approach applies to clear resonant heads. Clean around the vent holes and edge with care, but do not force cloth fibers into small openings.
How to Clean Natural Drum Skins
Natural skins require special care. They respond to humidity, temperature, and moisture much more than plastic heads do.
Use a soft, dry cloth for normal dust. If a mark must be removed, use a cloth that is only slightly damp and clean the smallest area possible. Dry the surface right away.
Never soak a natural skin. Water can make it swell, weaken the fibers, or create uneven tension as it dries. Do not use oils, leather conditioners, solvents, or household cleaners unless the drum maker specifically recommends them.
Keep natural-skin drums away from damp basements, heaters, open windows during rain, and sudden temperature changes. A stable environment is often more important than frequent cleaning.
How to Clean Drum Skins Without Removing Them
Many players want a fast method between rehearsals. You can clean drum skins in place with these steps:
-
Remove sticks, brushes, dampening gels, and other accessories.
-
Use a dry microfiber cloth to lift loose dust.
-
Wipe marks with a barely damp cloth.
-
Clean the rim area with a soft cotton swab.
-
Dry the head with a fresh cloth.
-
Check for dents, tears, loose coating, and uneven tension.
Keep moisture away from the bearing edge. This is the part of the shell where the head sits. Dirt or water on the bearing edge can affect seating and tuning.
A quick wipe after heavy playing is often more useful than a deep cleaning every few months. Sweat is easier to remove while it is fresh.
Cleaning the Drum Hoop, Rim, and Hardware
Dirt does not stay on the playing surface. It can also collect on the hoop, tension rods, claws, lugs, and snare wires.
Clean metal hardware with a separate dry cloth. If needed, use a slightly damp cloth, then dry the hardware right away. Keep liquid away from lug interiors and threaded tension rods.
Do not use metal polish unless the hardware manufacturer allows it. Polish can leave residue that transfers to the drumhead or attracts dust.
For tension rods, check that the threads turn smoothly. If they feel rough, remove the rod and clean the threads with a dry cloth. Use only a suitable lubricant if the drum maker recommends one.
The snare strainer and wires deserve attention too. Dust and lint can affect snare response, but aggressive cleaning can bend the wires. Work slowly and inspect the wires under good light.
Mistakes to Avoid When Cleaning Drum Skins
The biggest mistake is treating a drumhead like a kitchen surface. Drumheads are thin, tensioned parts. They need gentle care, not strong scrubbing.
Avoid these common errors:
• Spraying cleaner directly onto the head
• Using too much water
• Scrubbing with a rough sponge
• Using alcohol or ammonia-based products
• Cleaning with dirty cloths
• Applying wax or oil without approval from the maker
• Using high heat to speed up drying
• Reinstalling a damp head
• Tightening the head unevenly after removal
In my experience, the most common avoidable problem is over-cleaning. A player sees a few marks, adds stronger cleaner, and keeps rubbing until the coating becomes patchy. A small mark is usually less harmful than a damaged surface.
Another mistake is cleaning without checking the cause of the dirt. If oily marks return quickly, wipe the sticks, hands, or drum accessories too. Clean hands and dry sticks can reduce buildup.
How Often Should You Clean Drum Skins?
There is no fixed schedule for every drummer. Cleaning needs depend on playing time, sweat, room dust, brush use, and the drumhead finish.
A practical routine is:
• Wipe dust away before or after each session
• Wipe sweat and visible marks after long rehearsals or shows
• Perform a deeper gentle clean every few months
• Inspect the head whenever you change strings, wires, or other drum parts
• Replace the head when wear affects sound, feel, or tuning
Do not confuse cleaning with maintenance. Tuning, bearing-edge checks, hardware inspection, and head replacement also affect performance.
For touring drums, keep a clean microfiber cloth in the hardware case. This small habit prevents grime from building up during travel and setup.

When Cleaning Is Not Enough
Cleaning cannot fix structural wear. Replace the drumhead if you notice:
• A tear or split
• A deep dent that affects rebound
• Severe coating loss
• A stretched area that will not tune
• A crack near the edge
• A loose or damaged hoop
• A sharp drop in tone
A worn batter head may sound dull, feel slow, or lose tuning stability. A worn resonant head may reduce projection and sensitivity. If gentle cleaning does not improve the feel or appearance, the problem may be age rather than dirt.
Different players replace heads at different times. A touring drummer may replace them often, while a casual player may use the same head much longer. Your ears and hands are useful guides, but visible damage should always be taken seriously.
A Simple Drumhead Care Routine
This routine works well for most plastic drumheads:
-
Wash and dry your hands before playing.
-
Keep sticks, brushes, and accessories free from dirt.
-
Wipe the head with a dry microfiber cloth after use.
-
Use a barely damp cloth only for marks that remain.
-
Dry the surface at once.
-
Store drums in a dry, stable environment.
-
Inspect the head before important rehearsals and performances.
-
Replace the head when wear changes its sound or response.
This approach keeps how to clean drum skins simple. Good care is less about using special products and more about avoiding harsh treatment.
Frequently Asked Questions About How to Clean Drum Skins
Can I use glass cleaner on drum skins?
It is best to avoid glass cleaner unless the drumhead manufacturer clearly approves it. Many glass cleaners contain alcohol, ammonia, or other ingredients that may damage coatings or leave residue.
Can I wash a drumhead with soap and water?
Use only a tiny amount of mild soap diluted in water for stubborn dirt. Never soak the drumhead, and always wipe away soap residue before drying it fully.
How do I clean a coated drumhead?
Start with a dry microfiber cloth, then use a barely damp cloth if needed. Apply very light pressure because strong rubbing can wear away the coating.
How do I clean a natural skin drumhead?
Dust it with a soft, dry cloth and use almost no moisture. Avoid soaking, oils, solvents, and sudden heat because natural skin can swell, shrink, or lose tension.
Can I clean drum skins while they are still mounted?
Yes. Light cleaning is usually easier while the head is mounted. Keep moisture away from the rim, bearing edge, tension rods, and shell.
How often should I clean my drumheads?
Wipe away dust after playing and remove sweat or visible marks after long sessions. A deeper gentle clean every few months is enough for many players.
Does cleaning improve drum sound?
Cleaning can remove residue that affects feel and appearance, but it cannot repair a dented or worn head. Tuning, head age, shell condition, and room acoustics also shape the sound.
Conclusion
Learning how to clean drum skins is mainly about restraint. Use a dry microfiber cloth first, add only a little moisture when needed, and avoid harsh chemicals, rough tools, and excess heat. Coated, clear, mesh, and natural-skin heads each need slightly different care.
A clean drumhead is easier to inspect and may last longer when it is otherwise healthy. Make gentle wiping part of your normal playing routine, and replace the head when damage or wear affects its tone and response. Try these steps at your next practice, then share your best drum-care tip with other players.

Senior Music Reviewer
Alex Carter is a seasoned music reviewer with over a decade of experience in the world of sound and instruments. Passionate about helping musicians and enthusiasts make informed choices, he brings sharp insights and in-depth knowledge to every review. From classical instruments to modern gear, Alex combines technical expertise with a love for music to deliver content that resonates with readers.
As a Senior Music Reviewer and expert author on Tuneluma.com, Alex is dedicated to sharing honest evaluations, practical advice, and thoughtful commentary to guide readers in their musical journey.