How To Build A Drum Set: Easy Step-By-Step Guide
To build a drum set, assemble the shells, heads, hoops, hardware, cymbals, and pedals in a balanced playing layout.
Learning how to build a drum set is easier when you treat the kit like a small sound system. Each part affects comfort, tone, and control. This guide explains the correct order, common mistakes, tuning basics, and practical setup tips used by drummers in homes, studios, and live spaces.
What You Need to Build a Drum Set
Before learning how to build a drum set, identify every part of the kit. A standard acoustic drum set often includes drums, cymbals, stands, pedals, and a throne.
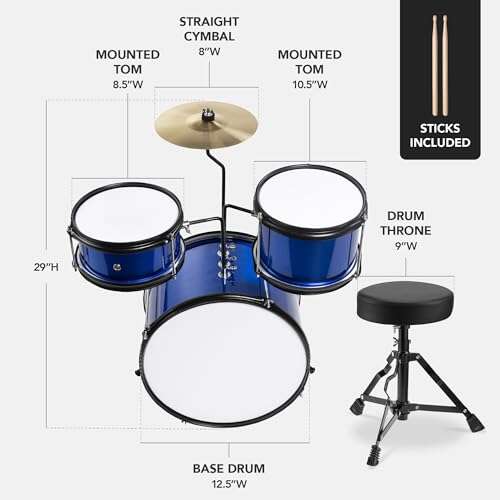
A basic five-piece drum set usually contains:
• Bass drum: The large floor drum played with a foot pedal.
• Snare drum: The sharp, cutting drum placed between your knees.
• Rack toms: Smaller toms mounted above the bass drum.
• Floor tom: The deep tom that stands on its own legs.
• Hi-hat cymbals: Two cymbals controlled with a foot pedal.
• Crash cymbal: A bright cymbal used for accents.
• Ride cymbal: A larger cymbal used for steady patterns.
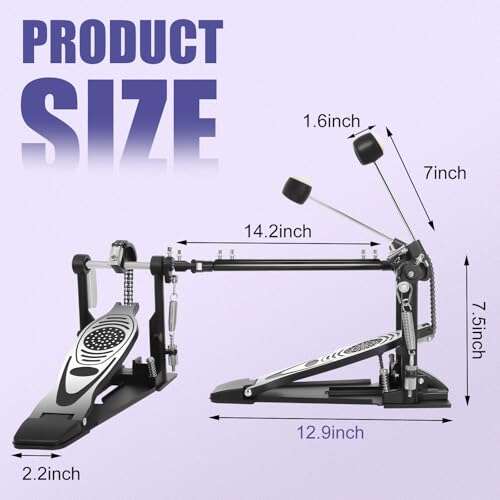
• Bass drum pedal: The pedal that moves the beater into the bass drum head.
• Drum throne: The adjustable seat used by the drummer.
• Hardware: Stands, mounts, clamps, brackets, and legs.
You may also need drumsticks, a tuning key, a felt mallet, a drum rug, and a small screwdriver. An electronic drum set uses pads, a rack, a sound module, cables, and headphones instead of acoustic shells and cymbals.
A useful first step in how to build a drum set is to place every item on the floor. Check that no wingnut, washer, tension rod, or stand part is missing. This simple check can save time and prevent frustration halfway through the setup.

Understand the Drum Set Layout
The most common drum set layout places the bass drum in the center, with the snare drum slightly to the left. The hi-hat sits beside the snare, while the rack toms rest above the bass drum.
The floor tom sits to the drummer’s right. The ride cymbal usually sits above or near the floor tom. A crash cymbal often sits to the left of the rack toms, although many players use two or more crash cymbals.
When deciding how to build a drum set, think about movement rather than appearance. Every drum and cymbal should be easy to reach without twisting your back or lifting your shoulders.
A comfortable layout normally follows these rules:
• Keep the snare close enough for relaxed strokes.
• Place the hi-hat pedal beside the bass drum pedal.
• Angle toms toward you, but do not point them sharply downward.
• Keep cymbals low enough to reach without raising your shoulders.
• Leave space for the bass drum pedal to move freely.
• Place the floor tom so your knee and hip stay relaxed.
There is no single perfect layout. Jazz, rock, metal, funk, and marching-style setups may use different positions. The best layout is the one that lets you play with steady motion and no pain.

How to Build a Drum Set Step by Step
The order matters. Set up the large and heavy parts first, then add the smaller pieces. This keeps the kit stable and reduces the chance of knocking over a stand.
1. Place the drum rug
Set a non-slip rug on the floor before assembling the kit. The rug helps keep the bass drum, hi-hat, and throne from sliding.
A rug is especially helpful on hardwood or tile floors. Without one, the bass drum may slowly move forward while you play. This can pull the pedal away from your foot and change your timing.
2. Position the bass drum
Place the bass drum in the center of the rug. The batter head should face you, and the front head should face the audience or room.
Extend the bass drum legs until their rubber feet touch the floor. Angle the legs slightly forward so they help stop the drum from rolling. Do not lift the front of the bass drum too high. A small lift is normal, but too much height can make the pedal feel weak.
3. Install the bass drum pedal
Slide the bass drum pedal onto the bottom rim of the batter side. Tighten the clamp by hand first, then use the adjustment knob to secure it.
Place the beater around the center of the bass drum head. Adjust the beater angle so it can move freely without hitting the hoop. Check that the pedal stays flat and does not rock from side to side.
When I explain how to build a drum set to new players, I stress this point: do not overtighten the pedal clamp. Too much pressure can damage the hoop or make later adjustments difficult.
4. Set up the hi-hat stand
Open the hi-hat legs and place the stand to the left of the bass drum pedal. Screw the bottom cymbal seat onto the stand, then place the bottom hi-hat cymbal on the seat with the correct felt and washer.
Insert the clutch through the top cymbal. Attach the clutch to the cymbal, then place the top cymbal on the rod. Adjust the clutch so the top cymbal sits several inches above the bottom cymbal when your foot is relaxed.
The hi-hat should close evenly. Press the pedal and listen for a clean, crisp sound. If the cymbals touch at an angle, adjust the bottom cymbal seat until they meet more evenly.
5. Assemble the snare stand
Open the snare stand legs and set the basket at a comfortable height. Place the snare drum in the basket and tighten the basket arms gently.
The snare should sit between your knees. Many drummers keep it level or angle it slightly toward the floor. Avoid a steep angle because it can make rimshots less comfortable and may affect your wrist position.
6. Mount the rack toms
Insert the tom holder into the bass drum mount or stand. Slide each rack tom onto its holder and tighten the mounting knobs.
Set the toms low enough to reach without lifting your elbows. Leave a small gap between the toms and the bass drum. The shells should not press against one another, because contact can create unwanted vibration and damage the finish.
7. Set up the floor tom
Attach the three floor tom legs and place the drum to your right. Adjust each leg until the drum sits level and does not wobble.
The floor tom should be close enough to reach with a relaxed arm. Its top head is often set near the same height as the snare, though many players prefer it slightly lower.
8. Add cymbal stands
Open the cymbal stand legs and adjust the height before placing cymbals on them. Add the plastic sleeve, felt, cymbal, and top felt in the correct order.
Tighten the wingnut enough to stop the cymbal from falling off. Do not lock the cymbal tightly. Cymbals need room to swing, and a loose setup usually produces a more natural sound.
9. Add the throne
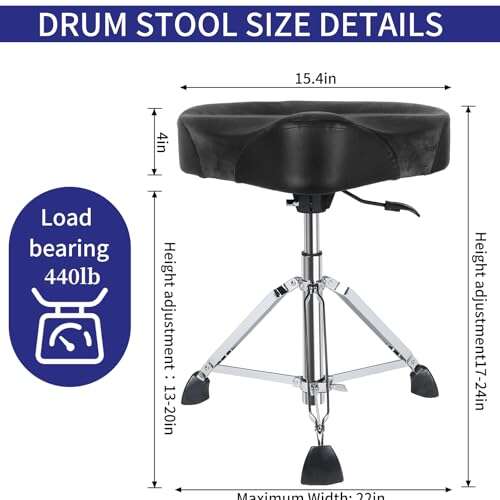
Place the throne behind the bass drum. Adjust its height so your thighs slope slightly downward toward your knees.
If the throne is too low, your hips may sit below your knees and your legs may feel cramped. If it is too high, your feet may lose control. Sit down and test the bass pedal before finalizing the position.

How to Adjust Drum Height and Playing Comfort
Good ergonomics are a major part of how to build a drum set. A kit can look impressive and still feel difficult to play if the heights are wrong.
Sit on the throne and place both feet on the pedals. Your knees should form a comfortable angle. Keep your shoulders low and your elbows loose.
Use this adjustment order:
-
Set the throne height.
-
Position the bass drum pedal and hi-hat pedal.
-
Place the snare between your knees.
-
Adjust the rack toms around the snare.
-
Position the floor tom beside your leg.
-
Add the cymbals last.
This order works because the snare and pedals define your natural playing zone. If you place the cymbals first, you may build the rest of the kit around an awkward reach.
Take a few slow strokes after each adjustment. Your wrists should stay fairly straight, and your arms should move with little effort. Pain is not a normal part of learning the drum set. Stop and adjust the setup if you feel strain.

How to Tune a Drum Set
Tuning controls pitch, resonance, attack, and sustain. You do not need perfect pitch to tune drums, but you do need even tension around each head.
Start by loosening the tension rods evenly. Seat the drumhead by placing it on the shell and fitting the hoop over it. Tighten each tension rod with your fingers, then use a tuning key in a cross pattern.
Turn each rod by small amounts. For example, tighten one rod, then move to the rod opposite it. This spreads pressure across the head and helps prevent wrinkles.
Tap the head a short distance from each tension rod. The pitch should sound similar at each point. If one area sounds much higher or lower, adjust that rod slightly.
General tuning ideas include:
• Bass drum: Low and controlled, with enough tension to remove wrinkles.
• Snare drum: Medium to high tension for a clear response.
• Rack toms: Medium tension with a musical pitch difference between drums.
• Floor tom: Lower tension for a deep and open sound.
New drummers often make the mistake of tuning every drum as low as possible. Very loose heads may sound deep, but they can feel slow and produce weak stick response. The best sound depends on the shell, head type, room, and playing style.
A drum key is enough for basic tuning. A digital drum tuner can help beginners compare tension, but it should support your ears rather than replace them.

How to Build a Drum Set for Different Music Styles
The basic process for how to build a drum set stays the same, but the final layout changes with the music.
Rock drum set
Place one or two rack toms above the bass drum. Use a crash cymbal near the hi-hat and a ride cymbal above the floor tom. Keep the snare and bass pedal in a strong central position for powerful backbeats.
Jazz drum set
Use a smaller bass drum, one rack tom, and one floor tom if available. Keep the cymbals open and easy to reach. Jazz players often prefer a natural, lively sound with less muffling.
Metal drum set
A metal setup may include double bass pedals, multiple rack toms, and several cymbals. Keep the arrangement symmetrical where possible, and make sure fast foot movements do not force your hips or knees into an awkward position.
Funk drum set
Funk often benefits from a tight snare sound, controlled bass drum tone, and quick access to the hi-hat. Avoid placing cymbals too high, since lower positions support fast and relaxed playing.
Beginner drum set
A simple five-piece kit is enough for most new players. Start with one rack tom, one floor tom, one crash, and one ride. A smaller setup makes it easier to learn timing, coordination, and consistent technique.

Common Drum Set Assembly Mistakes
Knowing what not to do is an important part of how to build a drum set. Most setup problems come from rushing or copying another drummer’s layout without considering body size.
Common mistakes include:
• Placing the throne too low: This can limit leg movement and create hip strain.
• Setting cymbals too high: High cymbals often force the shoulders upward.
• Tightening cymbal wingnuts too much: The cymbal needs room to move.
• Mounting toms too steeply: Sharp angles can make the wrists bend awkwardly.
• Forgetting to lock stand memory positions: The kit may shift each time you assemble it.
• Ignoring the bass drum legs: Poor leg angles can make the drum slide forward.
• Using uneven head tension: This creates unwanted overtones and weak tuning.
• Putting the kit directly on a hard floor: The bass drum and pedals may move during play.
One lesson I learned early is to photograph a comfortable setup before packing it away. A quick photo can help you rebuild the same layout at rehearsal or a show. You can also mark stand heights with small pieces of removable tape.

Acoustic Treatment, Volume, and Safety
An acoustic drum set can be loud. The American Academy of Otolaryngology and other hearing health groups warn that repeated exposure to loud sound can harm hearing. Use musician’s earplugs or hearing protection during practice, especially in small rooms.
Place the drum set away from thin shared walls when possible. A rug can reduce movement, but it will not make the drums silent. Foam panels may reduce reflections, but they do not fully block sound from leaving the room.
For safer practice:
• Wear hearing protection.
• Keep children and pets away from loose stands and pedals.
• Check wingnuts and pedal clamps before playing.
• Avoid cracked cymbals with sharp edges.
• Keep cables away from foot pedals if using microphones or electronic gear.
• Use proper lifting technique when moving heavy drums and hardware.
If you play in an apartment, consider mesh heads, low-volume cymbals, practice pads, or an electronic drum set. These options reduce volume, but they may not feel exactly like a full acoustic kit.
How Much Does It Cost to Build a Drum Set?
The cost to build a drum set depends on whether you buy new, used, beginner, or professional equipment.
A basic used kit may cost a few hundred dollars. A new beginner kit often costs more but may include stands, pedals, and cymbals in one package. Intermediate and professional kits can cost much more, especially when you buy cymbals and hardware separately.
When budgeting, remember that cymbals can be a major expense. A low-cost drum shell can still work well with good heads and careful tuning, while poor cymbals may remain harsh even after adjustment.
Before buying, inspect used equipment for:
• Cracks around bearing edges.
• Bent or missing tension rods.
• Damaged snare wires.
• Split cymbals or deep keyholes.
• Loose tom mounts.
• Rusted hardware.
• Bass drum hoops that are warped or cracked.
Buying used gear can offer strong value, but inspect it in person when possible. Ask the seller to show that every stand, pedal, and drum works correctly.
How to Improve the Sound After Assembly
Once you learn how to build a drum set, small changes can make a large difference. Begin with fresh drumheads if the original heads are worn or dented.
The batter head affects feel and attack. The resonant head affects sustain and tone. Replace badly damaged heads instead of trying to tune around dents.
You can also control unwanted ringing with:
• A small piece of drum gel.
• A thin muffling ring.
• A pillow touching the bass drum head.
• Careful room placement.
Use as little muffling as possible at first. Heavy muffling can remove the life from a drum. Tune the drum well before adding dampening.
Mic placement also changes the sound. If you record, place microphones according to the recording goal and follow safe cable practices. A well-tuned drum set in a suitable room often sounds better than an expensive kit that is poorly adjusted.
Frequently Asked Questions About How to Build a Drum Set
How long does it take to build a drum set?
A basic drum set can take 20 to 45 minutes to assemble for the first time. After you learn the layout and mark your stand positions, setup may take only 10 to 15 minutes.
What is the correct order for how to build a drum set?
Start with the rug, bass drum, bass pedal, hi-hat, snare, toms, floor tom, cymbal stands, and throne. Adjust the throne and pedals before finalizing the drums and cymbals.
Do I need to tune a new drum set?
Yes, most new drum sets need basic tuning. Factory tuning is often intended for shipping and may not match your room, playing style, or preferred sound.
Can I build a drum set without a drum rug?
You can, but the bass drum and pedals may slide on smooth floors. A non-slip rug improves stability and also protects the floor from hardware marks.
Should the snare drum be higher than the toms?
The snare is often slightly higher than the rack toms, but there is no fixed rule. Set it where your wrists remain relaxed and your sticks move naturally across the kit.
Is a five-piece drum set good for beginners?
Yes, a five-piece drum set provides the core drums used in many styles. It offers enough range for practice without making the layout crowded or confusing.
How often should I adjust my drum set?
Check the pedals, stand clamps, cymbal wingnuts, and drum tension before each playing session. A full ergonomic adjustment may only be needed when you change seats, rooms, or equipment.
Conclusion
Learning how to build a drum set is mainly about safe assembly, smart positioning, and careful tuning. Start with a stable rug and bass drum, set the pedals and throne for comfort, then place the snare, toms, floor tom, and cymbals within easy reach.
A simple kit that fits your body will help you play better than a crowded kit with poor positioning. Build the setup slowly, listen to each drum, and make small changes until the kit feels natural.
Now assemble your drum set, take a quick photo of the finished layout, and spend time tuning each drum. Explore more drum setup guides, practice consistently, and share your questions or results with other drummers.

Senior Music Reviewer
Alex Carter is a seasoned music reviewer with over a decade of experience in the world of sound and instruments. Passionate about helping musicians and enthusiasts make informed choices, he brings sharp insights and in-depth knowledge to every review. From classical instruments to modern gear, Alex combines technical expertise with a love for music to deliver content that resonates with readers.
As a Senior Music Reviewer and expert author on Tuneluma.com, Alex is dedicated to sharing honest evaluations, practical advice, and thoughtful commentary to guide readers in their musical journey.