Introduction
Taylor Swift’s “How Did It End?” is a slow piano ballad from her 2024 album The Tortured Poets Department. This USA-focused tutorial shows how to play a simple version on piano without needing to read full sheet music.
You will learn an easy chord pattern, a steady left-hand part, a soft right-hand style, and a practice plan. The song works well for beginners because its mood comes more from touch, timing, and space than from fast notes.
This guide teaches a simplified arrangement. It is not an official Taylor Swift transcription. The exact chords, key, and voicings may vary between piano tutorials, sheet music editions, live versions, and cover arrangements.

What You Need Before You Start
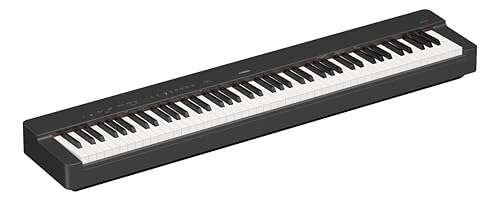
You need a piano or keyboard with a working sustain pedal. Headphones can help if you practice on a digital piano. You should also know the basic names of the white keys.
The tutorial uses chord names rather than full lyrics or a complete note-for-note transcription. This keeps the arrangement useful while respecting the song’s copyright.
Basic piano terms
- Chord: Two or more notes played together.
- Root note: The note that gives a chord its name.
- Inversion: The same chord with its notes in a different order.
- Bass note: The low note that supports the harmony.
- Voicing: The way the notes of a chord are spread across the keyboard.
- Sustain pedal: The pedal that lets notes ring after you lift your fingers.
You do not need to play the original recording perfectly. A simple version can still sound musical if you use a calm touch and smooth chord changes.
The best starting point
Start with the song’s slow pulse. Do not begin by trying to copy every piano note. First, make the chord changes feel steady.
A good beginner goal is:
- Find each chord.
- Play the chords in time.
- Add a soft bass note.
- Add a broken-chord pattern.
- Shape the song with dynamics.

Easy Chords for “How Did It End?”
A common beginner approach is to use a four-chord pop-ballad pattern. In the key of C major, the simplified pattern is:
C – G – Am – F
These chords are easy to play and can be moved to another key if needed. They are also useful for learning the song’s general mood and movement.
This is a simplified teaching arrangement, not a claim that every part of the studio recording uses only these four chords.
Chord notes
| Chord | Notes | Suggested right-hand fingering |
|---|---|---|
| C major | C–E–G | 1–3–5 |
| G major | G–B–D | 1–3–5 |
| A minor | A–C–E | 1–3–5 |
| F major | F–A–C | 1–3–5 |
Finger numbers use the standard piano system:
- 1 = thumb
- 2 = index finger
- 3 = middle finger
- 4 = ring finger
- 5 = little finger
If the full three-note chords feel wide, play only the root and fifth at first. For example, play C and G for a C chord. Add the middle note later.
A smoother chord shape
Large jumps can make a beginner arrangement sound uneven. Use nearby inversions instead.
For example, you can play:
- C major: C–E–G
- G major: B–D–G
- A minor: A–C–E
- F major: A–C–F
These shapes keep the hand closer to the keyboard position. The chord names stay the same, but the movement becomes smaller.
The main lesson is simple: choose the nearest shape instead of jumping to every root position.
If the key does not match your voice
You can transpose the progression. If C major feels too low or too high for your singing voice, move every chord by the same number of half steps.
For example:
| Key center | Equivalent chord pattern |
|---|---|
| C major | C–G–Am–F |
| D major | D–A–Bm–G |
| E major | E–B–C#m–A |
| G major | G–D–Em–C |
The pattern remains the same. Only the pitch changes.

How to Play the Left Hand
The left hand gives the song its low, gentle foundation. Begin with one bass note per chord.
For the C–G–Am–F pattern, play:
- C for the C chord
- G for the G chord
- A for the A minor chord
- F for the F chord
Hold each bass note for the length of the chord. Keep the sound soft. The left hand should support the right hand, not overpower it.
Beginner left-hand pattern
Use this four-count pattern:
- Play the bass note on beat 1.
- Hold it through the chord.
- Change on the next chord.
- Keep the volume low.
Count:
1 – 2 – 3 – 4
Then repeat the pattern.
More flowing left-hand pattern
When the basic pattern feels easy, use the root and fifth:
- C–G for C major
- G–D for G major
- A–E for A minor
- F–C for F major
You can play the root on beat 1 and the fifth on beat 3.
Example:
Root – hold – fifth – hold
This creates movement without making the part busy.
Broken bass option
For a more emotional sound, play the root, fifth, and octave:
- C–G–C
- G–D–G
- A–E–A
- F–C–F
Play these notes slowly. Let the sustain pedal connect them, but release the pedal when the harmony changes.

How to Play the Right Hand
The right hand should sound light and open. Avoid striking every chord with the same force.
Start by playing each chord as a block. After that, break the chord into separate notes.
Block-chord method
Play all three notes together once per measure. This is the easiest method.
For example:
- C major: play C–E–G
- G major: play G–B–D
- A minor: play A–C–E
- F major: play F–A–C
Use a relaxed wrist. Let the fingers rise only a little between chords.
Broken-chord method
A simple pattern is:
1 – 3 – 5 – 3
For C major, that means:
C – G – E – G
For A minor, it can be:
A – E – C – E
Repeat the pattern slowly. Do not rush the higher note.
Soft arpeggio method
An arpeggio plays the notes of a chord one at a time. For a gentle ballad style, try:
- Beat 1: low chord note
- Beat 2: middle chord note
- Beat 3: high chord note
- Beat 4: middle chord note
The exact rhythm can change. The goal is a quiet wave of sound, not a rigid exercise.
Use space as part of the music
A common beginner mistake is to fill every beat. This song benefits from space.
Try leaving a small gap after each phrase. Let the last chord ring. Silence can make the next chord feel more powerful.

A Simple Practice Routine
Practice in short stages. Do not add the next layer until the current one feels steady.
Stage 1: Learn the chord shapes
Play each chord four times:
- C
- G
- Am
- F
Keep your hand relaxed. Look at the keyboard only when needed.
Stage 2: Practice the changes
Set a slow metronome. Around 60 beats per minute is a useful starting point, but choose any speed that lets you stay relaxed.
Change chords every four beats:
C | G | Am | F
Repeat this loop for several minutes.
Stage 3: Add the left hand
Play the bass note with your left hand. Play the full chord with your right hand.
Start with one bass note and one right-hand chord per measure. This builds coordination without adding too much at once.
Stage 4: Add broken chords
Replace the block chord with the 1–3–5–3 pattern. Keep the left hand simple.
If you lose the beat, return to block chords. Control matters more than complexity.
Stage 5: Shape the dynamics
Use three basic volume levels:
- Verse: soft
- Build: medium
- Emotional peak: fuller, but still controlled
Do not press harder just because the song becomes emotional. Use a wider sound instead. Add more notes, a stronger bass, or a higher voicing.
Signs that you are ready to move on
You are ready for the next stage when you can:
- Change chords without stopping.
- Keep a slow, even pulse.
- Play the left and right hands together.
- Use the sustain pedal without creating a muddy sound.
- Play softly without losing the beat.

Sustain Pedal and Tone
The sustain pedal can make this arrangement sound warm. It can also make the harmony unclear.
Use the pedal after you play the chord. Change it when the chord changes. This is called pedal changing.
A basic pedal pattern is:
- Play the chord.
- Press the sustain pedal.
- Let the chord ring.
- Play the next chord.
- Lift and press the pedal quickly.
- Continue.
If the sound becomes muddy, use less pedal. You can also lift the pedal slightly between chords.
Digital pianos may have different pedal sensitivity. Some pedals respond quickly, while others allow more half-pedaling. Adjust by listening rather than relying on a fixed rule.
For a clean beginner version, no pedal is also acceptable. Clear chords are better than a blurred sound.

Common Problems and Quick Fixes
The chord changes feel too hard
Use inversions. Keep common notes in the same place when possible. Smaller movements reduce tension and improve accuracy.
The song sounds flat
Add dynamics. Play the first pass softly. Increase the volume during the emotional section. Then pull back again.
Also check your rhythm. A correct chord pattern can still sound lifeless if every chord lands late or early.
The piano sounds muddy
Use less sustain pedal. Change the pedal with each chord. Avoid playing too many low notes at once.
Low notes spread through the instrument quickly. Keep the left hand simple.
The hands do not stay together
Practice each hand alone. Then combine them at half speed.
You can also simplify the left hand to one bass note per measure. Add the fifth only after the hands feel secure.
The arrangement sounds too plain
Change the voicing rather than adding many notes. Try moving the right-hand chord higher. Add a gentle octave in the left hand. Use a broken-chord pattern for one section.
Small changes often sound more musical than a crowded arrangement.
You cannot sing and play at the same time
Learn the piano part first. Then speak the lyric rhythm while playing. After that, sing only the first word of each phrase.
Build the voice part in small pieces. Do not force both tasks at full speed from the start.

How to Make the Tutorial More Accurate
A simplified chord pattern is useful for learning. It may not match every detail of the recording.
For a closer version, compare the following:
- The key of your reference track.
- The chord changes at each phrase.
- The bass movement.
- Any passing chords.
- The number of beats per chord.
- Changes between verse, chorus, and bridge.
- Piano fills between vocal lines.
Licensed sheet music is the best choice when you need an exact written arrangement. A video tutorial can also help you hear rhythm and pedal use, but check whether it teaches an official transcription or a simplified cover.
Do not assume that a chord chart with the right title is exact. Online charts may use different keys, simplified chords, capo-style transpositions, or user-created arrangements.
The most useful test is to play along at a slow speed. If your chord change clashes with the recording, stop and check the timing before adding more notes.

Chord Pattern at a Glance
Use this table as a quick practice card.
| Part of practice | Left hand | Right hand | Main goal |
|---|---|---|---|
| First attempt | One bass note | Block chord | Learn the shapes |
| Basic ballad | Root note | Chord once per measure | Keep steady time |
| Flowing version | Root and fifth | 1–3–5–3 pattern | Add movement |
| Fuller version | Root, fifth, octave | Inverted chords | Create a wider sound |
| Performance version | Controlled bass pattern | Varied voicings | Shape the emotion |
The best version is not always the most complex one. Choose the level you can play without stopping.
For a beginner performance, a steady bass note, soft block chords, and clean pedal changes may sound better than a difficult arrangement played with tension.
Frequently Asked Questions
Is “How Did It End?” easy to play on piano?
A simplified version is suitable for beginners who know basic major and minor chords. The main challenge is control. The song sounds best with even timing, soft dynamics, and careful pedal use.
What key is “How Did It End?” in?
The key can vary by arrangement and reference version. Online tutorials may transpose the song to make the chords easier or to fit a singer’s range. Check the key shown by your sheet music or tutorial, then transpose the chord pattern if needed.
Can I play the song with only the right hand?
Yes. Play the chord notes with the right hand and leave out the bass. This is a good first step. Add the left-hand root notes when the chord changes feel comfortable.
What if C–G–Am–F does not match my recording?
Your version may use a different key, chord timing, or a more detailed arrangement. Transpose the pattern, check the number of beats per chord, and compare each section with a licensed score or reliable tutorial.
Do I need to read music?
No. Chord names are enough for this simplified method. Reading music becomes useful when you want exact rhythm, melody, fills, or a fully written arrangement.
Final Takeaway
To play a beginner version of “How Did It End?” on piano, start with the simplified C–G–Am–F progression. Play one soft bass note with the left hand and a relaxed chord with the right hand. Then add inversions, broken chords, dynamics, and careful pedal changes.
Practice slowly. Keep the sound open. Let the pauses work for you. A calm and controlled performance will capture the song’s mood better than a busy arrangement played too fast.

Senior Music Reviewer
Alex Carter is a seasoned music reviewer with over a decade of experience in the world of sound and instruments. Passionate about helping musicians and enthusiasts make informed choices, he brings sharp insights and in-depth knowledge to every review. From classical instruments to modern gear, Alex combines technical expertise with a love for music to deliver content that resonates with readers.
As a Senior Music Reviewer and expert author on Tuneluma.com, Alex is dedicated to sharing honest evaluations, practical advice, and thoughtful commentary to guide readers in their musical journey.