
How Do You Play Smoke On The Water On Guitar: Easy Guide
Introduction
If you are learning guitar in the United States, “Smoke on the Water” is one of the best riffs to start with. The opening uses a small group of notes, a steady beat, and simple finger movements. You can play it on one string first, then add power chords for a fuller rock sound.
The most common standard-tuning version uses the low E string. The riff begins at the 3rd fret and moves through frets 6, 8, and 9. Start slowly, keep each note clear, and focus on the rhythm before trying to play faster.

The “Smoke on the Water” Guitar Tab
Here is the main opening riff in standard tuning:
Standard tuning: E A D G B E

e|----------------------------------|
B|----------------------------------|
G|----------------------------------|
D|----------------------------------|
A|----------------------------------|
E|--3--6--8----3--6--9--8----3--6--8--6--3--6--9--8--|
Read the tab from left to right. The bottom line is the low E string, which is the thickest string on the guitar.
The numbers show the fret to play:
- 3 = third fret
- 6 = sixth fret
- 8 = eighth fret
- 9 = ninth fret
The spaces divide the riff into small phrases. They also show where the notes naturally group together.
A slower count can help:
3 6 8 3 6 9 8 3 6 8 6 3 6 9 8
Do not rush the gaps. The riff sounds strong because the notes have space between them.
Which finger should play each fret?
Use one finger for each fret area:
- 3rd fret: index finger
- 6th fret: index finger
- 8th fret: ring finger
- 9th fret: little finger
You can also shift your hand as needed. The goal is clean sound, not a strict fingering rule.

How to Play the Riff Step by Step
Follow this order if you are new to guitar.
1. Tune the guitar
Use standard tuning:
Low to high: E A D G B E
The thickest string should be tuned to low E. A clip-on tuner or phone tuner can help. If the guitar is out of tune, the fingering may be correct but the riff will not match the recording.


2. Find the low E string
The low E string is the thickest string and sits closest to your face when you hold the guitar in playing position.
Play it open once. You should hear a deep E note. The riff uses only this string in the basic version.
3. Play the first phrase
Start with:
3--6--8
Place your index finger on the 3rd fret. Then move to the 6th fret and 8th fret.
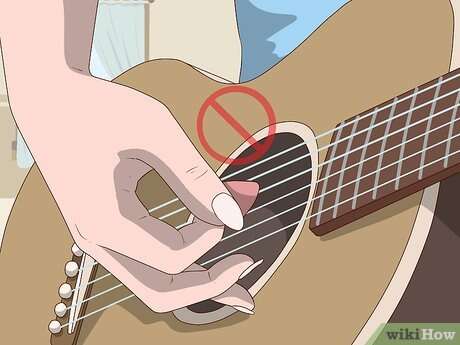
Use a pick with small downstrokes. Keep your picking hand relaxed.
4. Play the second phrase
Next, play:
3--6--9--8
The move from the 8th fret to the 9th fret is short. Use your little finger for the 9th fret if it feels comfortable.
5. Finish the riff
Play:
3--6--8--6--3--6--9--8
This part moves back and forth. Keep your hand steady. Avoid lifting your fingers too far from the string.
6. Join the phrases
Now play the full line:
3--6--8----3--6--9--8----3--6--8--6--3--6--9--8
Practice it at a slow speed. Once every note sounds clear, raise the tempo a little.

The Best Rhythm for the Main riff
the notes matter, but the rhythm gives the riff its identity. Play each note as a firm, separate hit. Do not let every note run into the next one.
Start with four even beats:
1   2   3   4
3   6   8   —
The dash means to leave space. This is only a practice count, not a full transcription of the recording.


You can mute the string after each note by lightly resting your picking hand on the strings. This is called palm muting. Use only a small amount at first. Too much pressure can make the notes dull.
Downstrokes or alternate picking?
For a beginner, downstrokes are usually the easiest choice:
D D D D D D D
Here, D means a downstroke.
Once the riff feels easy, try alternate picking:
D U D D U D U
Here, U means an upstroke.
Alternate picking can reduce hand movement. Downstrokes can give the riff a heavier attack. Both methods work.

Adding Power Chords
The one-string version is a useful starting point. To create a fuller rock sound, play power chords instead of single notes.
The main chord shapes are:
G5   = 3rd fret low E, 5th fret A
Bb5  = 6th fret low E, 8th fret A
C5   = 8th fret low E, 10th fret A
Db5  = 9th fret low E, 11th fret A
A simple power-chord pattern follows the riff:
G5    Bb5   C5

G5    Bb5   Db5   C5

G5    Bb5   C5    Bb5   G5

G5    Bb5   Db5   C5
Use the index finger for the root note on the low E string. Place your ring finger two frets higher on the A string. Do not play the other strings.
For example, the G5 shape is:
e|---x---|
B|---x---|
G|---x---|
D|---5---|
A|---5---|
E|---3---|
The x means do not play that string. This version sounds stronger, but it requires more control than the single-string riff.
When should you move to power chords?
Move on when you can:
- Play the one-string riff without stopping
- Fret each note cleanly
- Keep a steady beat
- Mute strings you do not want to hear
If extra strings ring out, slow down and check your picking hand. Light palm muting can also help.



A Simple Practice Plan
Practice for 10 minutes at a time. Short sessions often work better than one long session with tired hands.
Minutes 1–2: Tune and warm up
Tune the guitar. Play the low E string at frets 3, 6, 8, and 9.
Minutes 3–5: Practice each phrase
Repeat one phrase at a time:
3--6--8
3--6--9--8
3--6--8--6--3--6--9--8
Stop if your hand becomes tense. Shake it out, then start again.
Minutes 6–8: Play the complete riff
Join all three phrases. Use a slow metronome if possible. Set it to a speed where you can play every note without missing.
Minutes 9–10: Add muting or power chords
Choose one goal. Either add light palm muting to the single-note version or try the power chords.
Do not increase speed until the riff sounds clean. Fast practice can make mistakes feel automatic.

Common Problems and Fixes
The riff sounds too high or too low
You may be using a different string or tuning. The tab above uses the low E string in standard tuning. Some beginner arrangements use another string or move the riff to a different octave.
The notes may still have the same shape, but the pitch will change. If you want to match the familiar recording, use the low E-string version shown here.
Notes buzz
A buzzing note often means your finger is too far from the fret or is not pressing firmly enough. Place your finger just behind the metal fret, not directly on top of it.
Check your thumb position too. Keep it behind the neck rather than squeezing the neck with your whole hand.
Other strings ring out
This usually comes from a wide pick stroke or poor muting. Use smaller picking motions. You can lightly touch unused strings with your fretting hand or picking hand.
The riff does not sound heavy
A clean guitar can make the notes sound thin. A small amount of overdrive can add grit. Keep the gain moderate so each note remains clear.


Too much distortion can hide timing problems and make unwanted noise louder.
The hand feels tired
Do not force the stretch between the 3rd and 9th frets. Relax your wrist, lower your shoulder, and take short breaks. Stop playing if you feel sharp pain, numbness, or tingling.

Equipment and Tone
You do not need special equipment to learn the riff. Any working electric guitar can play it. An acoustic guitar can also play the notes, although the tone will be different.
For a classic rock-style sound, try:
- Bridge pickup or a bright pickup setting
- Moderate overdrive
- Moderate volume
- Light palm muting
- A firm but controlled pick attack
The exact tone depends on the guitar, amplifier, speakers, and effects. Technique matters more than expensive gear at this stage.
Avoid turning the gain up so high that individual notes disappear. A clear tone makes timing and string noise easier to hear.

Key Takeaways
- Play the basic riff on the low E string.
- Use frets 3, 6, 8, and 9 in standard tuning.
- Start with downstrokes and a slow tempo.
- Leave space between the phrases.
- Add power chords after the single-note version feels easy.
- Use light muting to control unwanted noise.
- Practice cleanly before practicing quickly.
Frequently Asked Questions
Is “Smoke on the Water” easy for beginners?
Yes. The basic riff uses one string and a small number of frets. The main challenge is keeping the rhythm steady and making each note sound clear.
Do I need an electric guitar?
No. You can learn the notes on an acoustic guitar. An electric guitar with moderate overdrive will sound closer to the well-known rock tone.
What tuning is used for the riff?
The tab in this guide uses standard tuning: E A D G B E. Tune the guitar before practicing.
Should I use a pick?
A pick makes the riff easier to play with a firm rock attack, but you can also use your thumb or fingers. Start with whichever method gives you the cleanest sound.
Why do some tabs show different frets?
Different tabs may use another string, another octave, or a different arrangement. Check the tuning and the string shown before comparing fret numbers.
Can I play the riff with chords?
Yes. Use G5, Bb5, C5, and Db5 power chords. The chord version sounds fuller but requires better muting and fretting control.
Conclusion
To play “Smoke on the Water” on guitar, tune to standard tuning and use the low E string. Start with the pattern 3–6–8, 3–6–9–8, 3–6–8–6–3–6–9–8. Play slowly, keep the phrases separate, and build speed only after the notes sound clean.
Your next step is simple: practice the first phrase, 3–6–8, ten times without stopping. Then add the next phrase and join them together.

Senior Music Reviewer
Alex Carter is a seasoned music reviewer with over a decade of experience in the world of sound and instruments. Passionate about helping musicians and enthusiasts make informed choices, he brings sharp insights and in-depth knowledge to every review. From classical instruments to modern gear, Alex combines technical expertise with a love for music to deliver content that resonates with readers.
As a Senior Music Reviewer and expert author on Tuneluma.com, Alex is dedicated to sharing honest evaluations, practical advice, and thoughtful commentary to guide readers in their musical journey.