How To Soundproof A Room For Drums: Easy DIY Guide
To soundproof a drum room, seal air gaps, add mass, isolate vibrations, and absorb sound inside the space.
Learning how to soundproof a room for drums takes more than hanging a few foam panels. Drums create strong low-frequency energy, sharp impact noise, and floor vibration that can travel through walls, ceilings, and shared structures. This guide explains the methods that work, the shortcuts that fail, and how to build a quieter practice space without wasting money.
What Soundproofing a Drum Room Really Means
Soundproofing reduces the amount of sound that leaves a room or enters it. Acoustic treatment improves the sound inside the room, but it does not fully stop noise from reaching neighbors or other rooms.
This difference matters. Foam panels, carpets, and bass traps can reduce echo and make drums sound cleaner. They usually do little to block loud drumming from passing through a wall.
When you learn how to soundproof a room for drums, think of sound as energy looking for a path out. It can move through:
• Air gaps around doors and windows
• Thin walls and ceilings
• Electrical outlets and vents
• Floor and wall framing
• Direct contact between the drum kit and the building
A good soundproofing plan uses four basic ideas:
• Mass: Heavy materials resist sound movement.
• Decoupling: Separate one structure from another to reduce vibration.
• Damping: Convert vibration into small amounts of heat.
• Sealing: Close gaps so air cannot carry sound through them.
The best results come from using all four. A heavy wall with a large gap under the door can still leak a surprising amount of sound.
Check the Room Before You Start
Before buying materials, inspect the room. Soundproofing works best when you find the weakest paths first.
Stand outside the room while someone plays the drums. Listen near the door, windows, ceiling, vents, and nearby walls. If possible, test one area at a time by covering it with a temporary heavy blanket or moving pad.
Look for these common weak points:
• A hollow-core door
• A large gap below the door
• Single-pane windows
• Cracks at wall joints
• Unsealed electrical boxes
• Shared air vents
• Lightweight ceiling tiles
• A drum throne or kick pedal touching a thin floor
• Walls that connect directly to a neighbor’s room
Room size also matters. A small room can create strong reflections and bass buildup. A larger room may sound better, but it can also have more surfaces that need treatment.
Take photos and make a simple room sketch. Mark doors, windows, vents, outlets, and shared walls. This small step helps you spend money where it can make a real difference.
One lesson from practical room projects is simple: people often treat the largest wall first, even when the door is the main leak. A sealed door can sometimes produce a bigger improvement than several expensive panels.

Set a Realistic Soundproofing Goal
No normal home room becomes completely silent without major construction. The goal is to reduce sound to an acceptable level, not to make the drum kit disappear.
Your target may be different depending on your situation:
• Reduce noise heard by family members
• Practice during the evening without disturbing neighbors
• Protect a bedroom next to the drum room
• Record drums with less outside noise
• Keep bass drum vibration from reaching the room below
Acoustic ratings can help, but they have limits. The Sound Transmission Class, or STC, mainly describes speech and midrange sound. Drums produce low bass energy, especially from the kick drum and floor tom. Low frequencies often pass through building structures more easily than speech.
This means a wall with a high STC rating may still allow some drum vibration to pass through. Impact noise also behaves differently from airborne noise. A kick pedal can send energy into the floor, while a cymbal sends more sound through the air.
For that reason, how to soundproof a room for drums depends on the type of noise you need to control. Airborne sound needs mass and sealing. Structure-borne sound needs isolation and vibration control.

How to Soundproof a Room for Drums Step by Step
Use this order when planning the work. Start with simple fixes, then move to construction if you need stronger results.
1. Seal the door
The door is often the weakest part of a drum room. Replace a hollow-core door with a solid-core door if the frame can support it.
Add:
• Compression weatherstripping around the frame
• A door sweep or automatic door bottom
• A threshold with a tight seal
• Acoustic sealant around the frame
The door should close firmly. If you can see light around it, sound can pass through it.
Do not rely on a thick curtain alone. A curtain may reduce high-frequency reflections, but it will not block the deep thump of a kick drum.
For better isolation, install two solid doors with a small air gap between them. This creates a basic sound lock. The gap works best when the doors do not touch the same rigid frame.
2. Add mass to the walls
Heavy wall layers make it harder for sound to move. A common upgrade is to add another layer of drywall over the existing wall.
For better performance:
• Use 5/8-inch drywall rather than thin drywall.
• Stagger the joints between layers.
• Apply damping compound between drywall layers.
• Seal the edges with acoustical sealant.
• Keep new drywall away from the floor and ceiling when possible.
Damping compound helps reduce panel vibration. It is not the same as glue, and it should be used according to the product instructions.
Adding drywall directly to a wall can help, but it does not provide the same isolation as a separate stud wall or resilient channel system. If you own the property and need strong isolation, a new isolated wall assembly usually performs better.
3. Decouple the wall
Decoupling creates a break between the room surface and the building structure. This reduces the direct path for vibration.
Common methods include:
• Building a new staggered-stud wall
• Building a separate stud wall with an air gap
• Using resilient channels correctly
• Using isolation clips and hat channels
• Installing acoustic isolation systems made for wall assemblies
Installation quality matters. A single screw that bridges an isolated wall can create a vibration path. This is a common mistake in do-it-yourself work.
Do not hang shelves, cabinets, or heavy equipment across both sides of an isolated wall. These items can reconnect the surfaces and reduce the benefit of decoupling.
4. Fill wall cavities with mineral wool
Mineral wool or acoustic fiberglass can absorb sound inside wall cavities. It helps reduce resonance within the wall and improves the performance of the wall assembly.
Use the right thickness for the cavity. Do not compress the material tightly. It should fit firmly without being crushed.
Cavity insulation is useful, but it is not a complete sound barrier. Soft insulation alone will not stop drums. It works best with sealed, heavy, and decoupled wall layers.
Wear proper protective equipment during installation. Follow local building rules, especially around fire safety and electrical work.
5. Treat the ceiling
Sound can travel upward through the ceiling, especially in apartments or rooms below another living space. If the ceiling is shared with someone else, it may need the same treatment as a wall.
A stronger ceiling assembly may include:
• Isolation clips
• Hat channels
• Mineral wool between joists
• Two layers of drywall
• Damping compound between drywall layers
• Sealed edges and penetrations
Avoid attaching a new ceiling directly to the old one if vibration control is your main goal. Direct attachment adds mass but does not fully break the vibration path.
If you rent, you may not be able to change the ceiling. In that case, focus on reducing impact vibration at the drum kit and avoid playing during quiet hours.
6. Isolate the floor and drum kit
The floor is a major concern because drums create impact energy. The kick pedal, hi-hat pedal, and stool can send vibration into the structure.
A practical drum isolation platform may include:
• A strong plywood top
• A dense rubber layer
• Isolation pads or floating supports
• A carpet or drum mat on top
The platform must be stable. A soft or uneven platform can make the pedals unsafe and may affect your playing.
Do not place the platform directly against the walls. Leave a small gap around it so vibration does not transfer into the wall.
A floating floor can provide stronger isolation, but it requires careful construction. If the floor touches the surrounding walls, pipes, or fixed furniture, the soundproofing benefit may be reduced.
7. Reduce sound through vents and windows
Air vents can act like open sound paths. Blocking a vent may create a health or safety problem, so never seal a required heating, cooling, or fresh-air system without professional advice.
Possible solutions include:
• Installing lined acoustic ductwork
• Adding sound attenuators
• Using a properly designed ventilation silencer
• Moving the room air path away from shared spaces
• Keeping doors closed while maintaining safe airflow
Windows are also weak points. A heavy secondary window insert can reduce sound leakage while preserving the original window. Seal the frame carefully.
Do not cover heaters, sprinklers, smoke detectors, or required ventilation openings with blankets or foam.

Use Acoustic Treatment Inside the Room
After blocking sound paths, improve the room’s internal acoustics. This makes the drums easier to hear and can reduce the need to play at excessive volume.
Useful acoustic treatment includes:
• Broadband absorption panels
• Thick bass traps in corners
• Ceiling clouds
• Heavy curtains over reflective glass
• Rugs on hard floors
• Diffusers on selected rear-wall areas
Place absorption at the first reflection points on the side walls. Add corner bass traps if the room has a strong low-end boom.
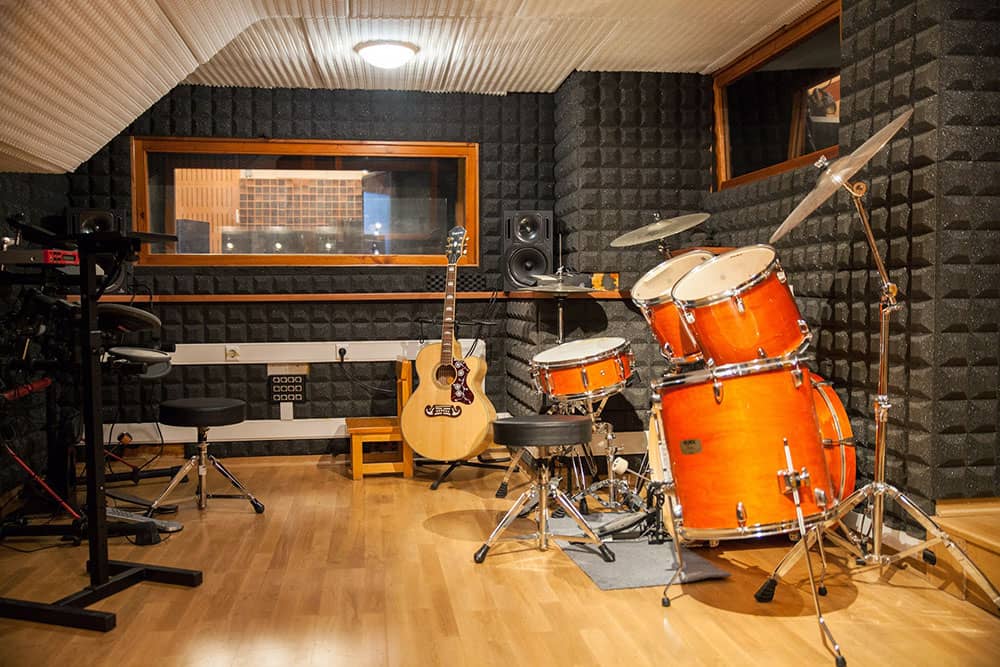
Foam tiles have limited use. Thin foam can absorb some high frequencies, but it does not control the low-frequency energy created by a kick drum. Covering every wall with foam may make the room sound dull without making it meaningfully quieter outside.
A balanced room usually sounds better than a dead room. Leave some reflective surfaces or use diffusion so the space does not feel unnaturally flat.
Choose Materials That Actually Help
Soundproofing products vary widely. Focus on how each material works rather than trusting words such as “studio grade” or “acoustic.”
Mass-loaded vinyl
Mass-loaded vinyl is a dense, flexible barrier. It can improve wall, ceiling, and floor assemblies when installed without gaps.
It is not magic. A thin layer placed loosely on a wall may offer less benefit than a well-built drywall assembly. Pay close attention to seams, corners, and penetrations.
Drywall
Drywall adds mass at a reasonable cost. Two layers of 5/8-inch drywall with damping compound often perform better than one thick layer installed without damping.
Mineral wool
Mineral wool helps absorb sound in cavities. It also offers useful fire resistance in many building systems. Check local code and product ratings before installation.
Acoustic sealant
Acoustic sealant stays flexible and helps close small gaps around drywall, frames, outlets, and joints. Standard hard caulk may crack as the building moves.
Rubber and isolation pads
Rubber pads can reduce vibration from drum stands and platforms. Their performance depends on the load, thickness, and material. A pad that is too hard may not isolate enough, while one that is too soft may feel unstable.
Heavy curtains and blankets
These can reduce echo and some high-frequency leakage. They are useful for temporary setups, but they are not a replacement for mass, sealing, or structural isolation.

Budget-Friendly Ways to Soundproof a Drum Room
You can make useful improvements without rebuilding the room. Start with the lowest-cost steps that address the largest leaks.
Try this order:
- Seal the door edges and bottom.
- Add a solid-core door if practical.
- Move the kit away from shared walls.
- Put the drums on a stable isolation platform.
- Add thick rugs under the kit.
- Seal visible cracks and wall penetrations.
- Add thick absorption panels inside the room.
- Use a second temporary barrier near the door.
- Adjust playing hours.
- Ask nearby household members which sounds they still hear.
A practical low-cost setup may reduce annoyance even if it does not create professional studio isolation. The result depends on the building, the drum volume, and the distance to other rooms.
Electronic drums can also help. They usually reduce airborne volume, but pedal impact can still travel through the floor. Use a properly isolated platform under the pedals and throne.
Practice pads reduce sound more than acoustic drums, though they do not reproduce the same feel or volume. They can be a useful option for late-night practice.
How Much Does Drum Room Soundproofing Cost?
Costs vary greatly by room size, local labor rates, and the level of isolation you want.
A basic improvement may cost a few hundred dollars. This may cover door seals, rugs, isolation pads, sealant, and a small amount of acoustic treatment.
A serious room upgrade can cost several thousand dollars. It may include new wall assemblies, ceiling work, ventilation changes, a floating floor, and professional labor.
A purpose-built recording room can cost much more. Structural soundproofing often becomes expensive because every surface must be designed as part of one connected system.
Before spending money, set a target. Ask whether you need:
• Less echo
• Lower sound in the next room
• Lower vibration downstairs
• Better recording quality
• Professional isolation from neighbors
These are different problems. Paying for the wrong solution is one of the most common soundproofing mistakes.

Common Mistakes to Avoid
Many drum room projects fail because they treat soundproofing like decoration. Avoid these problems:
• Using thin foam as the main sound barrier
• Ignoring the door gap
• Leaving electrical boxes and vents unsealed
• Building an isolated wall but bridging it with screws
• Letting a platform touch the wall
• Blocking required ventilation
• Installing heavy materials without checking the structure
• Forgetting the ceiling or floor
• Expecting total silence
• Spending money before identifying the sound path
Another mistake is focusing only on airborne sound. If the person below hears a low thump, the floor may be the main problem. Adding wall panels will not solve a vibration path under the drum kit.
Safety also matters. Heavy drywall can injure someone if installed poorly. Electrical outlets, heating systems, fire stops, and ventilation require care. Hire a qualified contractor or acoustical professional when structural work is beyond your experience.
How to Test Your Soundproofing Results
Test before and after each major change. This helps you learn what works in your room.
Use the same drum pattern at the same playing level each time. Ask someone to listen in nearby rooms and outside the building. Record short samples from the same locations with the same phone or sound meter.
A sound level meter can show changes, but it cannot tell the whole story. Human hearing is sensitive to low-frequency thumps and repeated impacts, even when the overall decibel reading seems modest.
Test at the times when noise matters most. A room that seems acceptable during the day may still disturb someone at night.
If possible, inspect the result from several locations:
• The room beside the drum room
• The room above and below it
• Hallways
• The exterior of the building
• The nearest neighbor’s room
Keep notes. Soundproofing is often a process of finding and fixing the next weakest path.
When to Hire an Acoustical Professional
Professional advice is useful when you share walls, live in an apartment, or need high isolation. It is also wise when you plan to modify floors, ceilings, ventilation, or structural walls.
An acoustical consultant can help with:
• Identifying airborne and structure-borne paths
• Selecting a wall or ceiling assembly
• Estimating expected sound reduction
• Designing ventilation that does not leak sound
• Checking whether the floor can carry added weight
• Avoiding costly construction errors
Ask for clear details. A trustworthy professional should explain the proposed assembly, expected limits, and areas that may still transmit sound.
Be cautious of anyone promising complete silence from a thin foam product. Real soundproofing depends on the complete building assembly and the quality of installation.
Frequently Asked Questions About How to Soundproof a Room for Drums
What is the cheapest way to soundproof a room for drums?
Start by sealing the door, adding a door sweep, using rugs, and placing the drum kit on a stable isolation platform. These steps reduce common sound and vibration paths, but they will not provide full isolation from neighbors.
Does acoustic foam soundproof a drum room?
Acoustic foam improves echo and high-frequency reflections inside the room. It does not add enough mass or isolation to block the low-frequency sound and impact vibration produced by drums.
How do I stop bass drum noise from traveling through the floor?
Use a stable platform with suitable rubber or isolation supports under the kick pedal, drum stands, and throne. Keep the platform away from the walls, and avoid rigid contact with pipes, furniture, or other parts of the building.
Will a solid-core door reduce drum noise?
Yes, a solid-core door can reduce sound leakage better than a hollow-core door, especially when combined with full perimeter seals and a door sweep. Any gap around or under the door can greatly reduce its performance.
Can I soundproof a drum room in a rental apartment?
You can reduce noise with door seals, removable window inserts, rugs, isolation platforms, thick curtains, and electronic drums. Do not alter walls, ceilings, floors, or ventilation systems without written permission and professional guidance.
How thick should walls be for a drum room?
There is no single ideal thickness. A well-sealed, heavy, decoupled wall with cavity insulation usually performs better than a thick wall that has gaps or rigid sound bridges.
Is a floating floor necessary for drum soundproofing?
Not always. A good isolation platform may be enough for moderate practice, but a floating floor can help when strong impact vibration travels to a room below.
Conclusion
The best way to soundproof a room for drums is to combine sealing, mass, damping, decoupling, and vibration isolation. Start with the door and other obvious gaps, then address the floor, shared walls, ceiling, windows, and vents. Use acoustic treatment to control the sound inside the room, but do not mistake it for structural soundproofing.
You do not need to rebuild everything at once. Test the room, fix the weakest path, and measure the result before moving to the next step. With a careful plan, you can create a better practice space and reduce the impact on the people around you.
Choose one improvement today, such as sealing the door or isolating the kick pedal, then keep refining the room. Explore more drum room and recording guides, and share your own soundproofing results in the comments.

Senior Music Reviewer
Alex Carter is a seasoned music reviewer with over a decade of experience in the world of sound and instruments. Passionate about helping musicians and enthusiasts make informed choices, he brings sharp insights and in-depth knowledge to every review. From classical instruments to modern gear, Alex combines technical expertise with a love for music to deliver content that resonates with readers.
As a Senior Music Reviewer and expert author on Tuneluma.com, Alex is dedicated to sharing honest evaluations, practical advice, and thoughtful commentary to guide readers in their musical journey.