Introduction
To make an electric guitar in the United States, you shape a wood body and neck, cut the fretboard, install frets and hardware, wire the pickups, then set up the finished instrument. A first build usually takes 40 to 100 hours, depending on your tools, finish, and skill.
The simplest first project is a solid-body electric guitar. It needs fewer parts than a hollow-body design and does not require complex acoustic bracing. You can build from raw lumber, use a ready-made neck, or buy a kit and focus on assembly and finishing.
This guide explains the full process in a safe U.S. home-shop context. It uses inches where measurements matter, but the formulas work in any unit.


What You Need Before You Start
You need a clear plan, suitable wood, accurate tools, and enough time to work slowly. Most failed guitar builds come from rushed measurements rather than difficult woodworking.
Choose a guitar design
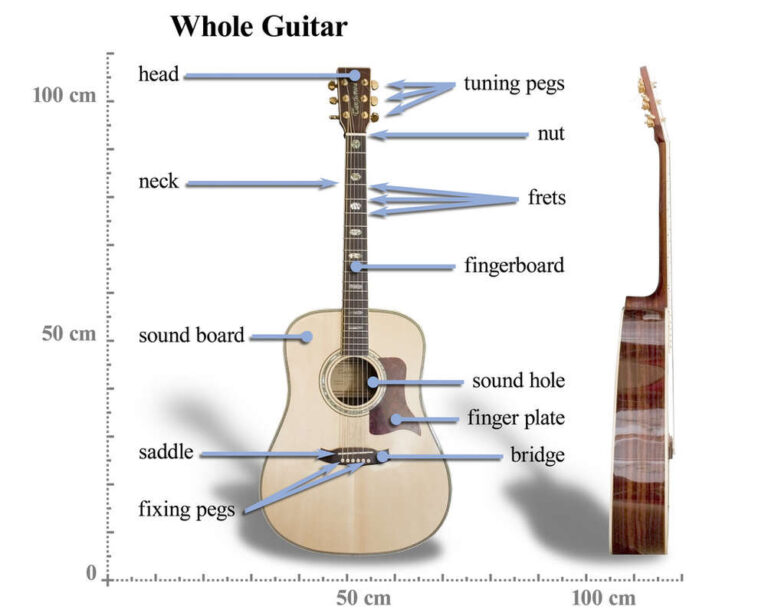
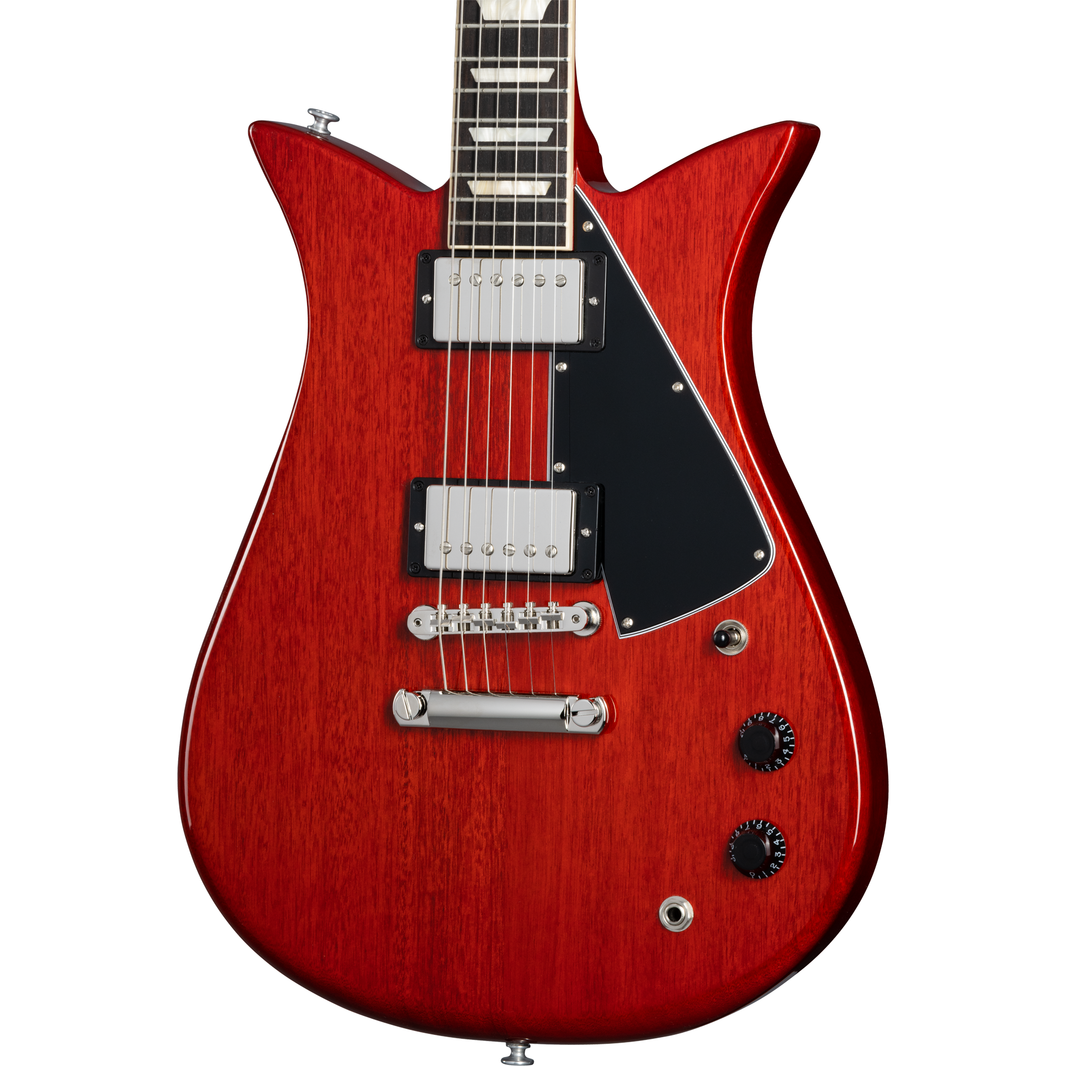
Start with a proven design. A simple solid-body guitar may include:
- One-piece or two-piece body
- Bolt-on neck
- Rosewood, maple, or another hard fretboard
- One or two magnetic pickups
- Fixed bridge or tremolo bridge
- One volume control and one tone control
- Three-way or five-way pickup switch
- Six tuning machines
- 22 or 24 frets
A bolt-on neck is the best choice for a first build. It is easier to make, easier to repair, and more forgiving than a set neck or neck-through design.
Decide whether to build or buy the neck
Building the body is much easier than building the neck. A neck must stay straight under string tension, hold frets at exact locations, and support stable tuning.
You have three practical options:
| Neck choice | Difficulty | Best for |
|---|---|---|
| Ready-made neck | Low | First build |
| Neck blank with a template | Medium | Woodworkers with routing tools |
| Neck made from raw lumber | High | Experienced builders |
A ready-made neck can reduce risk while still letting you design and finish the body yourself.
Plan the scale length
Scale length is the distance from the nut to the bridge’s theoretical string contact point. Common electric-guitar scale lengths include:
- 24.75 inches: common on many Gibson-style guitars
- 25.5 inches: common on many Fender-style guitars
- 25 inches: used by several manufacturers
- Multiscale: uses different lengths for different strings
The scale length controls fret placement, string tension, and neck position. Do not copy fret locations from a different scale.
Use this formula to calculate the distance from the nut to any fret:
[
\text{Distance from nut to fret} = L – \frac{L}{2^{n/12}}
]
In this formula:


- L is the scale length
- n is the fret number
For a 25.5-inch scale, the distance from the nut to the first fret is about 1.432 inches. The bridge must sit farther back than the scale length allows for intonation adjustment.
Make a full-size plan
Draw the body, neck pocket, bridge, pickups, controls, and centerline on paper or in computer-aided design software. Print the plan at full size.
Check these measurements before cutting wood:
- Body length and width
- Neck pocket width and depth
- Neck centerline
- Pickup spacing
- Bridge location
– Control cavity size - String path from nut to bridge
- Tuner spacing
- Fretboard width at the nut and last fret
The centerline is your main reference. Mark it clearly on the body blank and keep using it during every operation.
Materials and Tools
The materials affect the guitar’s weight, strength, appearance, and workability. The tools affect accuracy even more.
Common materials
A basic solid-body build may use:
- Body wood, such as alder, ash, basswood, mahogany, maple, or poplar
- Neck wood, often hard maple or mahogany
- Fretboard wood, such as maple, rosewood, ebony, or another suitable hard wood
- Truss rod
- Fret wire
- Nut blank
- Pickups
- Bridge
- Tuning machines
- Strap buttons
- Output jack and jack plate
- Pots, capacitor, switch, wire, and solder
- Screws and ferrules
- Wood glue
- Sandpaper
- Finish
Wood choice changes the handling of the instrument, but it does not guarantee a certain tone. Pickup design, strings, setup, amplifier settings, construction, and playing style also affect the final sound.
Essential woodworking tools
You do not need every tool in a professional guitar shop. You do need accurate tools for the jobs that control alignment.
Useful tools include:
- Workbench or sturdy table
- Clamps
- Combination square
- Steel ruler
- Marking knife or sharp pencil
- Router and guitar templates
- Drill and drill bits
- Coping saw or bandsaw
- Files and rasps
- Sanding blocks
- Fret-slotting saw and scale template
- Fret hammer or fret press
- Wire cutters
- Soldering iron
- Multimeter
- Safety glasses
- Hearing protection
- Dust mask or properly fitted respirator
A router removes wood quickly, but it can also cause serious injury and destroy a body in seconds. Secure the workpiece, use sharp bits, keep both hands away from the bit, and follow the tool maker’s instructions.
Select dry, stable wood
Wood should be dry and free of major cracks, loose knots, and twisting. Let new wood adjust to the shop before cutting it.
Do not assume a thick board is automatically stable. Look for:
- Straight grain
- No active cracks
- No deep checks
- No signs of insect damage
- No strong cup, bow, or twist
- Enough thickness for the planned body or neck
A neck needs especially stable wood. A warped neck blank can waste many hours of work.

Step 1: Make the Body
The body gives the guitar its shape and holds the bridge, pickups, controls, and neck joint. Work from a full-size template whenever possible.


Glue the body blank
If the body is wider than one board, glue two or more boards together.
- Joint or straighten the mating edges.
- Dry-fit the boards.
- Apply a thin, even coat of wood glue.
- Clamp the boards on a flat surface.
- Wipe away excess glue.
- Let the joint cure according to the glue maker’s instructions.
- Flatten the blank before tracing the outline.
Avoid forcing a warped blank flat with excessive clamp pressure. That can leave stress in the wood and cause movement later.
Transfer the outline
Place the body template on the blank. Align its centerline with the wood’s centerline.
Trace the shape, then mark:
- Neck pocket
- Pickup routes
- Bridge position
- Control cavity
- Jack location
- Wiring channels
- Strap-button positions
Cut outside the final outline first. Leave a small amount of extra wood, then use a template and router to reach the final shape.
Route the neck pocket
The neck pocket must fit the neck heel closely. A loose pocket may reduce support and make alignment difficult. A pocket that is too tight can split the body or prevent the neck from seating fully.
Test the fit often. Remove small amounts of wood at a time.
Check that:
- The neck sits flat
- The centerline remains correct
- The pocket depth gives the planned bridge height
- The neck does not rock from side to side
- The fretboard will clear the body correctly
Do not rely on paint or finish to correct a poor neck pocket.
Cut pickup and control cavities
Route the pickup cavities to match the actual pickup covers or mounting rings. Pickup dimensions are not universal.
Cut the control cavity from the back or front, depending on your design. Leave enough wood around the cavity for strength and hardware screws.
Add a channel between the cavities for wires. Drill slowly through the body. Long drill bits can wander, so use guides or drill from both sides when needed.
Drill hardware holes
Drill for:
- Bridge posts or mounting screws
- Tuning machines
- Neck screws
- Pickup screws
- Control pots
- Output jack
- Strap buttons
Use the hardware itself as your reference. Manufacturer drawings can vary, and similar-looking parts may use different hole spacing.
Step 2: Build or Prepare the Neck
The neck controls playability. It must resist string pull while allowing a small, adjustable amount of relief.


Install the truss rod
A truss rod is an adjustable metal rod inside the neck. It helps control the neck’s forward or backward curve.
The exact channel shape depends on the truss rod. Follow the rod maker’s dimensions. A channel that is too deep, too shallow, or poorly centered can weaken the neck or prevent adjustment.
Before closing the channel, confirm:
- The rod fits correctly
- The adjustment end is accessible
- The rod is centered
- The channel is clean
- The rod will not rattle
- The fretboard will cover the channel fully
Do not glue the truss rod unless its design requires it. Many rods need a small amount of clearance to work.
Shape the neck
Begin with a rectangular neck blank. Remove wood in stages:
- Mark the nut width.
- Mark the heel width.
- Mark the neck thickness at several points.
- Cut the side profile.
- Cut the rear contour.
- Blend the transitions.
- Sand with long, even strokes.
A spoke shave, rasp, file, and sanding block can produce a good neck. Power tools save time but remove wood quickly.
Frequently check the neck from several angles. A smooth feel does not prove that the neck is straight.
Add the fretboard
Prepare the fretboard before or after gluing it to the neck, depending on your method.
The fretboard must have:
- Correct scale length
- Accurate fret slots
- A straight centerline
- Proper width
- A planned radius
- A smooth surface
A common fretboard radius might range from 7.25 inches to 16 inches, but the correct radius depends on your design and playing preference.
Glue the fretboard in position with the centerlines aligned. Use a caul or radiused block so clamp pressure does not damage the wood.
Cut the fret slots
Fret slots must be accurate. Even a small error can cause poor intonation across the neck.
Use a dedicated fret-slotting template or a carefully made jig. Keep the saw vertical and control the depth with a stop.
Do not measure each fret by eye from the previous fret. Small errors can accumulate. Measure every slot from the same nut reference or use a reliable template.
Install and level the frets
To install frets:


- Cut fret wire slightly longer than each slot.
- Seat each fret with a press or controlled hammer.
- Check that the fret ends are fully down.
- Trim the ends.
- File the ends flush.
- Bevel the fret ends.
- Level the frets.
- Re-crown the fret tops.
- Polish them.
A fret that is not fully seated can cause buzzing. A fret that is too high can make notes sharp or uncomfortable.
Use a straightedge and fret rocker to find high frets. Leveling removes metal, so do not start with aggressive filing unless you have identified the problem.

Step 3: Join the Neck and Body
The neck and body must work as one straight string path. This is the point where careful planning matters most.
Set the neck angle and height
Many bolt-on solid-body guitars use a flat neck joint. Others need a small angle or a shim.
Place the neck in the pocket and temporarily install the bridge. Stretch a straightedge from the fretboard toward the bridge.
Check whether the straightedge reaches the planned bridge height:
- If it sits too high, the neck may need a lower pocket or a different angle.
- If it sits too low, the neck may need a shim or a higher bridge.
- If it misses the bridge center, correct the alignment before drilling.
A neck shim should be thin, flat, and placed for a clear reason. Do not use random scraps that leave gaps under the neck.
Align the centerline
Run a straightedge along the center of the fretboard toward the bridge. The strings should pass evenly over the fretboard and land in the correct relation to the bridge.
Check the alignment before drilling neck holes. Once the holes are drilled, fixing a serious error becomes harder.
Drill and mount a bolt-on neck
For a bolt-on neck:
- Clamp the neck in the correct position.
- Mark the screw locations.
- Drill clearance holes through the body.
- Drill pilot holes in the neck.
- Countersink or install ferrules as needed.
- Attach the neck with the correct screws.
The body holes must allow the screws to pass through without gripping the body. The screws should grip the neck, not pull the body off-center.
Step 4: Install the Bridge and Hardware
Install the bridge before final finishing if you need it to confirm alignment. Remove it or protect it during spraying and polishing.
Position the bridge
The bridge location depends on the scale length and saddle travel.
For a fixed bridge:


- Measure from the nut to the theoretical scale point.
- Mark the bridge centerline.
- Add room for saddle movement toward the tail.
- Check the two outer strings.
- Confirm that the bridge matches the neck width.
- Drill only after all checks agree.
The high-E saddle often sits close to the scale point, while the low-E saddle sits farther back. This is called intonation compensation.
A bridge placed too close to the nut may leave no room to correct sharp notes. A bridge placed too far back can make the guitar difficult to intonate or reduce useful saddle travel.
Install tuners and string trees
Drill tuner holes to match the actual tuner bushings. The holes should not be so large that the tuners move.
Install string trees only when the headstock design needs them. Their height and location affect the break angle and tuning behavior.
Install strap buttons
Place the buttons in strong areas of the body. Avoid thin edges and areas near cavities.
Use pilot holes. The screw should fit tightly without splitting the wood.
Step 5: Sand and Finish the Guitar
Finishing protects the wood and affects the appearance and feel. It does not repair poor shaping or bad joints.
Sand the body and neck
Sand through a planned series of grits. Remove scratches from the previous grit before moving on.
Keep the body edges crisp where the design needs them. Do not round over a sharp edge by accident.
Before finish, inspect the guitar under bright, angled light. Wipe the surface with a suitable cleaner or a lightly damp cloth, depending on the finish system. Avoid soaking unfinished wood.
Choose a finish
Common guitar finishes include:
- Oil
- Wiping varnish
- Water-based lacquer
- Nitrocellulose lacquer
- Polyurethane
- Polyester
Each finish has different drying times, safety needs, repair methods, and application tools. Follow the product’s safety sheet and label.
Spray finishes can release harmful vapors and create flammable overspray. Use proper ventilation, approved respiratory protection, eye protection, and ignition control. A household room is not automatically a safe spray booth.
Never spray solvent-based finish near a furnace, pilot light, open flame, or electrical source that can spark. If you cannot provide safe conditions, choose a finish that can be applied safely by hand or use a professional finisher.
Apply the finish
A typical finish process is:
- Seal the wood if the system requires it.
- Apply thin coats.
- Let each coat dry for the stated time.
- Sand lightly only when the product allows it.
- Build enough film for protection.
- Let the finish cure fully.
- Level and polish if the finish system requires it.
Do not confuse “dry” with “cured.” A surface may feel dry but remain soft underneath.

Step 6: Wire the Electronics
The electronics convert string movement into an electrical signal. The basic signal path is:
Pickup → switch or selector → volume control → tone control → output jack → amplifier
Plan the circuit
Common controls include:
- 250 kΩ volume and tone pots for many single-coil designs
- 500 kΩ pots for many humbucker designs
- Tone capacitor
- Three-way or five-way switch
- Shielded output cable
- Bridge or tailpiece ground wire
These are common starting points, not universal rules. Pickup makers often provide wiring diagrams for specific models.
Use the diagram for your exact switch and pickup layout. Two switches that look similar may use different terminal arrangements.
Solder the components
Solder with the guitar unplugged from any amplifier.
A basic process is:
- Mount the pots and switch.
- Trim wires to a useful length.
- Solder pickup hot wires to the correct terminals.
- Connect the volume output to the tone circuit and jack.
- Connect the ground wires.
- Connect the bridge ground if the design uses one.
- Inspect each joint for a solid connection.
- Prevent bare wires from touching other terminals.
Soldering irons can burn skin, damage finishes, and start fires. Use a stable stand, work in a ventilated area, keep flammable materials away, and let the iron cool before storage.
Shield the cavities
Copper foil or conductive shielding paint can reduce some unwanted electrical noise. Shielding works best when the conductive surfaces form a continuous path to ground.
A multimeter can check continuity between sections. Shielding cannot remove every source of hum, especially noise caused by single-coil pickup design, poor power wiring, lighting, or nearby electronics.
Test with a multimeter
Before installing the strings, test:
- Continuity between ground points
- No accidental short between hot and ground
- Pot and switch operation
- Pickup resistance, if useful for comparison
- Output jack connections
A multimeter can reveal wiring mistakes before you connect the guitar to an amplifier.
Do not work inside an amplifier or any mains-powered device unless you are trained to do so. Amplifiers can contain dangerous voltages even after they are unplugged.

Step 7: Perform the Final Setup
A guitar is not finished when the last screw goes in. It is finished when it plays, tunes, and intonates correctly.
Install strings
Install the intended string gauge. String gauge changes tension, neck relief, action, and intonation.
Tune the guitar to the target tuning, then stretch the strings gently and retune. Avoid excessive force.
Adjust neck relief
Relief is the small amount of forward curve that lets the strings vibrate without hitting the frets.
Use a capo or hold the string at the first fret and near the last fret. Check the gap around the middle of the neck with a feeler gauge.
A common starting range may be about 0.006 to 0.012 inches, but the best value depends on the guitar, fret condition, tuning, string gauge, and playing force.
Adjust the truss rod in small steps. If the rod feels stuck, stop. Forcing it can damage the neck or rod.
Set string action
Action is the height of the strings above the frets.
Measure at the 12th fret. A common starting point for electric guitars is around:
- 4/64 inch on the high-E string
- 5/64 to 6/64 inch on the low-E string
These are starting points, not fixed rules. Lower action may feel fast but can buzz. Higher action may reduce buzz but feel harder to play.
Raise or lower the bridge gradually. Check every string after each change.
Set pickup height
Pickup height affects output level, clarity, and magnetic pull. Set it with the strings fretted at the last fret, then adjust by ear and by output balance.
If a pickup sits too close to the strings, magnetic pull can affect sustain and intonation on some designs. If it sits too far away, its output may be weak.
Set intonation
Use a reliable tuner.
- Tune the open string.
- Play the note at the 12th fret.
- Compare the fretted note with the octave harmonic or the tuner reference.
- If the fretted note is sharp, move the saddle away from the neck.
- If the fretted note is flat, move the saddle toward the neck.
- Retune and repeat.
Check each string. Changing tuning, string gauge, neck relief, or action may require another intonation adjustment.
Cut and fit the nut
The nut slots control string height at the first fret. They must be cut to the correct width, depth, and angle.
A slot that is too high makes the first few frets feel sharp and stiff. A slot that is too low can cause open-string buzz.
Nut work requires special files and careful removal of material. If you are unsure, leave the slots high and have a qualified guitar technician finish them.

How Much Does It Cost to Make an Electric Guitar?
A homemade electric guitar can cost less than a high-end instrument, but the savings are not automatic. Tools often cost more than the first set of parts.
A hypothetical U.S. budget might look like this:
| Build type | Typical parts cost | Tool cost |
|---|---|---|
| Kit assembly | $200–$600 | Low to moderate |
| Body with ready-made neck | $400–$1,000 | Moderate |
| Full scratch build | $300–$1,200+ | High |
| Custom or premium build | $1,000+ | High |
These are planning ranges, not current retail quotes. Wood species, pickups, hardware, finish, shipping, and tool ownership can change the total.
A kit is often the cheapest way to learn the assembly, wiring, finishing, and setup stages. A scratch build gives more control but adds the cost of templates, routing tools, fret tools, measuring tools, and finish equipment.
Common Problems and Their Causes
Most problems have a short list of likely causes. Check the safe and simple items first.
| Symptom | Likely causes | First checks |
|---|---|---|
| Strings sit far from one edge | Neck or bridge misalignment | Recheck the centerline |
| Open strings buzz | Nut slots too low, loose hardware | Check nut and tuner fit |
| Fretted notes buzz | High frets, low action, poor relief | Check relief and fret level |
| Fretted notes play sharp | Nut too high, action too high, intonation | Check nut height and setup |
| Guitar will not intonate | Bridge too far forward or limited saddle travel | Check scale layout |
| Loud hum | Ground problem, single-coil noise, poor shielding | Test continuity and wiring |
| No sound | Bad solder joint, wrong switch terminal, jack error | Test with a multimeter |
| Neck moves after finishing | Wood movement, string tension, poor storage | Allow it to settle and recheck |
| Finish stays soft | Incompatible coats, cold conditions, poor cure time | Follow the finish maker’s instructions |
Do not keep sanding, filing, or routing when you do not know what is wrong. Measure first. Removing wood is easy; replacing it is not.
Safety Rules for a Home Guitar Workshop
Woodworking and finishing can cause eye, hearing, breathing, cutting, fire, and chemical hazards.
Follow these rules:
- Wear eye protection when cutting, routing, drilling, or hammering.
- Use hearing protection around routers, sanders, and saws.
- Control wood dust with source extraction and suitable respiratory protection.
- Keep loose clothing, hair, and cords away from rotating tools.
- Clamp the workpiece before drilling or routing.
- Unplug tools before changing bits or blades.
- Store solvents and finishes in approved containers.
- Keep finishes away from flames and heat.
- Ventilate spray and solvent work safely.
- Wash your hands after handling finishes, dust, and metal filings.
- Keep children and pets out of the work area.
- Have a qualified electrician inspect unsafe shop wiring.
The U.S. Occupational Safety and Health Administration provides guidance on wood dust, ventilation, machine guarding, and personal protective equipment. Product safety data sheets provide the correct handling and first-aid details for a specific finish or adhesive.
What Makes a First Build Successful?
A successful first build does not need rare wood or expensive pickups. It needs accurate geometry, a strong neck joint, reliable fretwork, clean wiring, and a careful setup.
Use a design with:
- A bolt-on neck
- A fixed bridge
- One or two pickups
- A simple control layout
- A known scale length
- A full-size plan
- Readily available replacement parts
Build in stages and test each stage before moving on. Test the neck fit before finishing. Test the wiring before closing the cavity. Test the bridge alignment before drilling. This habit prevents small errors from becoming expensive repairs.
For a first project, consider making the body yourself and buying the neck. That approach still teaches layout, routing, finishing, hardware installation, wiring, and setup while removing the most demanding structural part.
Key Takeaways
- A solid-body electric guitar is the simplest type to build.
- Use a full-size plan and mark a clear centerline.
- Scale length controls fret placement and bridge location.
- The neck pocket, fret slots, and bridge alignment need the highest accuracy.
- A ready-made neck can make a first build much easier.
- Test electronics with a multimeter before connecting an amplifier.
- Setup work—relief, action, pickup height, nut height, and intonation—determines how the finished guitar plays.
- Wear proper protection when routing, sanding, soldering, or spraying finish.
Frequently Asked Questions
Is it cheaper to build an electric guitar than to buy one?
It can be, but usually only when you already own the tools. Parts, finish, templates, and replacement materials add up quickly. A kit may offer a lower entry cost, while a scratch build provides more design freedom.
Can a beginner build an electric guitar?
Yes. A beginner can assemble a kit or build a body with a ready-made neck. Building a neck from raw wood requires more skill because fret placement, truss-rod installation, and neck stability must be precise.
What is the easiest electric guitar design to build?
A bolt-on solid-body guitar with a fixed bridge and one or two pickups is usually easiest. Avoid a tremolo bridge, set neck, carved top, or complex switching system for the first project.
What wood is best for an electric guitar?
There is no single best wood. Choose stable, dry wood that suits your tools and weight preference. Alder, ash, basswood, poplar, mahogany, maple, and several other woods can work when properly selected and prepared.
Do handmade electric guitars sound better?
Handmade does not automatically mean better. Sound depends on the pickups, strings, construction, setup, amplifier, and player. A handmade guitar’s main advantage is the ability to control its shape, feel, parts, and appearance.
Why does my homemade guitar buzz?
Buzz may come from low action, insufficient neck relief, high or loose frets, a low nut slot, loose hardware, or poor fretwork. Check the neck relief and action first, then inspect the frets and nut.
Can I wire a guitar without soldering?
Some systems use solderless connectors, but standard guitar electronics usually use soldered joints. Soldering provides a compact connection when done correctly. If you are new to it, practice on spare wire before working inside the guitar.
Conclusion
Making an electric guitar involves woodworking, metal hardware, electronics, finishing, and setup. The most reliable path is to choose a simple solid-body design, use accurate templates, buy a ready-made neck for the first build, and check alignment at every stage.
Start with a measured plan rather than a blank board. Then build slowly: body, neck fit, bridge alignment, finish, wiring, and setup. If the final guitar plays in tune, stays stable, and feels comfortable, the build is successful—even if the finish has a few marks or the body is not perfectly uniform.

Senior Music Reviewer
Alex Carter is a seasoned music reviewer with over a decade of experience in the world of sound and instruments. Passionate about helping musicians and enthusiasts make informed choices, he brings sharp insights and in-depth knowledge to every review. From classical instruments to modern gear, Alex combines technical expertise with a love for music to deliver content that resonates with readers.
As a Senior Music Reviewer and expert author on Tuneluma.com, Alex is dedicated to sharing honest evaluations, practical advice, and thoughtful commentary to guide readers in their musical journey.