How To Assemble Drum Set: Step-By-Step Setup Guide
Mount shells, attach hardware, set cymbals, position kit, and tune heads for a playable drum set.
I’ve built and set up dozens of kits for studios, bands, and students. This guide shows exactly how to assemble drum set parts, step by step, with clear tips, common mistakes, and real-world advice. You will learn how to assemble drum set pieces quickly, get a stable setup, and tune the drums so they sound great. Read on for simple steps, photos placeholders, and pro tricks that save time and frustration.

Tools and Parts Needed to assemble a drum set
A clean workspace and a few tools make assembly fast. Below are the common parts and tools you will need to assemble drum set pieces safely.
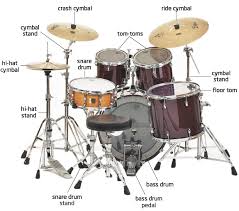
- Parts included with most kits:
- Bass drum
- Snare drum
- Rack toms
- Floor tom
- Hi-hat stand and cymbals
- Crash and ride cymbals with stands
- Bass drum pedal
- Throne (seat)
- Common tools:
- Drum key for tuning lug nuts
- Small adjustable wrench or socket for hardware
- Soft cloth to protect finishes
- Rubber mallet (optional) for gentle fit
- Optional extras:
- Drum rug to prevent slipping
- Isolation pads or riser
- Extra felts, wing nuts, and felts for cymbals
With these items ready, you can learn how to assemble drum set components in order and avoid hunting for parts mid-build.

Step-by-step guide: how to assemble drum set
Follow this order for a stable build and fast setup. Each step is short and clear.
- Prepare the area and unpack
- Clear space on the drum rug or soft floor.
- Lay out pieces and hardware near where the kit will sit.
- Assemble the bass drum and attach spurs
- Flip the bass drum carefully on its side.
- Screw in the spurs (legs) so the drum sits slightly angled and stable.
- Install bass pedal
- Attach the bass pedal to the hoop using the clamp.
- Check the beater strikes the center of the head.
- Mount the toms
- Use the bass drum tom mount or rack to attach toms.
- Position toms slightly tilted toward you for comfort.
- Set the floor tom
- Screw in the legs and set height to match tom reach.
- Make small angle adjustments to avoid hitting the snare.
- Position the snare drum
- Place snare on its stand and lock tilt.
- Height should let your wrists sit naturally over the snare.
- Set up hi-hat stand and cymbals
- Mount bottom and top hi-hat cymbals, secure felts and wing nut.
- Adjust pedal tension if needed.
- Mount crash and ride stands and cymbals
- Add felts, sleeve protectors, and wing nuts on each cymbal post.
- Position cymbals so arms don’t obstruct stick motion.
- Arrange throne and check spacing
- Sit and test reach for pedals, toms, and cymbals.
- Make small tweaks until everything feels balanced.
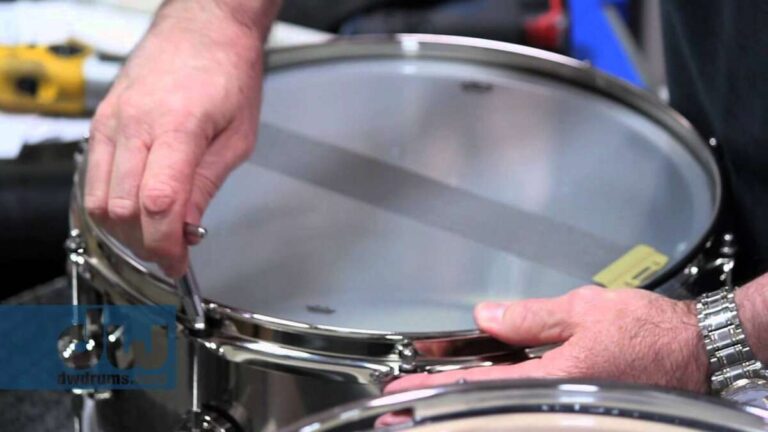
- Tune basic heads
- Use a drum key and tune in small quarter turns.
- Aim for even tension and listen for clear pitch.
Following this order makes how to assemble drum set fast and repeatable. Keep the drum key close; you will use it often.

Positioning, ergonomics, and tuning tips for a better setup
Good setup saves hours of practice time and prevents injury. Here are easy tips from experience.
- Seat height and posture
- Sit so your thighs are roughly parallel to the floor.
- Your feet should rest flat on pedals with knees slightly bent.
- Stick reach and angles
- Toms and cymbals should be close enough that you don’t strain.
- Angle toms so strokes land in a natural arc.
- Tuning basics
- Tighten lugs in a crisscross pattern for even tension.
- Tap near each lug and match pitch around the head.
- Cymbal positioning
- Keep cymbals at shoulder height or lower to avoid raised shoulders.
- Leave small gaps above cymbal felts to allow vibration.
- Sound balance
- Tune bass drum to a low, punchy pitch for rock.
- Tune toms and snare to complementary intervals for musicality.
When I teach beginners, adjusting seat height first solves most reach problems. Small moves make big comfort gains.
Common mistakes and troubleshooting when you assemble drum set
Mistakes can be costly in time and gear. Here are frequent problems and fixes when you learn how to assemble drum set.
- Loose wing nuts and felts
- Problem: Rattling cymbals or wobble.
- Fix: Tighten wing nuts, check felts and sleeves for wear.
- Uneven lug tension
- Problem: Dead spots or unwanted overtones.
- Fix: Loosen head slightly and retune using a crisscross pattern.
- Wrong pedal alignment
- Problem: Missed hits or sluggish response.
- Fix: Slide pedal clamp to center on hoop and test beater angle.
- Unstable stands
- Problem: Stands sink or shift mid-song.
- Fix: Ensure wing screws fully tightened and legs spread wide for stability.
- Poor mic placement for live or recording
- Problem: Muddy or thin sound.
- Fix: Place a mic near the beater spot on the bass head and a pair over the kit for clarity.
I once set up a kit on a smooth stage without a rug. The kit slid during a take. The fix was simple: add a rug and widen stand legs. Little details matter.
Maintenance and care after you assemble drum set
A tidy kit lasts longer and plays better. Keep a simple routine.
- Regular checks
- Inspect lug screws, wing nuts, and cymbal sleeves monthly.
- Tighten anything that moves under play.
- Head care and replacement
- Change batter heads when they lose tone or show dents.
- Rotate heads to even wear.
- Clean and protect finishes
- Use a soft cloth; avoid harsh chemicals on wood and chrome.
- Transport tips
- Use padded cases or bags for drums and cymbals.
- Loosen tension slightly for long travel to reduce stress on hoops.
Proper care keeps your kit sounding close to the day you learned how to assemble drum set. Little maintenance pays off in sound and longevity.
Frequently Asked Questions of how to assemble drum set
How long does it take to assemble a basic drum set?
Most people can assemble a basic kit in 20 to 45 minutes. With practice, setup time drops significantly.
Do I need a drum key to assemble a drum set?
Yes. A drum key is essential for tuning and tightening lugs. It’s a small, inexpensive tool that you will use often.
What order should I assemble the drums and hardware?
Start with the bass drum, attach pedal, mount toms, set floor tom, place snare, then set cymbals and throne. This order gives the most stable base.
How tight should cymbal wing nuts be?
Tighten wing nuts so the cymbal moves slightly on impact. Over-tightening restricts sound and can damage the cymbal.
How do I tune the bass drum after assembly?
Tune with even tension around the hoop. Start low and adjust beater placement to find the sweet spot. Add a pillow or dampener for a controlled sound.
Can I assemble a drum set without tools?
You can assemble many parts by hand, but a drum key is still needed for tuning. Some stands include wing nuts you can adjust without tools.
What mistakes should beginners avoid when assembling a kit?
Avoid over-tightening heads, placing cymbals too high, and ignoring rug placement. These cause bad sound and discomfort.
Conclusion
You now have a clear road map on how to assemble drum set, from unpacking to tuning and care. Follow the step-by-step order, check ergonomics, and use the simple maintenance tips to keep your kit playing well. Start slow, practice setup a few times, and you’ll cut setup time and improve comfort. Try building your kit today, tweak until it feels right, and share your setup tips or questions below to help others learn.