How Do You Restring An Acoustic Guitar: The 2026 Guide
Restringing an acoustic guitar involves removing old strings, inserting new ones through the bridge, and winding them securely.
Learning how do you restring an acoustic guitar is a rite of passage for every musician. I still remember the jitters the first time I changed strings. I worried a bridge pin would fly or a new string would snap. After changing hundreds of sets, I find the job calm and methodical. The steps are simple once you learn them. Knowing how do you restring an acoustic guitar saves money. It also builds a closer bond with your instrument. This guide walks you through the process step by step. It will help beginners and players who want a cleaner, more reliable setup.

Tools You Need to Restring an Acoustic Guitar
Before you begin, gather your supplies. This keeps the job smooth. Don’t scramble while the guitar is mid-restretch. You will need:
- a new set of acoustic guitar strings (see the Choosing Strings section below for tips),
- a wire cutter to clip excess string length,
- a string winder to speed up the tuning pegs,
- a bridge pin puller (many modern winders include one) to lift pins without marking the bridge,
- a soft cloth to wipe the fretboard and body while the strings are off.
Having these on hand makes the job faster. It also reduces the risk of mistakes. If you plan to clean the fretboard, keep lemon oil or a guitar-safe cleaner nearby.

Step by Step Process for Replacing Strings
Start with one string at a time. This keeps tension on the neck. It helps keep the setup stable. If you prefer, you can remove all strings at once, but that risks neck movement. I usually change strings one by one. Here is my trusted process.
1. Loosen and remove the old string
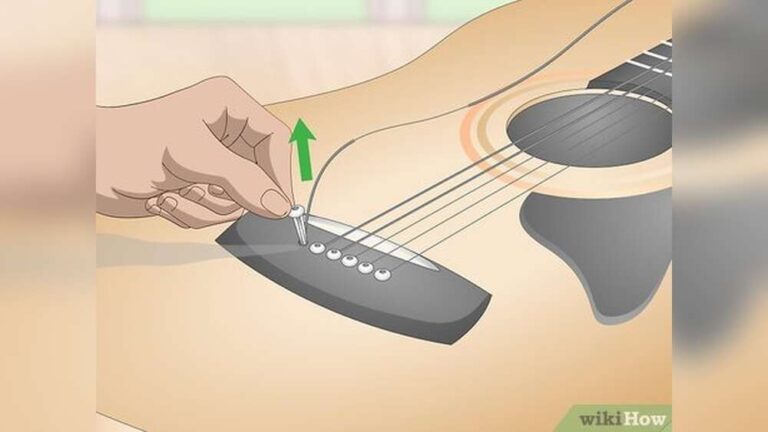
Turn the tuning peg to slacken the string. Once it is loose, cut it near the soundhole with a wire cutter. Cutting stops the string from whipping as it comes off. Use a bridge pin puller to lift the pin. Avoid pliers on the pins. Pliers can mar the wood or pin head.
2. Clean the fretboard and bridge
With the strings off, take a moment to clean. Use a soft cloth and a small amount of lemon oil or a guitar cleaner. Wipe the fretboard, bridge area, and the top of the guitar. This removes grime and extends string life.
3. Install the new string at the bridge
Insert the ball end of the new string into the bridge hole. Push the bridge pin back in so the pin slot faces the neck. Pull the string up toward the headstock to seat the ball against the bridge plate. Gently tug the string to make sure the ball is secure. If the pin pops, the ball may be under the pin instead of against the bridge plate. Pull the string up slightly and reseat the pin.
4. Thread and wind at the tuner
Feed the string through the corresponding tuner hole. Leave about two to three inches of slack. This allows the string to wrap around the post several times. As you wind, keep tension on the string. Make the coils stack neatly downward on the post. This creates a good break angle over the nut and improves tuning stability. Use a string winder to speed this up.
5. Trim and tune
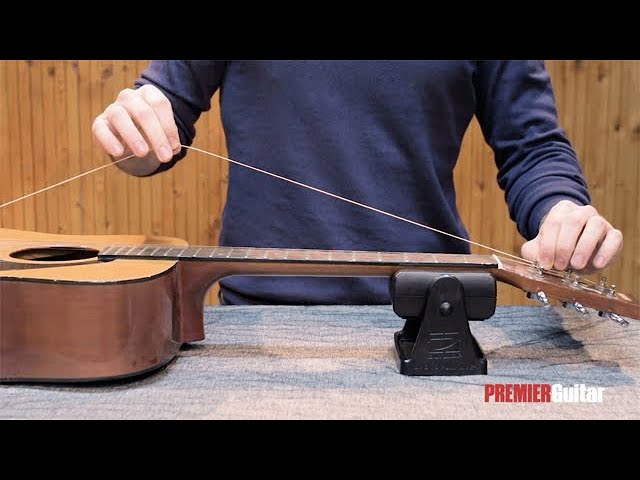
Once the string is roughly in tune, trim the excess near the tuner with a wire cutter. Tune to pitch with a tuner. New strings will stretch. Tune the string again and repeat until it holds pitch. Gently pull each string along its length a few times to help settle it. This reduces the need for frequent re-tuning.
6. Final checks
Check the bridge pins and tuners for tightness. Play a few chords. Listen for buzzing or dead notes. If a note sounds dull, re-seat the string and check the nut slot for binding. If needed, add a few more winds to the tuner for stability.
Choosing the Right Acoustic Guitar Strings
Choosing the right strings is key to tone and playability. Strings differ by gauge, material, and coating. Pick strings that suit your style and guitar.
String gauge and tone
Light gauge strings are easier to play. They suit fingerpicking and beginners. Medium or heavy gauges give more volume and fuller tone. They suit strumming and players who want more sustain. If you change gauge, the neck tension changes. Consider a setup if you move more than one gauge size away from your current strings.
Materials: phosphor bronze vs. 80/20 bronze
Phosphor bronze strings sound warm and last longer. 80/20 bronze tends to be brighter. Coated strings resist corrosion. They last longer in sweaty hands. But some players prefer the open tone of uncoated strings. I often use coated phosphor bronze when I travel. It keeps tone steady between gigs.
Specialty options
Consider silk-and-steel for a softer feel. Try carbon or hybrid sets if you like a mix of brightness and warmth. Always match the string type to your guitar’s scale length and bridge design.
Quick Tips for Better Tuning Stability
- Stretch new strings gently after installing them.
- Lock the string at the tuner by wrapping cleanly and using a string-lock method for extra hold.
- Check nut slots for sharp edges that can bind strings. Use graphite or a nut lubricant if needed.
- Keep the bridge pins seated fully. Loose pins can rattle and change tone.
- Tune up to pitch, not down. Always bring the string to pitch from below to reduce slippage.
Step-by-Step Safety and Best Practices
Work in a clear, stable space. Place the guitar on a padded surface. Keep wire clippings away from the guitar finish. Wear eye protection if you cut strings near your face. These small precautions prevent accidents and damage.
Frequently Asked Questions of how do you restring an acoustic guitar
How often should I change my guitar strings?
You should typically change your strings every one to three months depending on how often you play. If the strings look discolored, start to rust, or lose their bright tone, it is time for a fresh set. Gigging players may change more often. Casual players can stretch that interval.
Do I need to remove all the strings at once?
It is generally safer to change strings one at a time to maintain tension on the guitar neck. Removing all strings simultaneously can cause the neck to shift, requiring a truss rod adjustment. If you remove all strings, be gentle and check neck relief after restringing.
Why do my new strings go out of tune quickly?
New strings have a tendency to stretch naturally during the first few days of play. Gently tugging on the strings along their length after installation can help settle them and reduce the frequency of re-tuning. Also check for slippage at the tuner or binding at the nut.
Can I put electric guitar strings on an acoustic guitar?
While technically possible, electric strings have less mass and are designed for magnetic pickups, meaning they will sound thin and quiet on an acoustic. It is always best to use specific acoustic guitar strings for the intended resonance. Use electric-only sets only in a pinch.
What should I do if a bridge pin keeps popping out?
If a pin won't stay seated, the ball end of the string is likely stuck under the pin instead of being braced against the bridge plate. Simply pull the string up slightly while pushing the pin back down to ensure the ball end is seated correctly. Also check the pin hole for dirt or damage.
My guitar still buzzes after restringing. What next?
Check string height and nut slots. Make sure the strings sit cleanly in the nut. Look for loose hardware or worn frets. If buzzing continues, a setup by a tech may be needed to adjust action, intonation, or the truss rod.
How do I avoid sharp string ends after trimming?
Trim close to the tuner post, then bend the remaining tail down against the post. This reduces the chance of snagging and makes the headstock look tidy. Use a small amount of tape on the peghead if you have very short tails to avoid slips.
Conclusion
Mastering how do you restring an acoustic guitar is a basic yet powerful skill. It improves tone. It saves you money. It deepens your connection to the instrument. Take your time to remove, clean, and install each string. Follow the steps above and use the right tools. With practice, restringing becomes fast and routine. Grab your next set of strings, follow this guide, and enjoy the crisp, resonant sound of a well-maintained guitar. If you found this guide helpful, feel free to share it with a fellow player or leave a comment below about your own experiences with guitar maintenance.

Senior Music Reviewer
Alex Carter is a seasoned music reviewer with over a decade of experience in the world of sound and instruments. Passionate about helping musicians and enthusiasts make informed choices, he brings sharp insights and in-depth knowledge to every review. From classical instruments to modern gear, Alex combines technical expertise with a love for music to deliver content that resonates with readers.
As a Senior Music Reviewer and expert author on Tuneluma.com, Alex is dedicated to sharing honest evaluations, practical advice, and thoughtful commentary to guide readers in their musical journey.