How To Tune A Bass Drum: Easy Pro Tips For Punchy Sound
Tighten both heads evenly, tune the batter for attack and the reso for sustain, then damp as needed.
I’ve tuned bass drums for live shows, studio sessions, and teaching clinics for over a decade. This guide breaks down exactly how to tune a bass drum step by step, with clear tools, methods, and real-world tips you can use tonight. Read on to master consistent low-end, control over beater attack, and how to dial in tone for any musical situation.

Tuning basics: what matters and why
When you learn how to tune a bass drum, you control two main things: attack and sustain. The batter head (where the beater hits) gives the attack and click. The resonant head (front head) shapes the tone and low-end sustain. Tightening lugs raises pitch and reduces boom. Loosening lowers pitch and increases boom and warmth.
Key concepts to remember:
- Head tension affects pitch and overtones.
- Bearing edges and shell thickness influence clarity.
- Muffling controls sustain and removes unwanted rings.

Source: sweetwater.com
Tools and prep you’ll need
Before you tune, gather the right tools. A drum key is essential. A small tape measure or ruler helps center felt on the beater. Soft muffling options and a tuner app are helpful but not required.
Suggested kit:
- Drum key for even tuning
- Tuner app to check pitch if desired
- Soft felt strips, gaffer tape, or a pillow for muffling
- Microphone for checking sound at stage/PA levels
- Clean cloth to wipe heads and rims
Source: musicradar.com
How to tune a bass drum: step-by-step method
Follow this simple, repeatable workflow to tune a bass drum reliably. Practice these steps to build muscle memory.
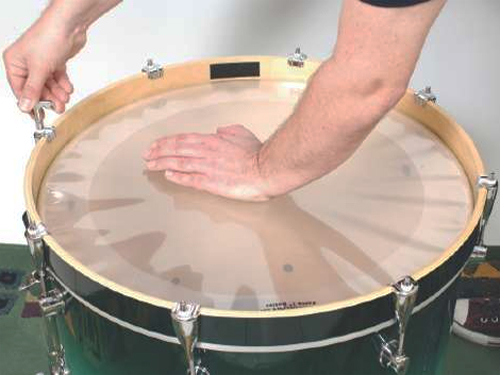
- Prepare the drum
- Place the drum on its side with the batter head up or on a stand.
- Inspect bearing edges and heads for damage. Replace old heads first.
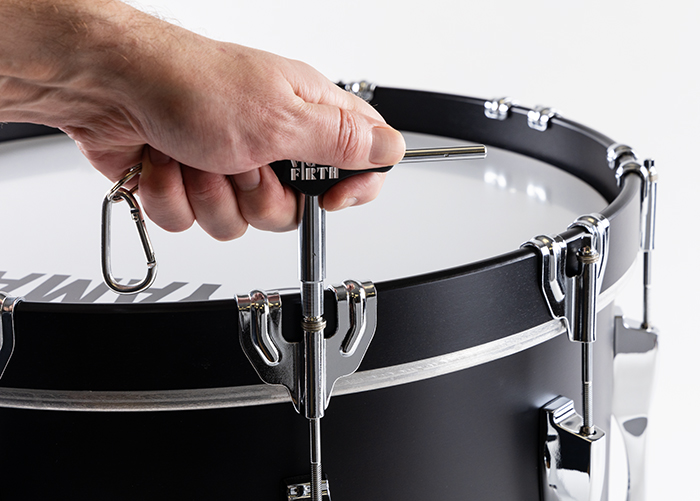
- Finger-tighten all lugs
- Turn each lug clockwise by hand until snug. This evens initial tension.
- Set a baseline
- Use the drum key and tighten each lug in a star pattern (opposite lug next) a quarter turn at a time.
- Keep tension even; don’t go fast on one side.
- Find batter pitch
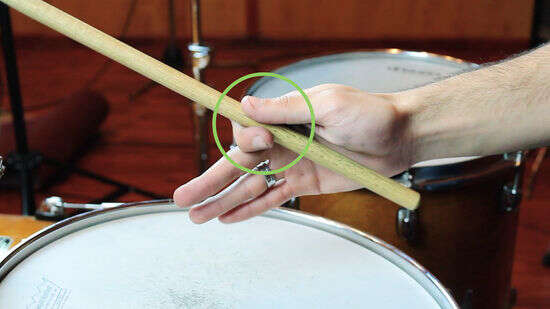
- Tap near each lug about an inch from the rim and listen to the pitch.
- Adjust each lug until the pitches around the head match.
- Tune the resonant head
- Repeat the star-pattern process for the front head.
- Aim for a pitch that supports the batter: lower for warmth, higher for more beater click.
- Check overall sound
- Play with a beater at the normal striking spot. Listen for a focused low end and controlled ring.
- Apply muffling as needed
- Use a small pillow, foam, tape, or moon gel on the inside or outside of the reso head.
- Remove or add dampening until sustain suits the music.
- Final mic and stage check
- If miking, test with the mic in place. Small tuning tweaks may be needed to avoid boom or mud in the mix.
Tips as you go:
- Tune in small increments. Quarter turns change things a lot.
- Keep lugs even; uneven tension creates unwanted overtones.
- When matching lug pitch, use an easy tap with your knuckle or a mallet.
Source: sweetwater.com
Tuning choices for different styles and setups
How you tune depends on genre, stage volume, and whether you’re recorded or live.
- Jazz and acoustic
- Looser batter and reso for warmth and resonance. Minimal muffling.
- Rock and pop
- Tighter batter for attack. Moderate reso tension and some internal muffling.
- Metal and high-gain
- Higher batter pitch for beater click. Tight reso and more damping to avoid low-end mud.
- Studio recording
- Dial in tones at low volume. Use subtle muffling and mic placement to shape sound.
- Live, loud stages
- Cut boom with more damping and higher reso tension so the kick sits in the mix.
Remember: when you learn how to tune a bass drum for a style, trust your ears and the band context.

Troubleshooting common problems and fixes
Here are quick fixes when things go wrong while you’re learning how to tune a bass drum.
Problem: Boom but no attack
- Solution: Raise batter head tension slightly. Add a thin internal muffler or tape on the batter contact area.
Problem: Ringing overtone
- Solution: Identify the offending pitch by tapping near lugs. Slightly lower or raise nearby lugs to cancel it, or add small external dampers.
Problem: Muddy low end on stage
- Solution: Tighten the reso head, add internal muffling, and reposition the mic closer to the beater for clarity.
Problem: Uneven tone around the head
- Solution: Use the star pattern, match pitches at each lug, and re-check bearing edges and head seating.

Source: schoolofrock.com
Personal experience: lessons from the road and studio
I’ve tuned dozens of kits for touring bands and solo sessions. One lesson stood out early on: never rush lug tightening. I once tightened one side quickly to hit a louder sound for a set. The kick sounded great alone but disappeared under guitars. I learned to check the band mix before finalizing tuning.
What helped me most:
- Use a quick mic check to hear real mix behavior.
- Keep a set of spare heads and a small tape roll in gig bags.
- Take photos or notes of what works for each venue; room acoustics vary a lot.

Source: youtube.com
Practical muffling options and placement
Muffling is part of how to tune a bass drum because it controls sustain and focus.
Common methods:
- Pillow or blanket inside the drum against the reso head for smooth low end.
- Moon gel or rings on the reso head for minimal damping.
- Gaffer tape on the batter head for a quick click cut.
- Internal foam block for a tight, controlled tone.
Placement tips:
- Small dampers near the beater reduce attack without killing low end.
- Larger internal dampers decrease sustain and remove boom.

Source: schoolofrock.com
Quick checks and routine maintenance
A little care keeps your tuning consistent.
- Change heads every 6–18 months depending on use.
- Clean rims and lugs; grime changes tension feel.
- Check bearing edges when replacing shells or heads.
- Keep a consistent beater position; angle and padding change tone.
Regular checks make learning how to tune a bass drum faster and more predictable.

Frequently Asked Questions of how to tune a bass drum
How tight should the batter head be?
Tighten the batter head until the pitch around the hoop is even and the attack is clear. Avoid extreme tightness; too tight reduces low-end power.
Should the front head be tighter than the batter head?
You can tune the front head slightly lower, equal, or higher than the batter head depending on tone. Higher reso emphasizes attack; lower reso emphasizes depth and warmth.
How much muffling is ideal?
Start with minimal muffling and add until the sustain fits the song. Use small doses—less is often better in the studio.
Can I tune without a drum key?
You need a drum key to make fine adjustments and keep lugs even. Finger-tightening can be a temporary prep step, but a key is essential for accurate tuning.
How often should I retune during a gig?
Check tuning if temperature or humidity shifts, or if the drum is hit hard over long sets. A quick 5-minute check before each set keeps tone consistent.
Is there a standard pitch for a bass drum?
There’s no universal pitch; choices depend on band mix and style. Many drummers tune the batter head to a note between E1 and A1 for common pop/rock settings, but use your ears first.
Conclusion
Tuning a bass drum is a practical skill you can learn quickly by following a consistent process: prepare, match lug pitches, balance batter and reso tension, and use muffling to control sustain. Practice these steps, test the drum in the band mix, and keep simple maintenance habits. Try the steps tonight on your kit, take notes, and adjust for the room and music. If this helped, leave a comment with your tuning goals or subscribe for more drum tips.

Senior Music Reviewer
Alex Carter is a seasoned music reviewer with over a decade of experience in the world of sound and instruments. Passionate about helping musicians and enthusiasts make informed choices, he brings sharp insights and in-depth knowledge to every review. From classical instruments to modern gear, Alex combines technical expertise with a love for music to deliver content that resonates with readers.
As a Senior Music Reviewer and expert author on Tuneluma.com, Alex is dedicated to sharing honest evaluations, practical advice, and thoughtful commentary to guide readers in their musical journey.