How To Connect Digital Piano To Computer For Recording: DIY
Connect your digital piano via USB, MIDI, or an audio interface to record easily.
I’ve recorded on dozens of setups and taught many players how to connect digital piano to computer for recording. I know the common pitfalls and the cleanest paths. This guide gives clear steps, gear lists, and troubleshooting so you can record fast, whether you want MIDI data or raw audio.

Why connect your digital piano to your computer
Recording on a computer opens big options. You can capture MIDI data to change sounds later. You can record high-quality audio to edit and mix. You can layer sounds and use plugins.
Connecting a digital piano to a computer also makes practice more useful. You can track progress. You can share performances easily. This article shows many ways to connect and record. It explains the difference between MIDI and audio. It helps you pick gear and avoid mistakes.

Which connection method should you choose
Choosing a method depends on what you want to record and your piano’s outputs. Here are the main options.
- USB-MIDI or USB-Audio
- Best when your piano has a USB port labeled "USB to Host" or "USB Audio."
- Lets you send MIDI and sometimes stereo audio to the computer over one cable.
- Standard MIDI (5-pin DIN)
- Use when your piano has MIDI OUT and you want MIDI only.
- Requires a MIDI interface or USB-MIDI adapter to reach the computer.
- Line outputs to an audio interface
- Use balanced 1/4 inch TRS or RCA outputs into an audio interface for the best audio quality.
- Records raw piano audio and allows mic-free high-fidelity capture.
- Microphone (if acoustic or hybrid)
- Not common for pure digital pianos but relevant for hybrid models or nearby acoustic sources.
Which method to pick depends on whether you want MIDI flexibility or pure audio quality. If you want to change sounds later, choose MIDI. If you want the piano’s built-in tone recorded as-is, use audio outputs or USB-Audio.

Gear checklist: what you need
Before you start, gather these items. They keep the process smooth.
- Computer
- Mac or Windows PC with a DAW installed
- Digital piano
- With USB, MIDI OUT, or line outputs
- Cables
- USB A-to-B or USB-C depending on your piano
- MIDI cable or USB-MIDI adapter if needed
- 1/4 inch TRS cables for line outputs
- Audio interface (recommended for audio)
- With 2 inputs, low-noise preamps, and good drivers
- Headphones or monitors
- For accurate listening and latency checks
- DAW (digital audio workstation)
- Reaper, Logic, Ableton, GarageBand, FL Studio, etc.
If you record MIDI often, a stable USB cable and up-to-date drivers matter. If you record audio, invest in a good audio interface.

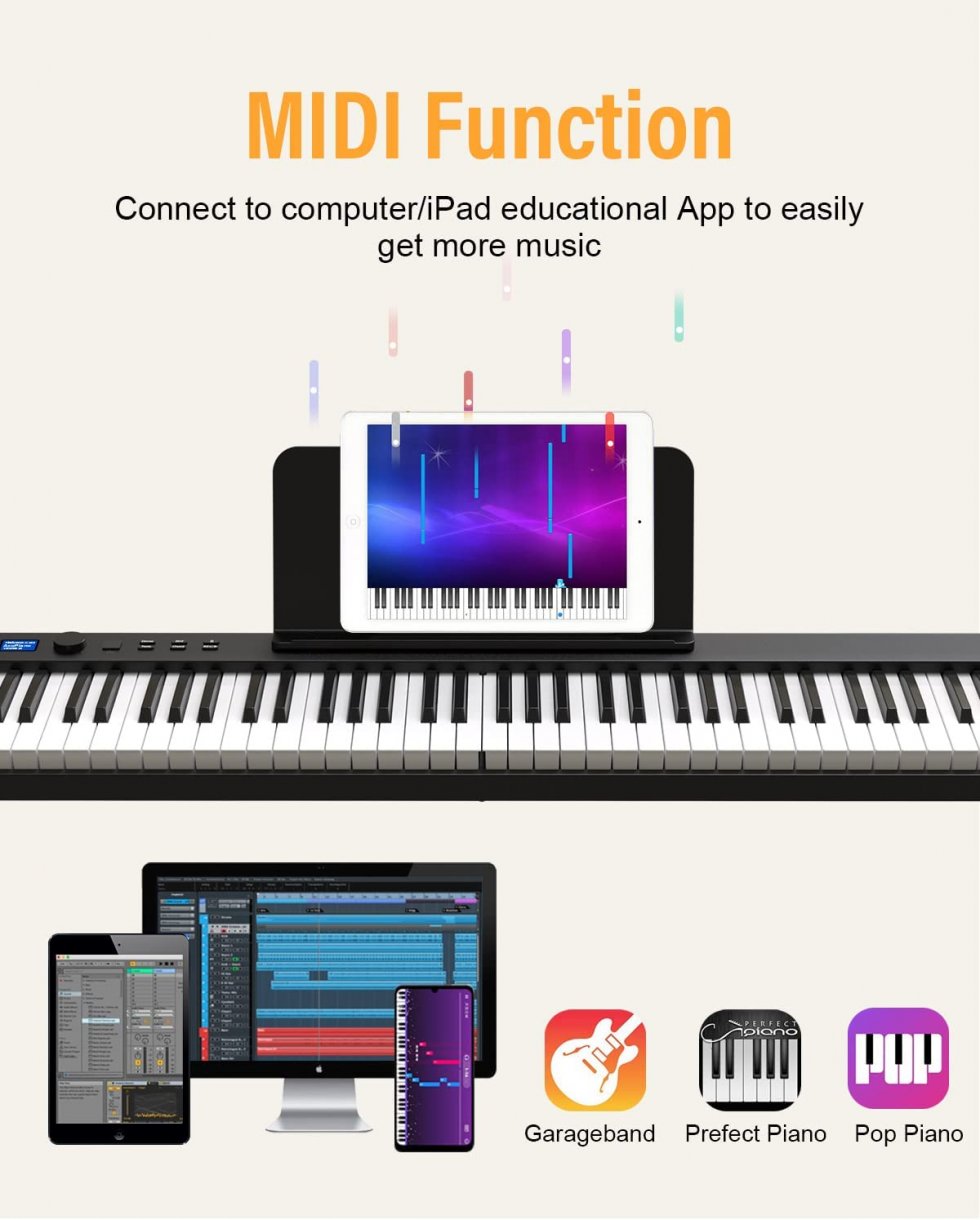
Step-by-step: USB connection (fastest path)
This is the most common route. Many modern digital pianos have USB that can carry MIDI and sometimes audio.
- Connect USB cable from the piano’s USB port to your computer.
- Turn on the piano, then the computer.
- If your piano needs drivers, install them from the manufacturer site.
- Open your DAW.
- In the DAW settings, select the piano as a MIDI device or audio interface.
- Create a MIDI track to record note data, or create an audio track for audio input.
- Arm the track and set levels. Use headphones to monitor.
- Record and test. Save your session.
Notes:
- On Windows, consider ASIO drivers for low latency.
- On Mac, the piano often appears in Core Audio automatically.
This method is great when you need quick setup and the option to record MIDI or audio without extra gear. Remember to set the piano’s audio sample rate to match the DAW if USB audio is used.

Step-by-step: MIDI DIN connection (for MIDI only)
Use this when you want MIDI data and your piano has 5-pin MIDI OUT.
- Connect MIDI OUT from the piano to MIDI IN on a MIDI interface.
- Connect the MIDI interface to your computer via USB.
- Power on devices and open your DAW.
- In the DAW, enable the MIDI interface as an input.
- Load a virtual instrument on a MIDI track.
- Record your performance as MIDI. Edit notes afterward.
Tip: Turn Local Control off on the piano if you use its keyboard to play a soft synth in the DAW. This avoids double notes.

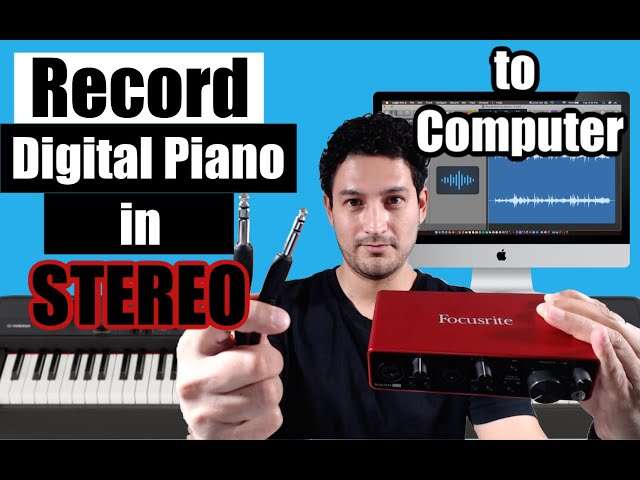
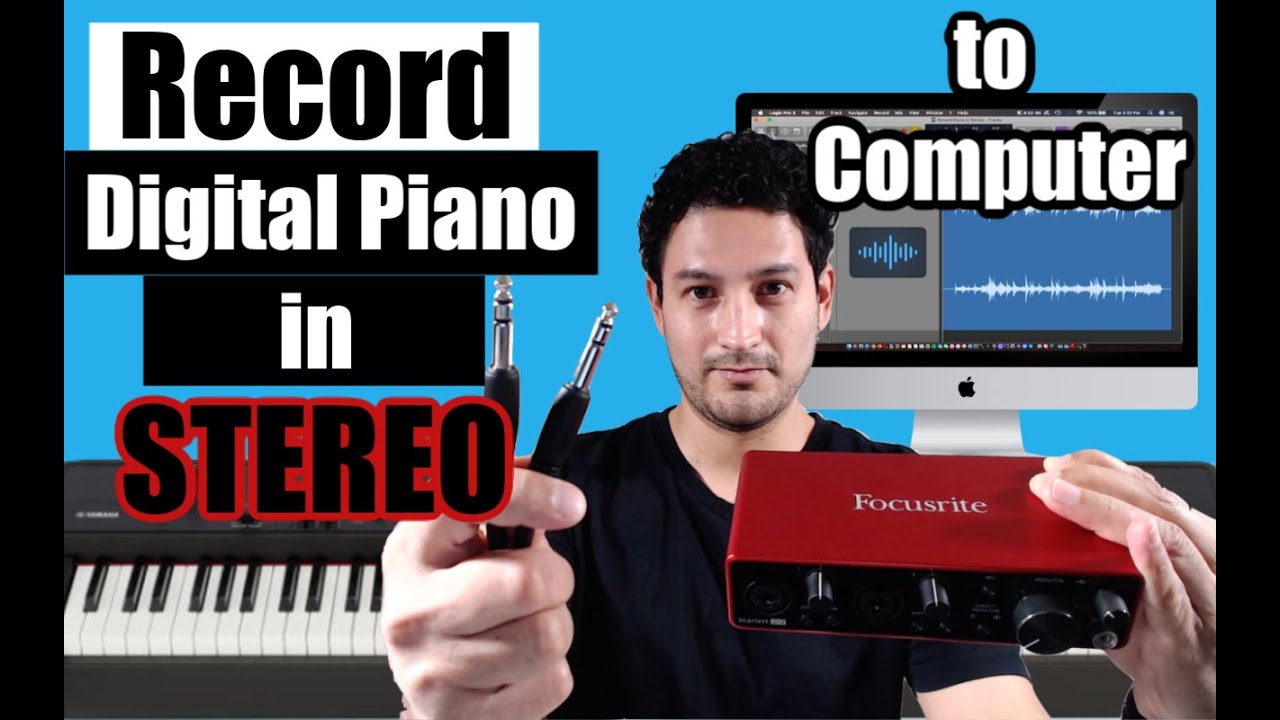
Step-by-step: Audio interface connection (best audio quality)
Recording the piano’s line outputs into an audio interface gives clean sound and full control.
- Connect the piano’s LINE OUT L/R to the audio interface inputs with TRS cables.
- Connect the audio interface to your computer via USB, Thunderbolt, or USB-C.
- Install the interface drivers if required.
- In your DAW, set the audio interface as the audio input and output device.
- Create stereo or mono audio tracks and select the correct inputs.
- Set input gain to avoid clipping. Aim for peaks around -6 dB to -12 dB.
- Arm tracks and use direct monitoring if latency is an issue.
- Record performance. Edit and mix as needed.
Using an audio interface also gives you phantom power, better preamps, and lower noise than plugging direct to the computer’s line-in.
MIDI vs audio: what to record and when
Understanding the difference helps you pick a workflow.
- MIDI recording
- Records note events and controller data.
- Lets you change instrument sounds later.
- Results in small files and full editability.
- Audio recording
- Records the piano’s actual sound.
- Captures pedal noise, built-in effects, and dynamics exactly.
- No later ability to change the instrument tone.
Many pros record both. Record MIDI for editing and a stereo audio track as a reference. This gives the best flexibility and a safety backup.

Latency, drivers, and monitoring
Latency is the delay between hitting a key and hearing sound. It can ruin takes. Here’s how to control it.
- Use low buffer sizes in your audio driver for low latency.
- On Windows use ASIO drivers for best performance.
- On Mac use Core Audio; no extra driver needed for many devices.
- Use direct monitoring on your audio interface to hear the piano with near-zero latency.
- If recording MIDI into a soft synth, lower buffer during tracking, then raise it for mixing.
If latency remains high, try these steps:
- Close background apps.
- Use a wired connection for MIDI/USB.
- Update drivers and firmware.
Common recording tips and workflow
These are practical habits I learned after many sessions.
- Create a session template in your DAW with tracks and inputs preset.
- Label tracks and color-code them.
- Record a short test take to set levels first.
- Keep a safety stereo audio track even when you record MIDI.
- Use a pedal and map sustain CC if needed.
- Save versions frequently and back up to the cloud.
I once lost a full take by not arming the audio track while thinking MIDI was enough. From then on I always record both.
Troubleshooting checklist
If your piano won’t record, try these quick checks.
- Check cables and power. A loose cable is often the issue.
- Confirm the DAW sees the piano in MIDI and audio settings.
- Install or update drivers and firmware.
- Check channel routing and track arming in the DAW.
- Turn Local Control off if using a soft synth to avoid double-triggering.
- Lower buffer size if MIDI feels laggy, or use direct monitoring for audio.
If the signal is noisy, try balanced TRS cables and an audio interface with good preamps.
Quick PAA-style questions
What cable do I need to connect a digital piano to a computer?
- Use USB A-to-B or USB-C for USB ports. Use a MIDI interface and MIDI cables for 5-pin DIN MIDI. Use TRS cables for line outputs to an audio interface.
Can I record high quality audio directly over USB?
- Many modern pianos support USB-Audio and can record stereo audio at good quality. For best fidelity, use a dedicated audio interface if your piano has line outputs.
Do I need a DAW to record?
- A DAW is recommended. It gives editing and mixing tools. You can use simple recorders for quick takes.
How do I reduce latency when recording?
- Use ASIO on Windows, low buffer sizes, and direct monitoring on your audio interface.
Should I record MIDI or audio?
- Record MIDI if you want to change sounds later. Record audio for the piano’s native tone. Many players record both.
Frequently Asked Questions of how to connect digital piano to computer for recording
What is the easiest way to connect a digital piano to a computer for recording?
The easiest way is a single USB cable if your piano has USB to Host. It often carries MIDI and audio. Plug, enable the device in your DAW, and record.
Why does my computer not detect my digital piano?
Check cables, power, and drivers. On Windows, install the piano’s driver or a MIDI interface driver. On Mac, try a different USB port or cable.
How do I record both MIDI and audio at once?
Use a USB connection that supports MIDI and audio or combine a USB-MIDI link with an audio interface for line outputs. Arm separate MIDI and audio tracks in your DAW.
Do I need special drivers to record?
Some pianos need drivers on Windows. Many Macs work without drivers through Core Audio. Check the manufacturer’s site for the latest driver and firmware.
How can I fix sticky notes or stuck MIDI notes?
Set Local Control off and use the piano only as a controller. Update firmware, and check MIDI routing in the DAW. Restart devices if notes hang.
Can I use my phone as a recorder for my digital piano?
Yes. You can use USB adapters or record the audio output into a phone interface. Quality may be lower but it's fine for demos.
Is an audio interface necessary?
Not always. If your piano offers USB-Audio and you want simple recording, you can skip an interface. For better sound and lower noise, use an audio interface.
How do I avoid clipping when recording piano audio?
Set input gain so peaks stay around -6 dB to -12 dB. Use your DAW’s meters and do a test play to adjust levels.
Can I record multiple keyboards to one computer?
Yes. Use an audio interface with multiple inputs or a MIDI interface with many ports. Configure each keyboard on separate tracks in the DAW.
What sample rate and bit depth should I use?
44.1 kHz and 24-bit work well for most projects. Use 48 kHz or higher for video projects or if your piano supports it.
Conclusion
You now have clear paths to connect and record your digital piano to a computer. Choose USB for quick setup, MIDI for editability, or an audio interface for the best sound. Test your connections, set levels, and use templates to speed your workflow. Start a simple session today and record one short piece. Share what you create, or ask questions below to refine your setup.

Senior Music Reviewer
Alex Carter is a seasoned music reviewer with over a decade of experience in the world of sound and instruments. Passionate about helping musicians and enthusiasts make informed choices, he brings sharp insights and in-depth knowledge to every review. From classical instruments to modern gear, Alex combines technical expertise with a love for music to deliver content that resonates with readers.
As a Senior Music Reviewer and expert author on Tuneluma.com, Alex is dedicated to sharing honest evaluations, practical advice, and thoughtful commentary to guide readers in their musical journey.