How To Adjust Guitar Truss Rod Without Special Tools: Tips
Loosen or tighten the nut a tiny amount using a socket or screwdriver substitute.
I’ve adjusted many guitars with no fancy tools. This guide explains exactly how to adjust guitar truss rod without special tools, when you should do it, and how to avoid costly mistakes. I’ll share hands-on steps, simple tool substitutes, safety tips, and real stories from my shop work so you can feel confident making small, safe adjustments at home.

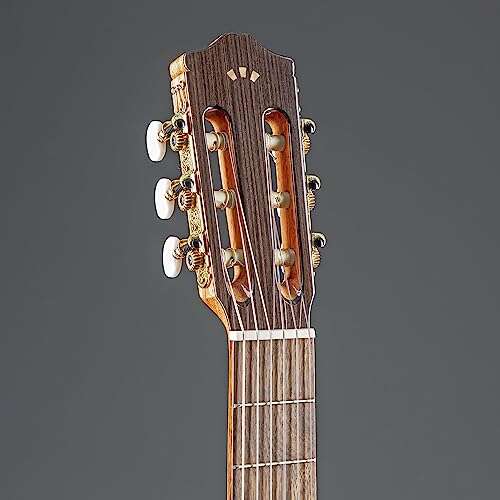
What a truss rod does and why it matters
A truss rod is a metal rod inside the neck. It controls neck relief. Relief is the slight bow that counters string tension. Too much bow makes high action and buzzing. Too little bow makes fretting out and poor tone.
Understanding this helps you adjust guitar truss rod without special tools safely. Small turns change relief a little. Big turns can damage the neck or finish. When you know how the rod works, you avoid overcorrection and keep the guitar stable.
When to consider adjusting the truss rod
Look for these signs before you learn how to adjust guitar truss rod without special tools:
- Noticeable fret buzz on middle frets with light touch.
- Action that sits too high near the middle of the neck.
- New strings with large tension change after a tune.
- Visible long bow or back-bow when sighting down the neck.
If the guitar is very old, warped, or has cracked finish, stop and see a pro. Simple neck relief issues are safe to fix at home. Severe problems need a luthier.

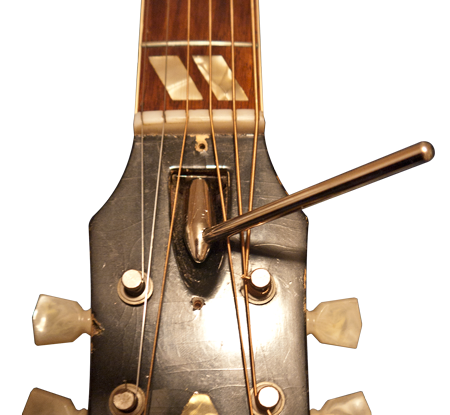
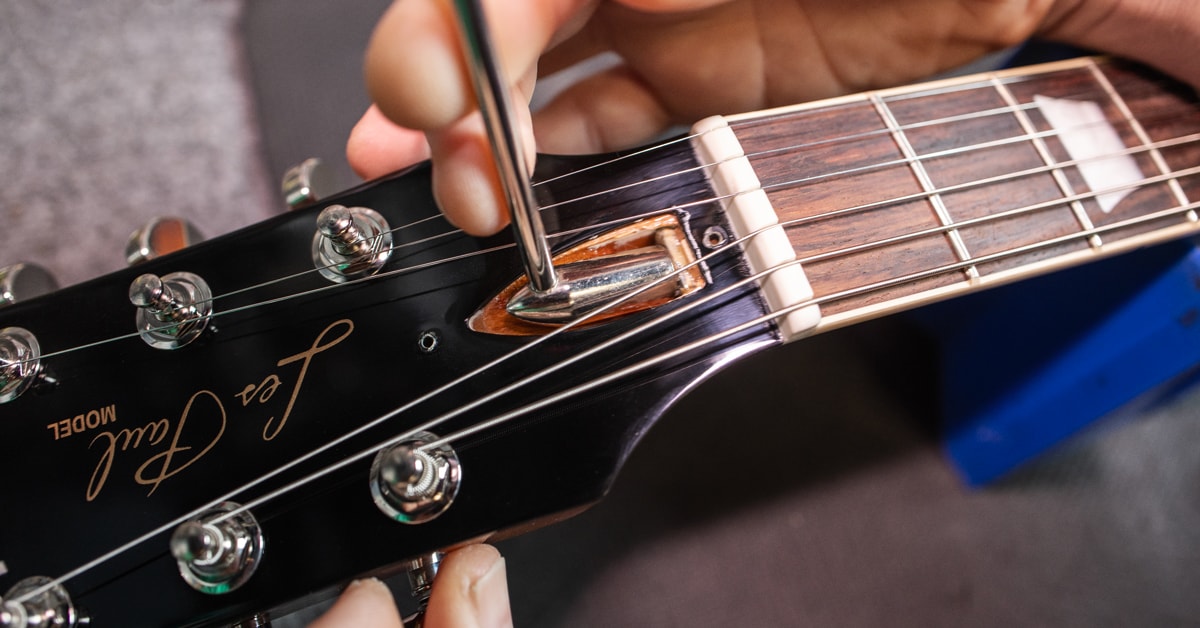
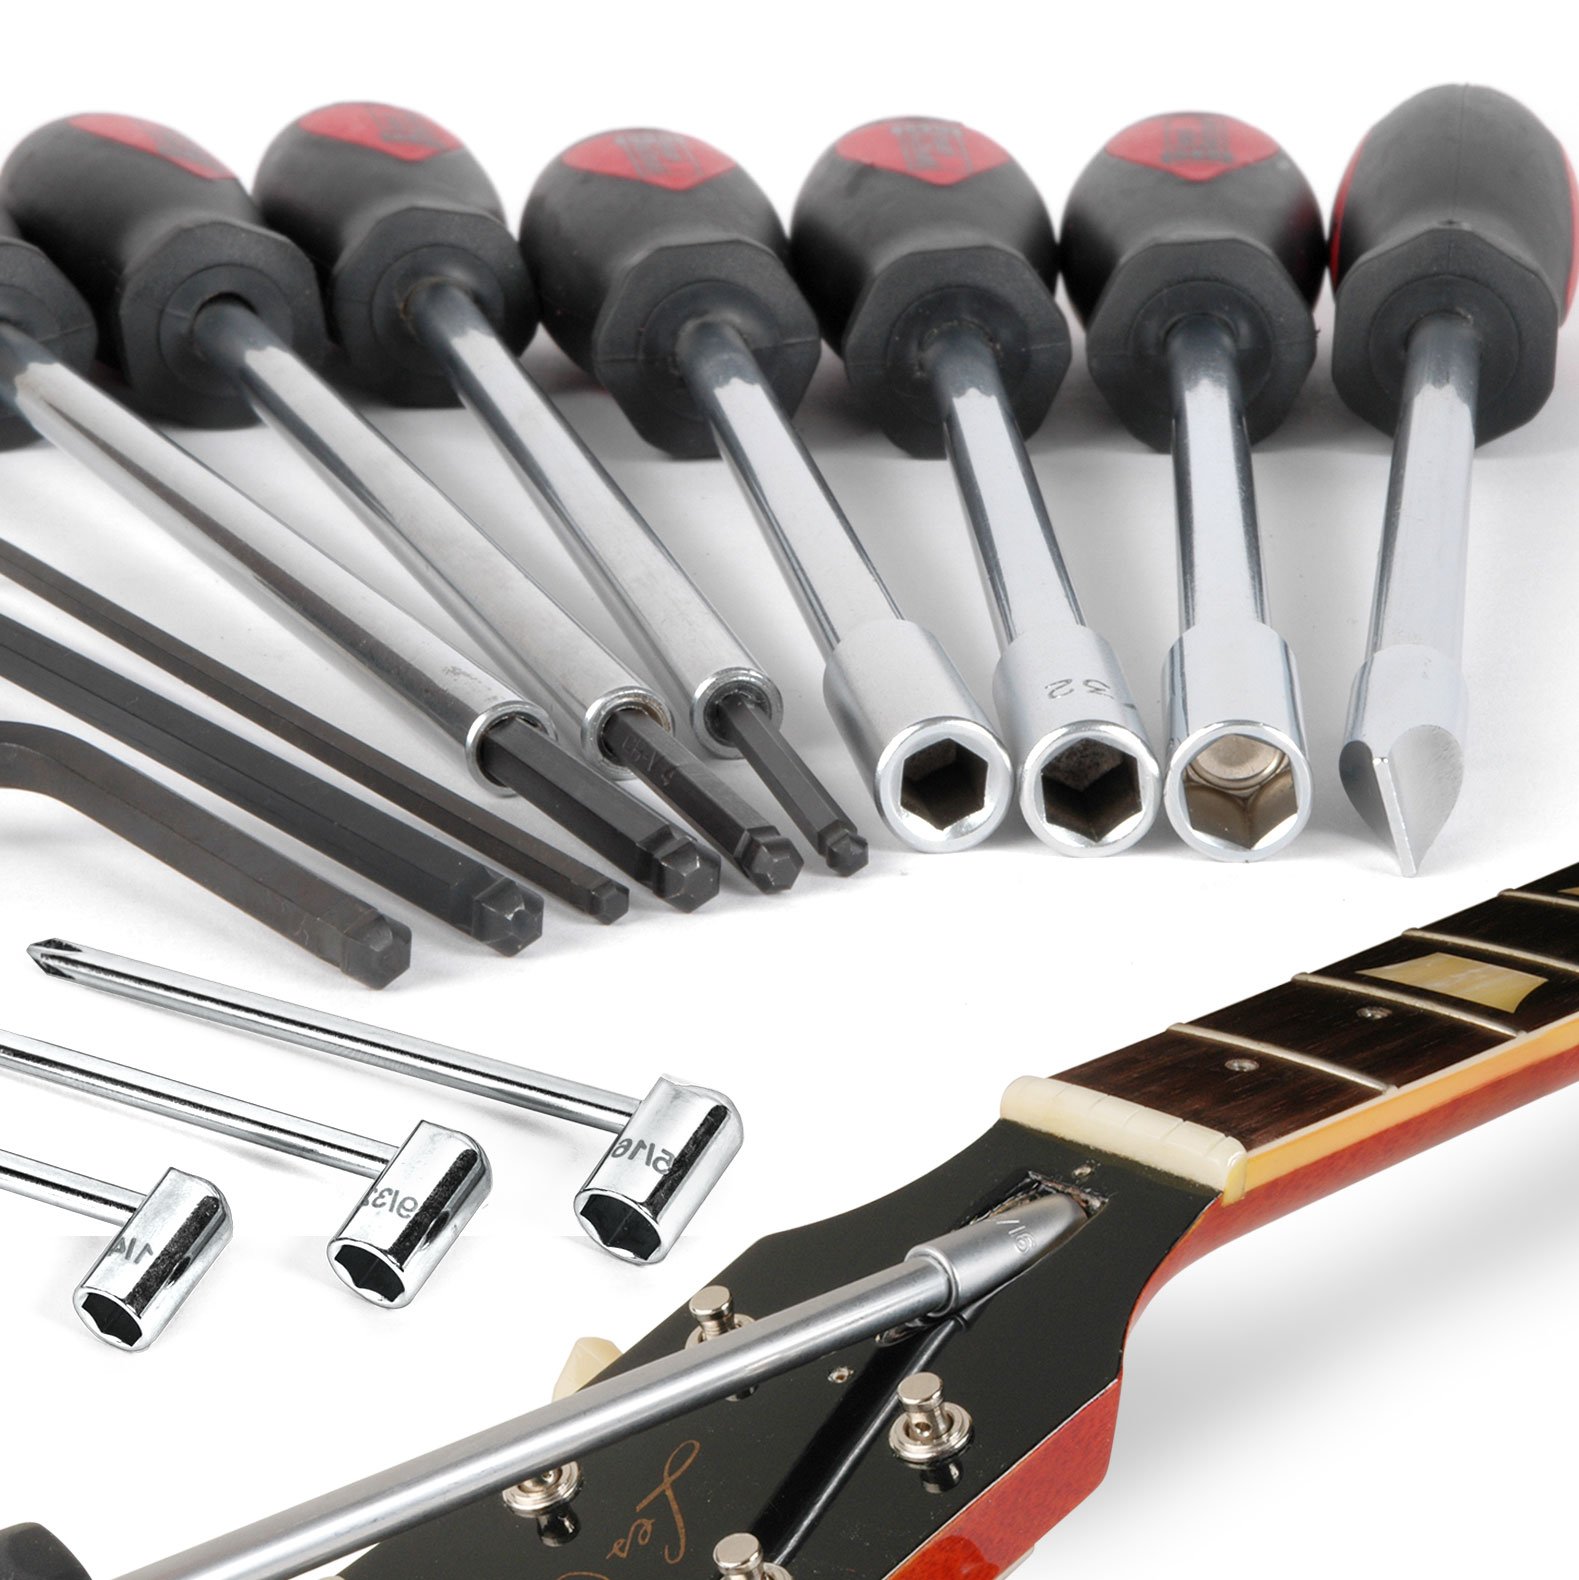
Simple tools and safe substitutes you can use
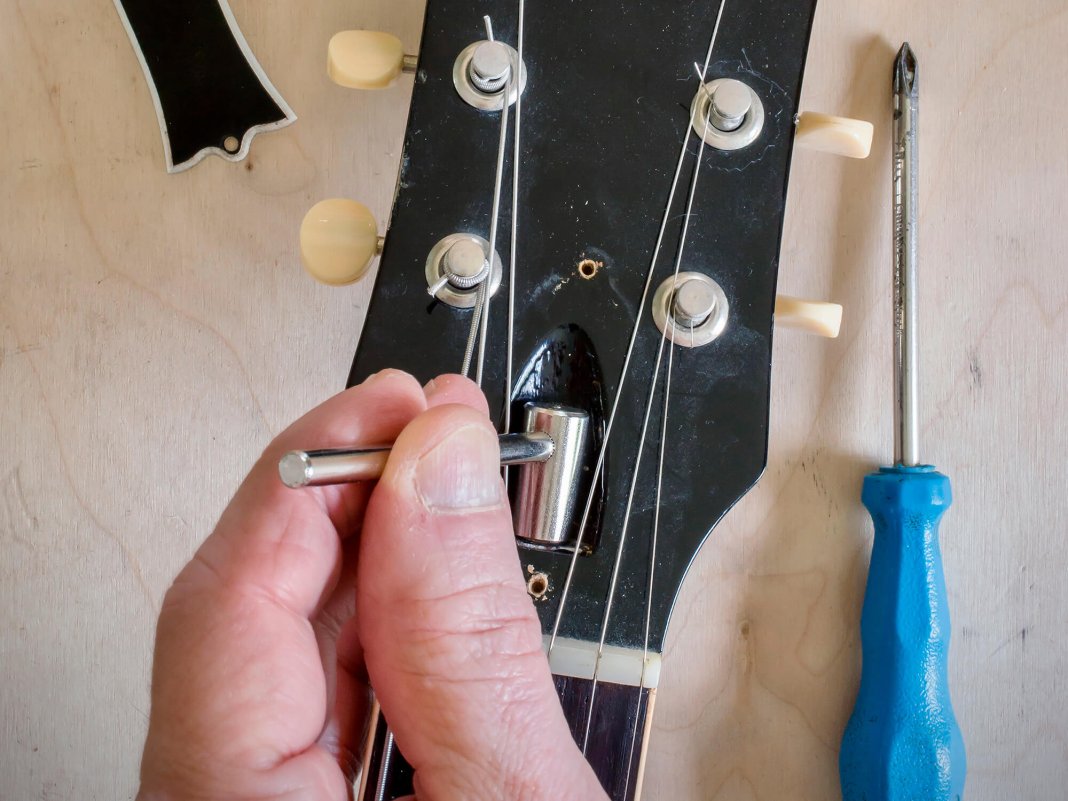
You can adjust guitar truss rod without special tools by using safe substitutes. Use these only for tiny turns. If your nut is a small allen, hex wrench, or socket type, match the size closely.
Useful substitutes:
- Proper-sized open nut or small adjustable wrench for coarse sockets.
- Short, stiff screwdriver shank fitted into the nut socket for leverage.
- Small crescent wrench used gently with padding to protect nut.
- Needle-nose pliers with cloth and very light grip for emergency turns.
- Socket from a basic toolkit fitted over nut, with cloth to protect finish.
Always pad tools with a cloth. If the nut is recessed or unusual, do not force tools in. When in doubt, stop and get the right tool.
Step-by-step: how to adjust guitar truss rod without special tools
Follow these short, clear steps to adjust guitar truss rod without special tools. Keep turns tiny. Count every quarter turn.
- Inspect and measure
- Sight down the neck from the headstock to the body to see the bow.
- Press the low E string at the first and last frets. Check gap at 7th-9th fret.
- Tune to pitch
- Tune the guitar to standard or preferred tuning. Tight or loose strings will change relief.
- Protect the finish
- Put a soft cloth around the tuning area. Place a towel under the neck.
- Choose the right substitute
- Match a tool substitute to the truss nut shape. Pad it with cloth.
- Make tiny turns
- Turn a quarter turn and re-tune. Let the neck settle for a minute.
- Check relief again by pressing string at first and last fret and measuring gap.
- Repeat as needed
- Make more quarter turns only when you see no improvement.
- If you need more than two full turns, stop and consult a pro.
Safety notes:
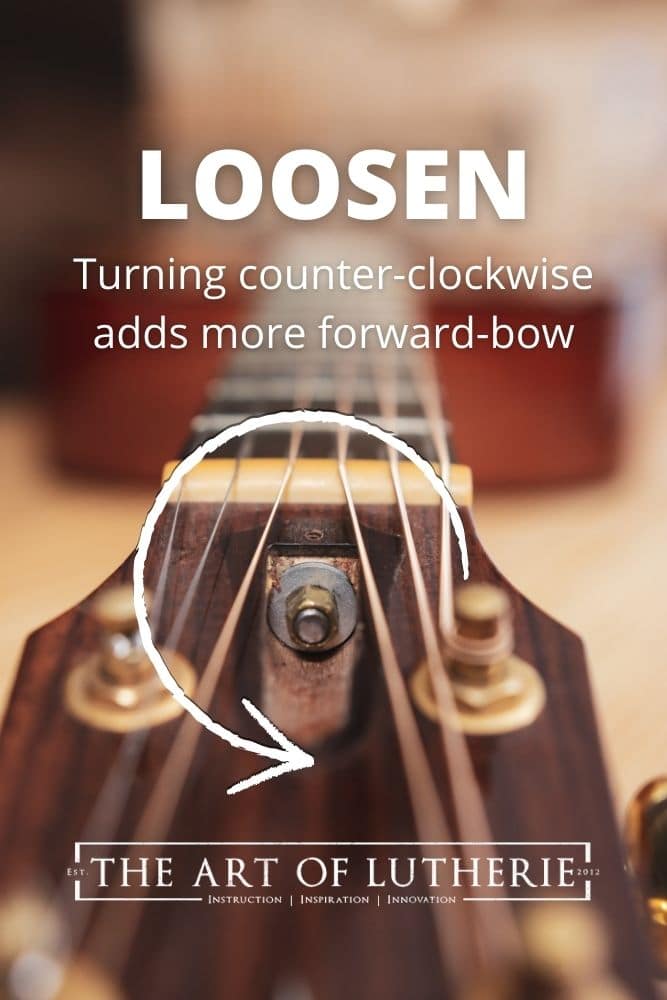
- Tightening (clockwise on most guitars) reduces relief. Loosening (counterclockwise) increases relief.
- Make adjustments in 1/4-turn steps. Never force the nut.
- Stop if you hear cracking or feel strong resistance.
How to measure relief and set targets
Measure relief visually or with a capo and feeler gauge substitute. You can do this without special tools.
Method:
- Capo the first fret or hold down the first fret.
- Press the last fret where the neck meets the body.
- At the 7th or 8th fret, check the gap between string and fret. Use a business card as a rough gauge.
Target ranges: - Electric guitars: 0.010–0.012 inch (very slight), or about a business card thickness.
- Acoustic guitars: 0.012–0.020 inch for most players.
Adjust as you prefer. Playability and feel matter more than numbers.

Common mistakes and how to avoid them
Learn from common errors so you won’t make them when you adjust guitar truss rod without special tools.
Common mistakes:
- Big turns at once — this risks neck damage.
- Not re-tuning and re-checking after each turn.
- Using wrong sized tool that strips the nut.
- Ignoring humidity or temperature changes that affect the neck.
How I fixed my own mistake:
I once tightened a truss rod too much to stop fret buzz. The neck straightened but the upper frets started choking. I had to loosen the rod and add a truss rod relief shim temporarily. The lesson: small steps, test play, and patience win.
Troubleshooting: when adjustments don’t help
If adjusting guitar truss rod without special tools doesn’t fix the issue, consider these causes:
- Worn frets causing uneven action.
- Saddle or nut slots too low or high.
- Loose neck joint or warped neck.
- Structural cracks or humidity damage.
Try these steps:
- Check fret wear visually.
- Inspect the nut slots for string seating.
- Measure neck angle at the heel.
If you still see problems after safe truss rod changes, consult a repair tech. A luthier can spot hidden issues quickly.
Maintenance and follow-up after adjustment
Keep your guitar stable after you adjust guitar truss rod without special tools. A small follow-up routine helps.
Routine tips:
- Re-tune and play for 10–15 minutes after each adjustment.
- Check neck relief again the next day.
- Keep humidity around 40–50 percent to avoid shifts.
- Learn the feel of your guitar so small changes are obvious.
Regular checks prevent big corrections later. I check neck relief when I change string gauge or tune down/up by more than one step.

Safety checklist before you start
Quick items to confirm before you touch the truss nut.
- Guitar is tuned to playing pitch.
- You have a padded tool or substitute.
- You know turn direction for your guitar.
- Neck shows only a small bow, not severe warp.
- You accept stopping if the nut resists.
Being careful protects your instrument and your confidence.
Frequently Asked Questions of how to adjust guitar truss rod without special tools
How much can I safely turn the truss rod without a proper tool?
Make quarter turns only. If you need more than two full turns, stop and get the right tool or a pro to inspect the neck.
Will adjusting the truss rod change my intonation?
Yes. Changing relief alters string length under stress and can change intonation slightly. Recheck and adjust your saddle or intonation after truss rod work.
Can I use pliers or a hammer to force the nut?
No. Forcing the nut risks stripping, cracking, or breaking the rod or neck. Use padded, matched tools and make tiny turns.
How long should I wait between adjustments?
Wait one to two minutes for the neck to settle after each quarter turn, then tune and check again. For large changes, check after a few hours or next day.
Is it safe to adjust an old or vintage guitar at home?
Not always. If the finish is cracked, the neck has visible warping, or the nut is seized, take the guitar to a luthier.
Conclusion
You can safely learn how to adjust guitar truss rod without special tools by taking small steps, using padded substitutes, and checking relief after each quarter turn. Start with careful inspection, make tiny adjustments, and stop if things feel tight or unusual. Practice these steps, and you’ll save time and money while keeping your guitar playing its best.
Take action: try a single quarter-turn adjustment on a low-risk guitar, observe the results, and share your experience in the comments. If you’re unsure at any step, book a pro setup to protect your instrument.

Senior Music Reviewer
Alex Carter is a seasoned music reviewer with over a decade of experience in the world of sound and instruments. Passionate about helping musicians and enthusiasts make informed choices, he brings sharp insights and in-depth knowledge to every review. From classical instruments to modern gear, Alex combines technical expertise with a love for music to deliver content that resonates with readers.
As a Senior Music Reviewer and expert author on Tuneluma.com, Alex is dedicated to sharing honest evaluations, practical advice, and thoughtful commentary to guide readers in their musical journey.