
Install piano hinges by measuring, pre-drilling, aligning, and fastening with the right screws and support.
I’ve installed piano hinges on cabinets, storage lids, and outdoor benches for years. This guide covers everything about how to install piano hinges — from picking the right hinge to final adjustments. Read on for clear steps, pro tips, and real mistakes I learned from so you can finish the job cleanly and quickly.

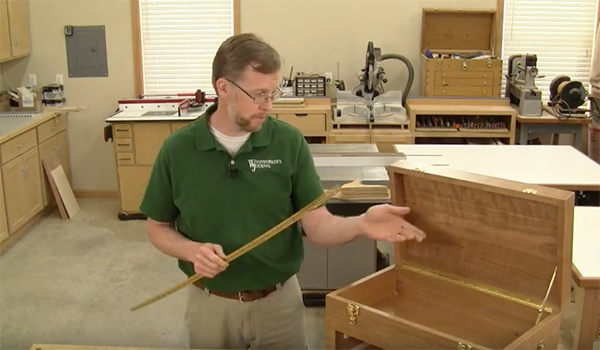
Why use piano hinges and where they shine
Piano hinges are long, continuous hinges. They run the full length of a joint. They spread load evenly. This makes them ideal for lids, doors, and long panels. They also give a neat look and strong support.
Common uses of piano hinges
- Cabinet lids and tool chests
- Piano and bench lids
- Long doors and flaps
- Folding workbenches and ramps
- Marine hatches and outdoor furniture
Benefits of choosing a piano hinge
- Even load distribution reduces stress on wood or metal.
- Fewer pivot points means smoother motion.
- Simple to align along a long edge.
- Available in many materials and finishes.
How this helps you
- If you want a durable, clean hinge for a long edge, learning how to install piano hinges will save time and prevent failures.

Source: youtube.com
Tools and materials you’ll need for how to install piano hinges
Having the right tools makes installation fast and accurate. Here’s a practical list.
Essential tools
- Tape measure and ruler
- Pencil or scribe
- Combination square or straight edge
- Drill and drill bits (including countersink bit)
- Screwdriver or impact driver
- Clamps (bar or strap)
- Center punch or nail
- Hammer (for pins or taps)
- Utility knife or chisel for slight wood cleanup
Materials and consumables
- Piano hinge of correct length and material
- Matching screws (flat-head or pan-head as required)
- Wood glue or epoxy (for reinforcing, optional)
- Lubricant like white lithium grease (for smooth action)
- Rust-inhibitor for outdoor installs (if steel)
Recommended screw sizes
- For light cabinet doors: #6 or #8 wood screws
- For heavy lids: #10 or #12 screws
- For metal-to-metal: self-tapping or machine screws with nuts
Safety gear
- Safety glasses
- Hearing protection
- Work gloves
Having these ready before you start makes the process smooth. I always lay parts out in order before drilling. It saves mistakes.

Choosing the right piano hinge before you begin
Picking the right hinge is the first step in how to install piano hinges well. Hinge selection affects strength, finish, and fit.
Length and gauge
- Buy a hinge that matches the full length of the joint. If you can’t get full length, join two hinges with a small gap for a clean look.
- Gauge refers to thickness. Thicker gauge offers more strength for heavy lids.
Material and finish
- Brass and stainless steel resist corrosion and look good for indoor use.
- Aluminum is light and corrosion-resistant, good for decks or boats.
- Steel is strong but needs coating or paint outdoors.
Knuckle and pin type
- Standard knuckles give a flush look.
- Continuous pin construction allows easy removal for wide openings.
Mounting style
- Surface-mounting leaves the hinge visible.
- Recessed or mortised installations create a flush look but require routing.
Match hinge to screws and load. If you’re unsure, choose stainless steel for outdoor or damp areas.

Step-by-step: how to install piano hinges (easy, reliable method)
Follow these steps to install a piano hinge with clean alignment and lasting hold.
- Measure and mark
- Measure the length of the edge where the hinge will go.
- Mark a centerline along both mating parts to keep parts flush.
- Test fit the hinge
- Lay the hinge on the centerline and check gaps. Close the parts and ensure the hinge opens freely.
- Trim the hinge length if needed. Use a hacksaw and file burrs clean.
- Remove the hinge pin (optional)
- For long hinges, remove the pin to separate leaves. This makes screwing easier.
- Use a punch to tap out the pin from one end.
- Clamp and align
- Clamp one leaf to one piece, aligning the knuckle to the centerline.
- Use a square to ensure the hinge is straight along the length.
- Mark pilot holes
- Through each screw hole, use a center punch or scribe to mark center.
- For wood, mark pilot hole positions every 4 to 6 inches for even load.
- Drill pilot holes and countersink
- Drill pilot holes sized to the screw core. For example, use 7/64" for #6 screws, 1/8" for #8 screws.
- Countersink lightly so screws sit flush and the hinge sits flat.
- Fasten one side first
- Drive screws into the fixed piece only, leaving them snug but not tight. Use a short driver bit to avoid overdriving.
- Keep screws at least 1/8 inch from the ends of the hinge to avoid splitting wood.
- Attach the second leaf
- Fold the hinge over and align the second leaf.
- Clamp in place and mark pilot holes through the remaining holes.
- Drill and fasten screws evenly along the length, alternating screws as you go for even pressure.
- Reinsert hinge pin
- If you removed the pin, reinsert it. Tap gently until seated.
- Test the motion. Tighten any loose screws.
- Final checks
- Open and close the hinge several times to test.
- Ensure there is a consistent gap and no binding.
Tips during installation
- Work from the center out to prevent bowing.
- Use slightly shorter screws near hinges’ ends to prevent splitting.
- For exterior projects, use stainless screws with exterior hinges.
Following these steps will teach you how to install piano hinges right the first time.
Alignment, gaps, and fine adjustments when installing piano hinges
Small misalignments cause binding or sloppy motion. Fix them early.
Check gaps
- Aim for an even 1/32 to 1/16 inch gap along the hinge knuckle.
- Too tight causes drag. Too wide looks sloppy.
Shimming and trimming
- Use thin cardboard or brass shim for fine adjustments.
- If one side sits higher, thin the mating edge with a plane or sanding.
Screw tightening sequence
- Tighten screws alternately along the hinge. This keeps the hinge flat.
- Do not over-tighten. Screws should be snug but not crushed.
Fixing common alignment problems
- If one end binds, loosen screws near that end and realign.
- If the hinge cups in the wood, remove screws and clean the pocket, then reinstall with glue and screws.
I learned to always test motion before final tightening. That step saved me time and repairs.

Advanced tips, mistakes to avoid, and personal experience
Here are advanced tips from hands-on installs and common pitfalls to skip.
Advanced tips
- For very long hinges, support the middle with a temporary block while aligning.
- Use a torque-limited driver to avoid stripping wood or screws.
- Consider rivets or machine screws with nuts for metal-to-metal installs.
Common mistakes to avoid
- Skipping pilot holes for hardwood — leads to split wood.
- Over-countersinking, which weakens the screw hold.
- Using short screws that pull out under load.
Personal experience
When I installed a 6-foot hinge on a cedar lid, I tried to save time by not removing the pin. The result was a crooked set of screws and a binding lid. Removing the pin and working with separate leaves fixed the problem. I also once used #6 screws for a heavy bench lid. They pulled out after a season. Switching to #10 stainless screws solved it.
Lessons learned
- Measure twice and clamp well.
- Use the correct screw size and material for the job.
- Patience in alignment pays off with smooth, durable results.

Source: reddit.com
Maintenance and troubleshooting after you install piano hinges
A well-installed hinge still needs care. Here’s how to keep function and avoid problems.
Lubrication and corrosion control
- Apply light grease or oil to the pin for smooth action.
- For outdoor installs, use a corrosion inhibitor or choose stainless hinges.
When screws loosen
- Check screws yearly and tighten wrist-tight only.
- If screw holes are stripped, use a larger screw or plug with wood dowel and glue.
Replacing a hinge
- Remove hinge pin for easy removal.
- If hinge mounts are damaged, fill holes and remount with correct pilot holes.
Troubleshooting common issues
- Binding: Check alignment and remove binding screws. Shim if needed.
- Sagging: Add support screws or a secondary cleat.
- Rust: Replace with stainless or brass and treat the surrounding wood/metal.
Small checks every season keep a hinge working for years.

Quick questions about how to install piano hinges
What size screws should I use for a piano hinge?
- Use screws that match hinge hole size and material. For wood, #8 or #10 are common; choose length that penetrates at least half the substrate.
Do I need to remove the hinge pin every time?
- Not always, but removing the pin makes alignment and screwing easier for long hinges. It also lets you separate parts for drilling.
Can I mortise a piano hinge for a flush look?
- Yes. Mortising gives a flush finish but needs precise routing. It takes more time but looks cleaner.
Is stainless steel worth the extra cost?
- For outdoor or moist environments, stainless resists rust and lasts longer. It often saves money over time.
How often should I lubricate a piano hinge?
- Once a year for indoor use and every 3 to 6 months outdoors or in heavy-use areas keeps motion smooth.

Source: popularwoodworking.com
Frequently Asked Questions of how to install piano hinges
What is the correct gap between a piano hinge and the mating parts?
Aim for a tiny gap, about 1/32 to 1/16 inch. This prevents binding while keeping the joint tight.
Can I cut a piano hinge to size without damaging it?
Yes. Use a hacksaw and file the cut end smooth to remove burrs. Cutting works well for custom lengths.
How do I prevent the screws from pulling out of softwood?
Use longer screws that bite deep, or use wood glue and plugs to reinforce holes. You can also switch to a larger diameter screw.
Are there special screws for marine piano hinges?
Yes. Use stainless steel or marine-grade fasteners to avoid corrosion and staining of surrounding material.
How do I align two long piano hinges joined in the middle?
Place both hinges on a straight surface. Clamp them together and ensure knuckles meet with a uniform gap. Insert pins and then mount.
Can I use piano hinges on heavy doors?
Yes, for long doors piano hinges work well, but choose heavy-gauge material and larger screws. Consider additional supports if the door is very heavy.
What pilot hole size do I use for machine screws?
Match the pilot hole to the screw’s core diameter. For machine screws, use the drill size that allows the screw to pass freely when fastening with a nut.
Should I countersink every screw hole?
Countersink flat-head screws so they sit flush. For pan-head screws, countersinking is not needed. Match countersink to screw head type.
How do I remove a stuck hinge pin?
Tap from the opposite end with a punch and hammer. Apply penetrating oil and work it slowly until it begins to move.
Is adhesive ever a good idea when installing piano hinges?
Adhesives can reinforce the joint in wood or composites. Never rely on adhesive alone for load-bearing hinges; screws must still hold the load.
Conclusion
You now have a complete, practical roadmap for how to install piano hinges. From picking the right hinge to precise alignment, these steps cut mistakes and save time. Try the method on a small project first, then move to larger builds with confidence. If you found this helpful, leave a comment with your project details or subscribe for more hands-on guides and pro tips.

Senior Music Reviewer
Alex Carter is a seasoned music reviewer with over a decade of experience in the world of sound and instruments. Passionate about helping musicians and enthusiasts make informed choices, he brings sharp insights and in-depth knowledge to every review. From classical instruments to modern gear, Alex combines technical expertise with a love for music to deliver content that resonates with readers.
As a Senior Music Reviewer and expert author on Tuneluma.com, Alex is dedicated to sharing honest evaluations, practical advice, and thoughtful commentary to guide readers in their musical journey.
Leave a Reply