How To Draw A Keyboard Piano: Easy Step-By-Step Guide
Draw a simple rectangle, add evenly spaced white keys, then place black keys above them.
I’ve taught drawing workshops and sketched instruments for years, so I’ll walk you through how to draw a keyboard piano with clear steps, smart tips, and real-life shortcuts. This guide covers materials, proportions, step-by-step instructions, perspective, shading, common mistakes, and practice exercises so you can draw a convincing keyboard piano whether you work on paper or screen.
Materials and tools you need to draw a keyboard piano
Start with basic tools. For traditional drawing, use:
- HB or 2B pencil for construction lines.
- Mechanical pencil or 4B for darker lines.
- Eraser and ruler for straight edges.
- Smooth paper (weight 90–120 gsm).
For digital drawing, use:
- A tablet or iPad with pressure sensitivity.
- A stylus with tilt control.
- A drawing app with layers and rulers.
These tools cut mistakes and speed up work when you learn how to draw a keyboard piano. Use a ruler initially, then loosen up freehand as you gain confidence.
Understanding keyboard proportions before you draw a keyboard piano
A full-size piano keyboard has 88 keys, but drawing one doesn’t need that many. Focus on the pattern:
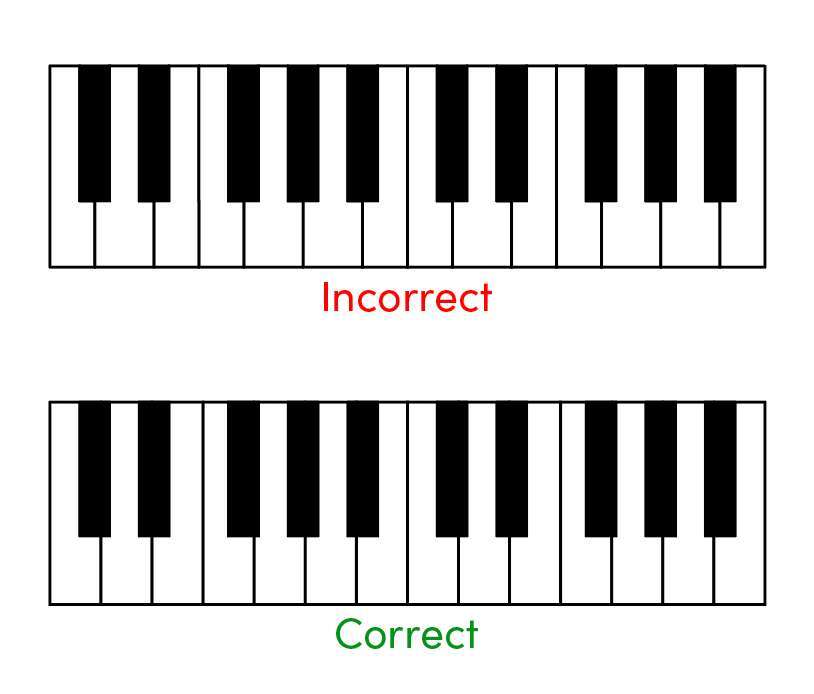
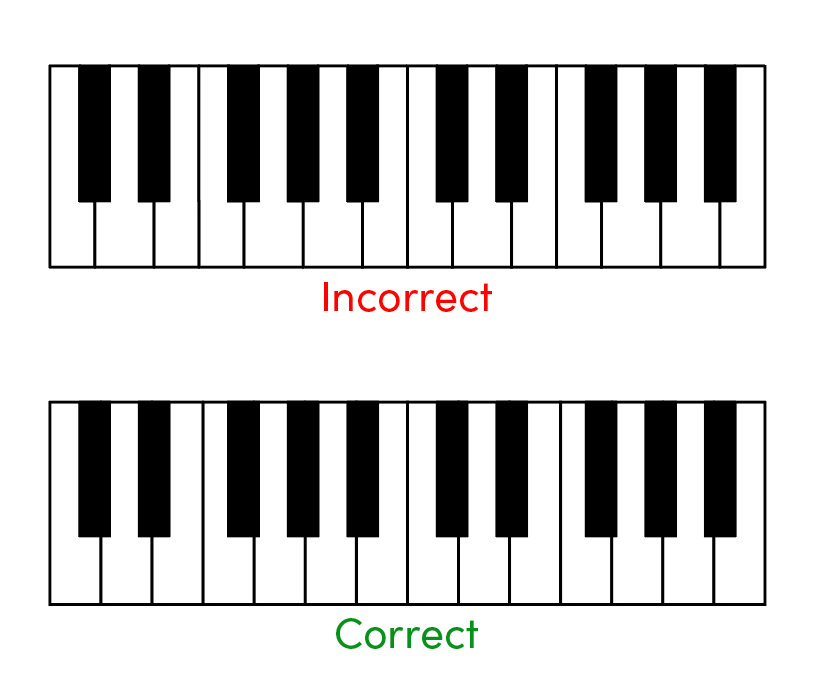
- Grouping of black keys repeats every 12 keys: two, then three.
- White keys are wider and taller; black keys are shorter and narrower.
- Key height proportion is roughly 1.0 for white keys and 0.55–0.6 for black key height relative to white key length.
Measure once and repeat the pattern. I often sketch a single octave first to lock the proportions. Knowing these basics makes every drawing of how to draw a keyboard piano look correct.

Step-by-step: simple method to draw a keyboard piano
Follow these steps to draw a clean, convincing keyboard piano:
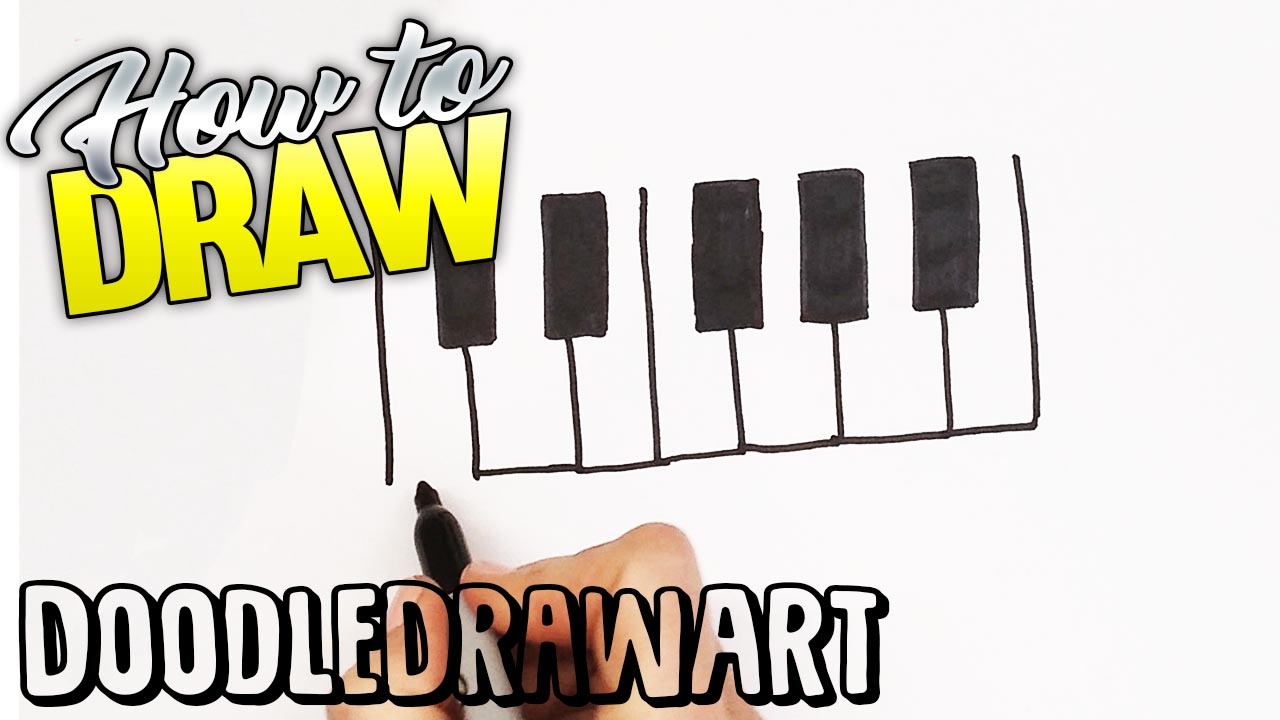
- Draw a long horizontal rectangle for the keyboard base.
- Add a thin inner rectangle near the top edge to mark the key bed.
- Divide the key bed into equal-width white key sections with light vertical lines.
- Mark the black key positions: two grouped, then three, repeat.
- Draw slightly shorter rectangles for each black key, centered above gaps between white keys.
- Erase overlapping lines where black keys sit on top of white keys.
- Thicken the outline of the keyboard base and refine the key edges.
- Add small gaps or bevels at the key tops to suggest separation.
- Include a music rest, control panel, or logo if you want more detail.
- Ink or darken final lines and erase construction marks.
Practice this sequence several times. Repeating the steps helped me draw accurate keyboards faster.

Adding realistic details after you draw a keyboard piano
Details make the drawing believable. Add:
- Key bevels and tiny gaps to suggest separation.
- Shadow beneath black keys for depth.
- Control knobs, sliders, or a display above the keys.
- Brand or small emblems, but keep proportions small.
Keep details light at first. When I sketch for design work, subtle detail beats heavy decoration. This is a key part of how to draw a keyboard piano that looks like a real instrument.
Perspective and angle: drawing a keyboard piano in different views
Decide your viewpoint early. Common options:
- Straight-on view shows key faces equally—easiest.
- Three-quarter view adds depth and requires foreshortening.
- Top-down view compresses key height but shows layout.
To do a three-quarter view:
- Draw a horizon line and a vanishing point.
- Use converging lines for the long edges of the keyboard.
- Space keys along the receding edge, keeping the white-to-black key ratio.
I recommend mastering straight-on first, then move to three-quarter view once you’re comfortable with proportions. This approach simplifies learning how to draw a keyboard piano in perspective.

Shading and texture to make your keyboard piano pop
Shading creates form. Use these tips:
- Light source: pick one direction and keep it consistent.
- Blacks: use darker, softer strokes or a separate layer in digital work.
- Highlights: add a thin white strip on the edge of black keys for glossy shine.
- Cast shadows: include small shadows on white keys under black keys.
For realism, add slight wear marks or fingerprints near the most-used keys. In my session work, small imperfections sell realism better than flawless keys.
Digital vs traditional techniques when you draw a keyboard piano
Both methods work well. Key differences:
- Traditional gives tactile control; use rulers for straight lines.
- Digital allows undo, layers, and precise guides.
- Use separate layers for base shapes, keys, and shading in digital work.
I switch between both often. Digital speeds iteration; pencil practice strengthens your hand control. Learning how to draw a keyboard piano in both mediums widens your skillset.

Common mistakes and how to fix them when drawing a keyboard piano
Watch for these pitfalls:
- Uneven key widths — measure and repeat one octave.
- Black keys misaligned — mark centers first.
- Flat look — add bevels and shadows.
- Over-detailing — keep the focal area clean.
When I teach, students rush keys too tall or short. Slow down and measure. Fixes are simple if you keep construction lines.

Practice exercises and variations to improve how to draw a keyboard piano
Try these drills:
- Draw a single octave 20 times, refining each attempt.
- Sketch keyboards at different angles from photos.
- Practice shading a black key in three lighting setups.
- Create a stylized keyboard: cartoon, minimal line, or photorealistic.
Tracking progress helps. I record sketches weekly and compare them. Small daily practice sessions beat occasional long ones.
Tips, lessons learned, and mistakes I’ve made while drawing a keyboard piano
From my experience:
- Use a ruler early; loosen lines later for life.
- Start with a single octave to build confidence.
- Keep black keys shorter and slightly inset.
- Don’t over-render every key—suggest detail instead.
I once spent hours fixing uneven spacing. Now I mark key centers before drawing. These small changes save time and make studying how to draw a keyboard piano enjoyable.
Frequently Asked Questions of how to draw a keyboard piano
How long does it take to learn how to draw a keyboard piano?
It depends on practice. With focused practice, basic sketches take a few sessions; more detailed, realistic work takes weeks.
Can I draw a realistic keyboard piano with simple shading?
Yes. Consistent light source, cast shadows under black keys, and small highlights often create convincing realism.
Do I need special tools to draw a keyboard piano accurately?
No. A pencil and ruler suffice. Digital tools help with corrections but are not required.
How do I draw black keys so they look aligned?
Mark the centers of white keys first. Place black keys centered between the correct gaps and keep their tops slightly inset.
What is the easiest view to start when learning how to draw a keyboard piano?
Start with a straight-on view. It removes perspective and makes spacing easier to control.
Conclusion
Drawing a keyboard piano is a step-by-step skill you can learn with clear proportions, steady practice, and attention to light. Start with the rectangle and one octave, use measured spacing for keys, add black-key shadows, and practice different angles. Try daily short sketches, compare progress, and don’t fear mistakes—each line teaches you something valuable. If this guide helped, try a quick sketch now, share your progress, or subscribe for more step-by-step drawing lessons.

Senior Music Reviewer
Alex Carter is a seasoned music reviewer with over a decade of experience in the world of sound and instruments. Passionate about helping musicians and enthusiasts make informed choices, he brings sharp insights and in-depth knowledge to every review. From classical instruments to modern gear, Alex combines technical expertise with a love for music to deliver content that resonates with readers.
As a Senior Music Reviewer and expert author on Tuneluma.com, Alex is dedicated to sharing honest evaluations, practical advice, and thoughtful commentary to guide readers in their musical journey.